# FAQs for Ticket Holders
Welcome to our frequently asked questions (FAQs) section for ticket holders. We hope to provide you with helpful information to enhance your experience with CrowdWork.
{% hint style="warning" %}
**Note to Ticket Holders and Students**
For *exchanges, refunds*, and *questions about tickets or events*, please **reach out to the theatre directly**. This will allow you to receive assistance more quickly.
{% endhint %}
{% hint style="info" %}
**Are you a theatre admin?** If a patron contacted you with an issue, see our [Helping Your Patrons](https://docs.crowdwork.com/for-theatres/helping-your-patrons) guide for step-by-step resolution instructions and ready-to-send messages for your patrons.
{% endhint %}
### Help, I Bought a Ticket to the Wrong Show/Date!
If you find yourself needing to change your ticket for any reason, please contact the theater directly. The theater has the ability to manage exchanges and refunds to ensure you get the support you need promptly.
### Oops! I Signed Up with the Wrong Email Address
No worries! If you created a password during checkout, you can still log in with the wrong email address and the password you set. Once logged in, go to [crowdwork.com/account](https://crowdwork.com/account) and click on the email address drop-down menu near the top. Select "Settings," where you will have the option to correct your email address.
### I Lost or Didn't Receive My Ticket Confirmation Email
Easy, just login to your account at [crowdwork.com/account](https://crowdwork.com/account) from the user menu select My Orders then the show name and click the "Re-send Confirmation Email" button.
| 1. Select My Orders | 2. Pick the Show | 3. Click Re-Send |
| :------------------------------: | :------------------------------: | :------------------------------: |
|  |  |  |
However, sometimes when this happens, it's because you might have accidentally had a typo or entered the wrong email address when purchasing your tickets. To resolve this issue, first make sure you entered the correct email address. Try logging in at [crowdwork.com/account](https://crowdwork.com/account) or perform a password reset to access your account.
Once logged in, follow the first suggestion by going to My Orders, find the show name, and clicking "Re-Send Confirmation Email" button.
And if none of that works, contact the theater directly, and they can resend your ticket order confirmation email.
### My Payment Was Declined, or I Have No Card on File
If a recurring charge for a membership or payment plan was declined, you can fix it yourself from your account at [crowdwork.com/account/payment-methods](https://crowdwork.com/account/payment-methods). Your cards are grouped by theatre and by what they're used for — Payment Plans and Enrolled Memberships.
* **If you have no card on file**, click "Add Card" under the relevant heading to add one for your upcoming payments.
* **If you already have a card on file**, click "Replace Card" to update it.
Once your card is added or updated, we'll automatically use it for your next scheduled charge. For the full walkthrough, including what happens to a payment that already failed, see [Update the Card on File for a Membership or Payment Plan](/for-ticket-holders/updating-your-payment-card).
{% hint style="warning" %}
**Seeing nothing at all on that page?** No cards, no theatre headings, no buttons — that usually means your purchase isn't connected to the account you're signed in to, and it isn't something you can fix yourself. [Contact CrowdWork support](/contacting-support) and include the email address you used when you bought.
{% endhint %}
The Payment Methods page with an Add Card button shown when no card is on file
{% hint style="info" %}
**Which card gets charged?** The card you used for a purchase is always tried first. If it can't be charged, we'll attempt any other card on your account — even one saved under a different heading.
{% endhint %}
### When I Login All I See is "Your Theatre Dashboard" / Can't Find My Ticket Order
If you see "Your Theatre Dashboard" when you login and can't locate your ticket order, this means you're currently on the Theatre Dashboard. To switch to view your ticket orders, please visit [crowdwork.com/account](https://crowdwork.com/account), or click your email address at the top of the page, and then select "My Orders" from the drop-down menu.
By default, everyone who purchases tickets via CrowdWork has an account that also allows them to sell tickets. You can easily switch between Theatre **Dashboard** and **My Orders** using the drop-down menu.
### **How Do I Change My Password?**
You can change your password by performing a password reset from the login screen at [crowdwork.com/account](https://crowdwork.com/account). Alternatively, once logged in, go to the "Settings" menu, where you will find an option to change your password.
### How Do I Delete My Account?
If you need to delete your account, please contact our support team [using this contact form](/contacting-support). We will be happy to assist you with this request.
### How Do I Opt Out of the Email List?
We, CrowdWork, do not keep an email list of users who have purchased a ticket or registered for a class. However, the theater you purchased from may have their own email lists. In that case, we recommend you click the unsubscribe link in any of the newsletters or contact the theater directly for removal.
### How Do Waitlists Work?
When a show or class is sold out, you may see a **"Join Waitlist"** button instead of the usual ticket purchase button. Here's what to know:
* **Joining a waitlist** — Click the button and confirm to add yourself to the waitlist for that specific date and time. You'll need to be logged in or create an account.
* **What happens next** — If a spot opens up, the theatre may send you an email inviting you to purchase a ticket. This email will include a link to the event page.
* **No guarantees** — Being on a waitlist doesn't guarantee you'll get a ticket. It simply means you'll be notified if the opportunity arises.
* **Check your email** — If you're on a waitlist for an event you really want to attend, keep an eye on your inbox! Spots can fill up quickly when they become available.
{% hint style="info" %}
**Tip:** Make sure your email address is correct in your account settings so you don't miss any notifications!
{% endhint %}
### Need Additional Help?
For any other questions or assistance, feel free to [reach out to us](/contacting-support) or contact the theatre directly.
# Member's Guide to Memberships
Welcome to the club! This guide explains how your new subscription works and how to get the absolute most out of this awesome perk.
{% hint style="warning" %}
**The following guide is for students and ticketholders.**
For venue admins and managers, see our guide on [Setting Up Memberships](/for-theatres/setting-up-memberships).
{% endhint %}
## What Is a Theatre Membership?
Think of your theatre membership as an all-access pass to your favorite venue! It's a recurring subscription that hooks you up with special benefits - usually free tickets to selected shows and classes, and on some memberships a standing discount instead. Instead of the usual ticket-buying dance for each event, you pay one regular fee (monthly, weekly, etc.) and voilà - you're all set to enjoy included events without the extra hassle or costs!
## Membership Benefits
Your theatre membership isn't just a ticket - it's a relationship upgrade with your favorite venue! With it, you can:
* Breeze into included shows and classes without opening your wallet again
* Skip the whole "should I buy a ticket?" decision process - you're already in!
* Support the creative work you love with steady, reliable funding (the artists thank you!)
* Usually save a nice chunk of change compared to buying individual tickets
* Feel like a true insider and part of the theatre family
## Finding and Purchasing a Membership
#### To purchase a membership:
1. Visit your theatre's Public page
2. Click on the "Memberships" tab
3. Browse available membership options
4. Select your preferred membership tier
5. Review the membership details (which will display in a popup modal)
6. Complete the checkout process
7. Your membership benefits begin immediately!
## Using Your Membership
Once you've purchased a membership, here's how to use it:
### Booking Tickets for Included Events
1. Sign in to your CrowdWork account
2. Browse shows and classes on your theatre's Public page
3. On events your membership covers, you'll see a message telling you what you get — free entry on most memberships, or a discount on some
4. Add the ticket to your cart - it will show your member price, which is $0 on a free-entry membership
5. Complete checkout to confirm your spot
{% hint style="info" %}
**Important Notes About Ticket Redemption**
* You can redeem **one member ticket per showtime** on covered events (some theatres set theirs to cover more than one seat)
* A showtime is a specific date *and* time — if a show plays at 7:00 PM and again at 9:00 PM, those are two separate showtimes and your membership applies at each
* You can attend as many different included events as you wish, unless your membership lists a limit per billing period
* If you need additional tickets for friends or family, you can purchase them at regular price in the same transaction
* **🚨 Your member ticket still counts toward the event's capacity, so book early for popular shows!**
{% endhint %}
### When a membership covers only some ticket types
A show can sell several kinds of ticket — a general admission seat, a premium seat, a version that comes with a drink — and a theatre can set a membership to cover some of those and not others. When yours works that way, the message on the event page says so with *"eligible tiers only."*
You'll see the effect in your cart: covered ticket types show your member price, and the ones your membership doesn't include stay at their normal price. You can still buy them — you're simply paying for the extra the way anyone else would. Which types are covered is entirely up to the theatre, so if you're unsure, ask them.
{% hint style="info" %}
**Two small things that work in your favor automatically:**
* If your cart has more covered tickets than your membership allows, the benefit is applied to the **most expensive** eligible ones — you always get the biggest saving available to you.
* If you hold more than one membership at the same theatre, checkout uses whichever one saves you the most on that order. They don't combine on a single purchase.
{% endhint %}
## Managing Your Membership
> **Direct link:** [Manage Your Memberships](https://crowdwork.com/account/memberships)
#### To view and manage your membership:
1. Log in to your account
2. Click your email address in the upper right
3. Select "My Account" from the dropdown
4. Navigate to the "Memberships" section
5. From here, you can:
* View your active memberships
* See upcoming renewal dates
* [Update payment information](#payment-method-management)
* [Pause](#pausing-your-membership) or [cancel](#cancelling-your-membership) your membership
### Pausing Your Membership
#### If you need to temporarily suspend your membership:
1. Go to the [Memberships section of your account](https://crowdwork.com/account/memberships)
2. Find the membership you want to pause
3. Click the "Pause Membership" button
4. Your membership will be paused immediately
#### When a membership is paused:
* You temporarily lose access to your member benefits
* Your renewal date shifts forward by the same number of days paused
* You can reactivate at any time
* No immediate charges upon reactivation
### Cancelling Your Membership
#### To cancel your membership:
1. Go to the [Memberships section of your account](https://crowdwork.com/account/memberships)
2. Find the membership you want to cancel
3. Click the "Cancel Membership" button
4. Confirm your cancellation
#### When a membership is cancelled:
* You maintain access until the end of your current paid period
* Your membership will not renew after that date
* To rejoin later, you'll need to sign up for a new membership
### Payment Method Management
You can manage your membership's card yourself at any time — add your first card, replace an existing one, or add a card if you don't have any on file yet.
> **Direct link:** [Manage Payment Methods](https://crowdwork.com/account/payment-methods)
{% hint style="warning" %}
**If that page looks completely empty** — no cards, no theatre headings, no buttons — your membership probably isn't connected to the account you're signed in to, and that isn't something you can fix from your side. [Contact CrowdWork support](/contacting-support) and include the email address you used when you joined.
{% endhint %}
1. Open the "Payment Methods" section of your account
2. Find the heading for your membership — cards are grouped by theatre and by what they're used for (Payment Plans and Enrolled Memberships)
3. If you have no card on file, click "Add Card" to add one for your upcoming payments; if you already have one, click "Replace Card" to update it
The Payment Methods page with an Add Card button shown when no card is on file
{% hint style="info" %}
**Which card gets charged?** The card you used for a membership is always tried first. If it can't be charged, we'll attempt any other card on your account — even one saved under a different heading.
{% endhint %}
{% hint style="danger" %}
**Add your new payment card before you delete an old one!**
Before you remove a payment method, ensure it's not attached to an active membership plan or payment plan, or you risk cancelling your plans!
{% endhint %}
## FAQs for Members
**Q: How do I know which events are included in my membership?**\
A: When signed in, covered events display a message telling you what your membership gets you there. If that message ends with *"eligible tiers only,"* the membership covers some of that event's ticket types but not all of them — your cart will show which.
**Q: Can I use my membership to bring friends for free?**\
A: Memberships usually cover one ticket per showtime on covered events, though some theatres set theirs to cover two or more. If your membership covers just the one and you'd like to bring friends, you can purchase additional tickets at regular price in the same transaction.
**Q: My membership didn't discount one of the tickets in my cart. Why?**\
A: Most often the theatre has set the membership to cover only certain ticket types on that event — a general admission seat but not a premium or add-on one, for example. It can also mean you've already used your allotment for that showtime, or reached the limit for your current billing period. The event page and your cart both show what's covered; your theatre can confirm how theirs is set up.
**Q: What happens if I miss an event I booked with my membership?**\
A: As with regular tickets, if you can't attend, it's courteous to cancel your reservation so others can attend.
**Q: If I sign up mid-month, is my membership prorated?**\
A: Nope! You can start anytime, and your renewal date will simply match your signup date (if you sign up on the 15th, you'll renew on the 15th of next month, week, etc.). This way, you always get your full membership period - no matter when you start, you'll always get your complete membership term (day, week, month, or year). It's actually a great system - join whenever you're ready!
**Q: What happens if my payment method fails?**\
A: The system automatically retries your payment several times over a few days. If those attempts don't succeed and you have another card on file, we'll try that card too. If we still can't collect the payment, your membership may be deactivated.
**Q: Can I switch between different membership tiers?**\
A: Currently, you would need to cancel your existing membership and sign up for a different tier.
**Q: What happens if the theatre deactivates its membership program?**\
A: If a theatre deactivates memberships, all subscriptions are immediately terminated. You would need to sign up again if they reactivate the program.
### **Having trouble with your membership?**
Just reach out to the theatre! Directly contact your theatre anytime for assistance with your membership.
# Patron's Guide to Payment Plans
Learn how to view and manage your payment plans!
{% hint style="warning" %}
**The following guide is for students and ticketholders.**
For venue admins and managers, see our guide on [Setting Up Payment Plans](/for-theatres/setting-up-payment-plans).
{% endhint %}
## What are Payment Plans?
Payment Plans are an optional method for customers to break up payments into smaller installments over time. For example, instead of a $100 payment, they can decide to split into four $25 payments over time. This can help with purchasing specific shows or classes that might otherwise not be able to be afforded in one payment. The amount and number of installments can be decided by you, along with which specific shows and classes you want to allow to be purchased via a plan.
{% hint style="info" %}
Don't forget to check your email's inbox! That's how we'll let you know about payments or issues charging your card on file.
{% endhint %}
## Viewing Current Plans
> **Direct link:** [Your Account (My Orders)](https://crowdwork.com/account)
After enrolling with a plan, you can view them by visiting the specific Order from your Account page.
To access your account page, simply [create an account with CrowdWork](https://crowdwork.com/users/sign_up). If you've already created an account and want to access it, simply [login](https://crowdwork.com/users/sign_in) and ensure you're on the account page by selecting it from the upper-right dropdown (where your email is listed).
From your Account page, you'll see a **My Orders** table listing all of your purchases. Orders with a payment plan will show **"Online (Payment Plan)"** in the **Source** column on the right side of the table.
{% hint style="info" %}
**On mobile devices and smaller screens**, the orders table may be wider than your screen. Scroll left and right on the table to see all columns, including the Source column where payment plan status is displayed.
{% endhint %}
To open the order, you can click the **Order ID** on the left side of the table or the **View** link on the right — both will take you to the order details page. Once you open the order, scroll down and you'll find two important sections:
* **Payment Details** — A history of all payments that have been charged to your card, including the payment method, date, and amount for each installment.
* **Payment Plan Details** — A full breakdown of your payment plan schedule, showing each installment's status (Paid, Upcoming, Paused, or Canceled), the date it was or will be charged, and the amount.
{% hint style="danger" %}
We'll try to charge your payment three times, each time with 24 hours between. Every attempt uses the card saved for that plan — we don't automatically try a different card. If the card is the problem, update it (see *Add or Update Your Payment Method* below) and the next attempt will use your new card. If all three attempts fail, that installment is marked Failed, any remaining installments are canceled, and the theatre is alerted.
{% endhint %}
## Need to Pause or Cancel Your Payment Plan?
Payment plans are managed by the theatre or venue where you made your purchase. If you need to make changes to your payment plan—such as pausing payments, adjusting the schedule, or canceling remaining installments—please contact the theatre directly.
{% hint style="info" %}
**Why contact the theatre?** Payment plans are a soft contract between you and the venue. The theatre has the tools to pause, adjust, or cancel your remaining payments based on your situation. They're happy to work with you!
{% endhint %}
{% hint style="info" %}
**If your order is refunded:** the theatre can cancel your remaining payments at the same time. Those installments then show as **Canceled** in your Payment Plan Details and won't be charged. If you've been refunded but still see **Upcoming** payments listed, reach out to the theatre so they can cancel them.
{% endhint %}
You can typically find the theatre's contact information on:
* Your order confirmation email
* The event page where you purchased tickets
* The theatre's website
## Add or Update Your Payment Method
You can manage the card on file for your payment plan yourself, without contacting the theatre — whether you need to add your first card, replace an existing one, or you don't have any card on file yet.
> **Direct link:** [Manage Payment Methods](https://crowdwork.com/account/payment-methods)
{% hint style="warning" %}
**If that page looks completely empty** — no cards, no theatre headings, no buttons — your purchase probably isn't connected to the account you're signed in to, and that isn't something you can fix from your side. [Contact CrowdWork support](/contacting-support) and include the email address you used when you enrolled.
{% endhint %}
On the left-hand sidebar of the Account page, click "Payment Methods." Your cards are grouped by theatre and by what they're used for — Payment Plans and Enrolled Memberships.
**If you have no card on file**, click "Add Card" under the relevant heading to add one for your upcoming payments.
The Payment Methods page with an Add Card button shown when no card is on file
**If you already have a card on file**, click "Replace Card" to update it.
{% hint style="info" %}
**Which card gets charged?** Each payment plan is charged to the card saved for it. If that card is declined, we don't switch to another card — we try the same card again on the next daily attempt. If you replace or remove that card, we'll use your current card for that theatre from the next attempt onward, so updating it is the fastest way to get a stuck payment through.
{% endhint %}
{% hint style="warning" %}
**Important:** You cannot delete a payment method while you have upcoming payments scheduled. Once all your payment plan installments are complete, you'll be able to remove the card from your account.
{% endhint %}
# Update the Card on File for a Membership or Payment Plan
Your card expired, was replaced, or a payment was declined? Go straight to your Payment Methods page and add or replace the card yourself — no need to contact the theatre.
{% hint style="success" %}
**Go straight there:** [crowdwork.com/account/payment-methods](https://crowdwork.com/account/payment-methods)
If you're not signed in yet, you'll be asked to sign in first and then taken to the page.
{% endhint %}
If a card on your account expired, was cancelled or replaced by your bank, or a scheduled payment was declined, you can fix it yourself in about a minute. You don't need to contact the theatre, and you don't need to wait for anyone to reset anything.
## Add or Replace Your Card
The Payment Methods page groups your cards by theatre and by what each card is used for — **Payment Plans** and **Enrolled Memberships**. Find the heading for the theatre and the item you're fixing, then:
1. **If a card is already listed**, click **Replace Card** and enter the new card details. The old card is removed from that plan or membership at the same time.
2. **If no card is listed**, click **Add Card** and enter your card details. This is what you'll see if your previous card was deleted or your bank issued you a new number.
That's it — your next scheduled charge uses the new card automatically. You don't need to re-enter it anywhere else, and you don't need to tell the theatre you've done it.
## If the Page Looks Empty
{% hint style="warning" %}
**Seeing nothing at all on the Payment Methods page — no cards, no theatre headings, no buttons?** That is not something you can fix from your side. It usually means your purchase isn't yet connected to the account you're signed in to.
Please [contact CrowdWork support](/contacting-support) and mention that your Payment Methods page is empty. Include the email address you used when you bought your tickets or registered for your class — that's usually the piece that resolves it.
{% endhint %}
Two things worth checking before you reach out, because either one produces the same empty page:
* **Are you signed in with the right email address?** If you bought with one address and later created an account with another, your purchases live under the first one. Sign out and sign back in with the address on your confirmation email.
* **Do you actually have a recurring payment?** This page only lists cards attached to an active membership or payment plan. A one-off ticket purchase doesn't leave a card on file, so there's nothing to show — that's normal.
## Which Card Gets Charged
This works slightly differently for memberships and for payment plans, which is worth knowing if you're trying to rescue a payment that already failed.
* **Memberships** — the card used for the membership is tried first. If it can't be charged, we'll try any other card on your account, including one saved under a different heading.
* **Payment plans** — each plan is charged to the card saved for that plan, and we don't switch to a different card automatically. We try that same card three times, 24 hours apart. Replacing the card is therefore the fastest way to get a stuck payment through: the next attempt uses your new card.
{% hint style="danger" %}
**Add the new card before removing the old one.** Removing a card that's still attached to an active membership or payment plan can interrupt it. Add or replace first, then remove anything you no longer need.
{% endhint %}
You also can't remove a card while it has upcoming payments scheduled against it. Once every installment on a plan is complete, the card can be removed.
## If a Payment Already Failed
Update the card first, using the steps above. What happens next depends on what the payment was for:
* **A membership payment** retries automatically over the following few days and will pick up your new card.
* **A payment plan installment** that has already exhausted its three attempts is marked Failed, and the theatre is alerted. Once your new card is on file, contact the theatre and ask them to reschedule the failed installment — they can do that in a couple of clicks, but they can only do it after the card is updated.
## Related Guides
* [Patron's Guide to Payment Plans](/for-ticket-holders/patrons-guide-to-payment-plans) — how to view your installment schedule and payment history.
* [Member's Guide to Memberships](/for-ticket-holders/members-guide-to-memberships) — how to pause, cancel, and manage a membership.
# Where Everything Lives in Your Account
Direct links to your orders, tickets, class registrations, memberships, and payment methods on CrowdWork — go straight to the page you need instead of hunting for it.
Everything you've bought through CrowdWork lives in one account, no matter how many different theatres you bought from. Each page below has its own address, so you can go straight there rather than clicking through menus.
{% hint style="info" %}
**Not signed in?** Any of these links will ask you to sign in first and then take you to the page you clicked. You don't need to sign in ahead of time.
{% endhint %}
## Your Account Pages
* **Orders** — [crowdwork.com/account](https://crowdwork.com/account)\
Every purchase you've made, newest first. Open an order to see its receipt, resend the confirmation email, or check a payment plan's schedule. This is also the account home page.
* **Tickets** — [crowdwork.com/account/tickets](https://crowdwork.com/account/tickets)\
Your show tickets, grouped by the theatre you bought them from.
* **Classes** — [crowdwork.com/account/registrations](https://crowdwork.com/account/registrations)\
Every class you're registered for. Listed as **Classes** in the account sidebar.
* **Memberships** — [crowdwork.com/account/memberships](https://crowdwork.com/account/memberships)\
Your active memberships and their renewal dates. Pause or cancel a membership from here.
* **Payment Methods** — [crowdwork.com/account/payment-methods](https://crowdwork.com/account/payment-methods)\
The cards on file for your memberships and payment plans. Add a card, or replace one that expired or was declined.
{% hint style="success" %}
**Card expired or a payment declined?** That's the most common reason people come looking, and you can fix it yourself in about a minute — see [Update the Card on File for a Membership or Payment Plan](/for-ticket-holders/updating-your-payment-card).
{% endhint %}
## One Account, Every Theatre
These pages show everything you hold across every theatre you've bought from — you don't switch between theatres, and you don't need a separate address for each one. Your cards on the Payment Methods page are grouped under the theatre they belong to, and your tickets and registrations name the theatre they're for.
## If a Page Looks Empty
If a page shows nothing and you're sure you should see something there, it's almost always one of these two:
* **You're signed in with a different email address.** If you bought with one address and later created your account with another, your purchases sit under the first one. Check the address on your order confirmation email, then sign in with that.
* **Your purchase isn't connected to your account yet.** This one you can't fix from your side — [contact CrowdWork support](/contacting-support) and include the email address you used when you bought. That's usually all it takes to sort out.
## Changing Your Email or Password
Both live in **Settings**, reached by clicking your email address at the top right of any account page. The [FAQs for Ticket Holders](/) guide walks through both, along with what to do about a confirmation email you never received.
## Things Only the Theatre Can Do
Your account is for viewing and for keeping your payment details current. For anything that changes a purchase, contact the theatre you bought from directly — they can act on it immediately, where we'd only end up passing the message along. That includes:
* Refunds and exchanges
* Moving your ticket to a different date
* Pausing, rescheduling, or cancelling the remaining installments on a payment plan
* Anything about the event itself
Their contact details are on your order confirmation email and on the event page where you bought.
# Setup Your Theatre Account
Start here! This page describes how to create a new CrowdWork (formerly Fourth Wall Tickets) account, including connecting to Square, creating shows or classes, and customizing your theatre details.
## Create a Theatre Account
1. From [crowdwork.com](https://crowdwork.com), click the [**Create Free Account**](https://crowdwork.com/users/sign_up) button.
2. Select "I am a Theatre" and complete the *Theatre Name*, *Email*, *Password*, *Password confirmation,* and *Theatre Timezone* fields, then click the **Sign Up** button
Account Registration form on CrowdWork.com
3. You will be presented with the admin dashboard view upon successful account creation. To begin selling paid tickets, you must complete the first two of the following three steps. [Customization of your theatre](/for-theatres/customizing-your-theatre-settings), the final step, is strongly recommended, as it will ensure your theatre branding is present on your event pages.
1. [Connect your Square Account](/for-theatres/setup-your-theatre-account/connecting-your-square-account)
2. [Create a Show or Class](/for-theatres/creating-a-show-or-class)
3. [Customize your Theater](/for-theatres/customizing-your-theatre-settings)
# Connecting Your Square Account
This page describes how to connect your Square account to your CrowdWork account.
Connecting your Square account is a vital step to enable seamless transactions on CrowdWork. Square serves as one of our trusted partners for processing payments, facilitating the transfer of your ticket revenue directly to you. Fortunately, the setup process is straightforward and can be completed in just a few quick steps.
{% hint style="success" %}
**Get Square and get paid!**
While offering free event tickets is possible with any CrowdWork account, ***linking a Square account is required for selling paid tickets***. If you've never used Square, no worries! Square accounts are free and [you can get one here](http://squareup.com/i/FOURTHWTIX).
{% endhint %}
Theatre Details in the CrowdWork Dashboard menu
### Connect Your Square Account
To ensure smooth transactions for your CrowdWork account, connecting to Square is crucial.
Here's a guide to get you started:
1. Ensure you have a Square account. Don't have one? [Create a free Square account here](http://squareup.com/i/FOURTHWTIX).
2. From your [Admin Dashboard Homepage](https://crowdwork.com/dashboard), click the "Connect Square Account" button.\
*or*\
Navigate to **Theatre > Theatre Details**, and then click on "Connect Square Account" in the upper-right corner.
3. Enter your Square account credentials when prompted on the Square website. Once done, you will see a confirmation message on your CrowdWork dashboard.
Your Square account is now linked and ready to accept payments inside your CrowdWork account!
Example success message after connecting your Square account
***
### **Changing Your Square Account**
If you need to switch to a different Square account, follow the same steps mentioned above. After logging in with your new Square account, you'll be redirected back to your CrowdWork dashboard with the new connection active.
### **Disconnecting Your Square Account**
To completely remove your Square account connection, simply [contact our support team](/contacting-support), and we'll assist in permanently disconnecting Square from your CrowdWork account.
For questions about deleting your Square account entirely, please contact Square directly.
***
A linked Square account makes it even easier to sell tickets and get paid on CrowdWork. If you have any questions or need further assistance, feel free to [reach out to us](/contacting-support).
\
# Understanding CrowdWork Fees
How CrowdWork's fee structure works — including standard transaction fees, who pays them, how to change your fee settings, and Special Feature pricing.
### Our Goal: Keep CrowdWork Free for Theatres
CrowdWork is **completely free** for theatres to use. No monthly fees, no contracts, no hidden costs. Whether you're using our standard features, or even our premium tools, CrowdWork can remain completely free for theatres. Here's how it works:
#### Standard Transaction Fees
* **$1 flat fee** per ticket/registration
* **Plus standard credit card processing** (2.9% + $0.30 via Square)
* **Example**: On a $10 ticket, total fees are $1.64
#### Who Pays These Fees?
**By default: Your customers pay the fees** - so you receive the full ticket price.
For that $10 ticket example:
* Customer pays: $11.64
* You receive: $10.00
**Alternatively: You can absorb fees** if you prefer customers to pay face value.
For that same $10 ticket:
* Customer pays: $10.00
* You receive: $8.36
{% hint style="success" %}
**Completely Free Events** Free tickets and cash transactions have **zero fees** - they're 100% free to use!
{% endhint %}
#### How to Change Your Fee Setting
You can change how fees are handled at any time from your [Theatre Settings](https://crowdwork.com/dashboard/theatres/0/edit) page, under the **Service Fees** section. The four options are:
* **Pass Along to Customer** *(default)* — All fees are added to the patron's total; you receive the full ticket amount
* **Absorb All** — Patrons pay face value; fees are deducted from ticket revenue
* **Absorb Shows** — Fees are absorbed for shows only; class fees are still passed to patrons
* **Absorb Classes** — Fees are absorbed for classes only; show fees are still passed to patrons
For full details on this and other theatre-wide settings, see [Customizing Your Theatre Settings](https://docs.crowdwork.com/for-theatres/customizing-your-theatre-settings).
***
### ✨ Special Features
**Special Features** are powerful tools to grow your revenue and deepen patron loyalty with features like **Memberships** and **Gift Cards**. These features are completely optional. When enabled, each one adds a 1% fee to all transactions. If your theatre passes fees on to customers (the default setting), they cost you nothing to use.
Since Special Features take more time to develop and support, this fee allows us to maintain them and continue building more. They're designed so that even these costs can be covered by a few extra cents per ticket — keeping us toward our mission of providing free tools for theatres and low-cost fees for your patrons.
#### Pricing
* **Additional 1% fee** per active feature, applied to all transactions
* Example: 5¢ on a $5 ticket, 10¢ on a $10 ticket, 15¢ on a $15 ticket
#### Your Controls
* **Activate/deactivate anytime** — only active when you're using them
* **Mix and match** — activate only the features that make sense for your venue
* **Built from your feedback** — developed based on requests from theatres like yours
***
### Other Fee-Related Settings
#### Surcharges
Your theatre can also apply a surcharge to ticket and registration amounts. Surcharges are added before donations or service fees and do not apply to free events. You can configure surcharges (as a percentage or flat dollar amount, separately for shows and classes) in the **Surcharges** section of your [Theatre Settings](https://crowdwork.com/dashboard/theatres/0/edit) page. For full details, see [Customizing Your Theatre Settings](https://docs.crowdwork.com/for-theatres/customizing-your-theatre-settings).
#### Membership Transactions
Membership fees work differently from standard ticket fees. Regardless of your theatre's fee settings, fees on membership transactions are **always absorbed by the theatre** and never passed to the patron. This keeps membership pricing clean and predictable for subscribers. When setting membership prices, build processing costs into your tier pricing to account for this. For complete details, see [Understanding Membership Fees & Pricing](https://docs.crowdwork.com/for-theatres/setting-up-memberships#understanding-membership-fees-and-pricing).
#### Payment Plan Transactions
Payment plan fees work differently from standard ticket fees in the opposite direction. Regardless of your theatre's fee settings, fees on payment plan transactions are **always passed on to the patron** and never absorbed by the theatre. Each installment is processed as a separate credit card transaction through Square, and each incurs its own processing fees. Patrons see a complete breakdown of every installment amount — including fees — before they commit to a plan at checkout.
If your theatre absorbs fees for standard ticket sales, payment plans are the one exception to that setting. For complete details on how payment plans work, see [Setting Up Payment Plans](https://docs.crowdwork.com/for-theatres/setting-up-payment-plans).
{% hint style="info" %}
**Memberships and Payment Plans — opposite fee behavior at a glance:** Membership fees are always absorbed by the theatre. Payment plan fees are always passed to the patron. Both exceptions exist regardless of your theatre's fee settings and are noted on their respective setup pages.
{% endhint %}
***
### Fee Examples in Action
Regardless if fees are paid by your patrons ("Pass Through" - the default setting) or by you ("Absorb Fees" setting), the fee structure is the same.
{% columns %}
{% column %}
**CrowdWork with standard features**
**On a $15 Show Ticket:**
* Customer pays: $16.64 (includes $1 + processing)
* **Theatre receives: $15.00**
* CrowdWork cost to theatre: $0
{% endcolumn %}
{% column %}
**CrowdWork with Special Features Active**
**On a $15 Show Ticket (with Gift Cards enabled):**
* Customer pays: $16.79 (includes $1 + 1% + processing)
* **Theatre receives: $15.00**
* Additional feature fee: 15¢
{% endcolumn %}
{% endcolumns %}
{% hint style="info" %}
**Notice:** With default fee settings (pass-through), your theatre receives the full **$15.00** ticket price in both examples. Special Features add just a few extra cents to what your patron pays at checkout.
{% endhint %}
***
### Quick FAQ
Is CrowdWork really free?
Yes! Standard ticketing has zero cost to theatres. All fees are passed to patrons by default, so your theatre receives the full ticket price. Even our premium Special Features can be completely free when fees are passed to patrons (the default setting).
Where do I change who pays the fees?
Go to your [Theatre Settings](https://crowdwork.com/dashboard/theatres/0/edit) page and find the **Service Fees** section. You can choose to pass fees to patrons (the default), absorb all fees, or absorb fees for shows or classes only. See [Customizing Your Theatre Settings](https://docs.crowdwork.com/for-theatres/customizing-your-theatre-settings) for full details.
Are fees the same for in-person and online sales?
Yes. The fee structure is identical whether you sell tickets online or through the [POS app](https://docs.crowdwork.com/for-theatres/setting-up-point-of-sale-pos): **$1 per ticket + standard credit card processing**. Free tickets and cash transactions never incur any fees.
How do fees work when a patron buys multiple tickets?
Each ticket incurs a separate $1 service fee. For example, a purchase of 4 tickets has a $4 service fee (plus standard credit card processing fees on the total).
What if I don't want Special Features?
Don't activate them! Your account remains completely free. Special Features are entirely optional.
Can I try Special Features without commitment?
Absolutely. Activate when you want to test them, deactivate anytime. If your theatre passes fees on to patrons, they cost you nothing to use. Just keep in mind that some features — like Memberships — may affect active patrons if deactivated, so it's worth checking before you flip the switch.
Do I need to choose between Special Features?
No — you can activate whichever combination works for your venue. Each active feature adds its own 1% fee.
Do memberships follow my theatre's fee settings?
No. Membership transaction fees are always absorbed by the theatre, regardless of your fee settings. This keeps membership pricing predictable for subscribers. We recommend building processing costs into your membership price — for example, pricing at $35 if you want to net $30 after fees. See [Setting Up Memberships](https://docs.crowdwork.com/for-theatres/setting-up-memberships#understanding-membership-fees-and-pricing) for pricing guidance.
Do payment plans follow my theatre's fee settings?
No — but in the opposite direction from memberships. Payment plan fees are always passed to the patron, regardless of your fee settings. Each installment is a separate credit card transaction, and processing fees are included in the amounts patrons see at checkout. Even if your theatre absorbs fees for standard ticket sales, payment plan installments will include fees. See [Setting Up Payment Plans](https://docs.crowdwork.com/for-theatres/setting-up-payment-plans) for details.
***
{% hint style="success" %}
**Questions about fees?** [Contact our support team](/contacting-support) - we're happy to help you understand exactly how fees will work for your specific setup and goals.
{% endhint %}
**Love CrowdWork?** Know a theatre that could benefit? [Share our referral program](https://crowdwork.com/referral) and help more independent theatres discover us!
# Creating a Show or Class
This page describes how to create, manage, duplicate, or delete a show or class.
## Create a Show or Class
Creating a Show or a Class is similar, with a few key differences.
1. To create a Show or Class, use the navigation menu on the left of the Admin Dashboard to select the relevant section, [**Shows**](https://crowdwork.com/dashboard/shows) if you want to create a show, and [**Classes**](https://crowdwork.com/dashboard/classes) if you want to create a class.
2. Click the **+ Add New Show/Class** button in the upper-right
> **Direct links:** [Shows Dashboard](https://crowdwork.com/dashboard/shows) | [Classes Dashboard](https://crowdwork.com/dashboard/classes) | [Create New Show](https://crowdwork.com/dashboard/shows/new) | [Create New Class](https://crowdwork.com/dashboard/classes/new)
### Required Fields
Shows and Classes have two **required fields**. These fields must be completed before you can save your created show.
* **Name**: the public name of your event
* **Start Date**: the start date of your event
{% hint style="info" %}
**Which timezone are these times in?** Every time you type here is saved in your theatre's timezone — not your computer's — and there's no per-event timezone. If your event actually happens in another timezone, you have to enter it converted. See [Timezone](https://docs.crowdwork.com/for-theatres/customizing-your-theatre-settings#timezone) for the full explanation and a conversion table.
{% endhint %}
### **Optional Fields**
* **Description**: Include a description of your event
{% hint style="info" %}
**Want to format your description, add images, or embed a video?** The description field uses CrowdWork's rich text editor. See [Using the Rich Text Editor](https://docs.crowdwork.com/for-theatres/using-the-rich-text-editor) to learn about formatting options, adding images, embedding YouTube/Vimeo videos, and attaching files.
{% endhint %}
{% hint style="info" %}
**Global Descriptions**
In addition to having descriptions per show or class, you can also add global descriptions to every show or class in the [**Theatre Settings**](https://crowdwork.com/dashboard/theatres/0/edit).
This is helpful for details that you want to repeat across every event type, such as refund information, parking, and more.
{% endhint %}
* **Tags**: Group and organize related events with tags. **Public tags** group events together on your Public page — for example, tag all your "Standup" or "Improv" events so patrons can filter to just those. **Internal tags** stay private and make it easy to assign discounts and custom checkout fields across events. Pick existing tags or create new ones right from the event form.
{% hint style="info" %}
**Tags replaced Categories**
If you used Categories before, Tags have taken their place and added internal (private) tags on top of the public grouping. See [Tags](https://docs.crowdwork.com/for-theatres/tags) for how to create, assign, and order them.
{% endhint %}
* **Venue**: This field can be used to specify the specific venue this particular event will be happening at. For example, if you had two stages, you could specify the "upstairs stage" or the "basement theatre." Check **Only display the venue above, without the theatre address** when the event happens somewhere other than the address set in your Theatre Settings.
* **Poster image file**: Upload one or multiple images in .gif, .png, and .jpeg format. These images are shown on the Public page of the event.
### Poster Images
| More about images... | |
| --------------------------------------------------------------------------------------------------------------------------------------------------------------------------------------------------------------------------------------------------------------------------------------------------------------------------------------------------------------------------------------------------------------------------------------------------------------------------------------------------------------------------------------------------------------------------------------------------------------------------------------------------------- | ------------------------------------------------------------------------------------------------------------------------------------------------------------------------------------------------------------------------------------------------------------------------------------------------------------------------------------------------------------------------------------------------------------------------------------------------------------------------------------------------------------------------------------------------------------------------------------------------------------------------------------------------------------------------------------------------------------------------------------------------------------------------ |
|
ADD MULTIPLE IMAGES Multiple images will appear in a "carousel" fashion, meaning the user can click or swipe between the different images. You can use multiple aspect ratios and image sizes - they don't need to all match. Images are contained within the card so that the full image is always displayed without cropping. If you add more than one image, drag them into the order you want them shown.
|  |
|
BEST IMAGE DIMENSIONS Images are displayed in landscape orientation and automatically scale to fit within the card area. The full image is always visible — it will never be cropped. For best results, use landscape images with a minimum size of 516×250 pixels (approximately 2:1 ratio). For higher quality images, scale proportionally:
1032×500 (2x scale)
1548×750 (3x scale)
2064×1000 (4x scale)
You can also use any resolution that maintains approximately a 2:1 ratio.
Pricing badges are positioned in the lower 20% area of the image.
|
MAXIMUM IMAGE FILE SIZES Upload images under 400KB for optimal performance, though we accept files up to 5MB. Larger files may take longer to load on slower connections.
|
|
POSTER IMAGE TEMPLATE GRAPHIC While you can use any images you like, our template can be used as an approximate guide to ensure your poster images display perfectly across all devices. The template shows the most common actual sizes that images are displayed on most users' devices. Safe areas and optimal placement zones for your content are noted. On some pages, pricing badges are displayed in the lower 20% of the poster image.
|
### Schedule and End Date
The **Schedule** section answers one question: how often does this event happen? Set **Occurs** to Once, Daily, Weekly, or Monthly, enter a **Show Starts** (or **Class Starts**) date and time, and — for anything that repeats — a [**Show Ends** / **Class Ends**](https://docs.crowdwork.com/for-theatres/creating-a-show-or-class#show-ends-and-class-ends) date. CrowdWork generates every date in that range for you.
Need two patterns on one listing, like a weekly Thursday class that also meets one extra Saturday? Click **+ Add Dates** for a second schedule row. Each row has its own Occurs setting and its own start and end dates, and every date they produce lands on the same event.
{% hint style="warning" %}
**Once ignores the end date.**
Occurs: Once always creates exactly one date — the start date. Adding an end date next to it changes nothing, and you get no warning. This is the most common setup mistake here: an eight-week class entered as Once starting Sept 10 and ending Oct 29 becomes a single event on Sept 10, not eight weekly sessions. If your event happens more than once, choose Daily, Weekly, or Monthly.
{% endhint %}
Here is what each option does:
| Occurs | What CrowdWork creates | Choose it for |
| ------------------------------------------------------------------------------------------ | ------------------------------------------------------------------------------------------------------------ | --------------------------------------------------------------------------- |
| [Once](https://docs.crowdwork.com/for-theatres/creating-a-show-or-class#occurs-once) | One date only — the start date. The end date is ignored. | A one-night show, a single workshop, a one-off special event. |
| [Daily](https://docs.crowdwork.com/for-theatres/creating-a-show-or-class#occurs-daily) | Every calendar day from the start date through the end date, weekends included. | A run of consecutive nights, a festival, a school-break camp. |
| [Weekly](https://docs.crowdwork.com/for-theatres/creating-a-show-or-class#occurs-weekly) | The same weekday as the start date, every week, through the end date. | A multi-week class or workshop, a recurring Friday show, a weekly jam. |
| [Monthly](https://docs.crowdwork.com/for-theatres/creating-a-show-or-class#occurs-monthly) | One date a month through the end date, on the weekday position you pick in the Every and Day of Week fields. | A monthly showcase, a first-Sunday open mic, a last-Thursday variety night. |
#### Occurs: Once
Creates exactly one date, at the start date and time you entered. The end date does nothing here — a Once event with an end date months away is still a single date. Pick Once when the event genuinely happens one time.
#### Occurs: Daily
Creates a date on *every* calendar day from the start date through the end date, weekends and holidays included. A start of Mon, Jun 15 with an end of Fri, Jun 19 gives you five dates. Every date uses the start date's time of day. If a few days inside the range should be skipped, list them in the **No Shows on...** / **No Classes on...** field rather than splitting the run into separate listings.
#### Occurs: Weekly
Creates a date every seven days, on the same weekday as the start date, through the end date. There is no separate day-of-week picker — the weekday comes from the start date itself, so a start of Thu, Sept 10 produces Thursdays. This is the right choice for almost every multi-week class or workshop.
{% hint style="success" %}
**Worked example: an eight-week class**
Set **Occurs** to Weekly, **Class Starts** to Thu, Sept 10 @ 7:00 PM, and **Class Ends** to Thu, Oct 29 @ 7:00 PM. That generates all eight Thursday sessions.
Then check **Dates are purchased as a grouped package** so students enroll in the full run instead of buying single nights — see [Grouped-Package Classes](https://docs.crowdwork.com/for-theatres/creating-a-show-or-class#grouped-package-classes) below.
{% endhint %}
#### Occurs: Monthly
Creates one date a month through the end date. Choosing Monthly reveals two more fields — **Every** (First, Second, Third, Fourth, or Last) and **Day of Week** — and together they define the date: the first Sunday of each month, the last Thursday, and so on. They open on First / Monday, so set both to match your event. Monthly schedules by weekday position — the first Sunday, the last Thursday — rather than by a fixed date like the 15th.
{% hint style="warning" %}
**Check the dates list after you save a monthly event.**
Monthly builds its dates from the beginning of the start date's month rather than from the start date itself. So if the weekday position you picked falls earlier in that month than your start date — you start Wed, Sept 10 and choose the First Wednesday — that earlier date is generated too, and it can even land in the past.
Open the saved event, look at the dates it produced, and drop any you did not want using the **No Shows on...** / **No Classes on...** field.
{% endhint %}
#### Show Ends and Class Ends
The end date is optional, and it is what tells a repeating schedule when to stop. Enter one and CrowdWork generates dates up to it and no further.
Leave it blank — the field is labeled **Ends (blank repeats forever)** — and the event really does keep going: CrowdWork creates roughly the next year of dates and quietly extends that window every day, so patrons always see about twelve months ahead. For a class with a known last session, enter the end date anyway; it is what tells students how long the course runs.
{% hint style="info" %}
**Excluding Dates**
When Daily, Weekly, or Monthly is selected for the Schedule, there is an additional field named **No Classes on...** (**No Shows on...** for Shows) This field can be used to specify dates where the event would typically be scheduled, but that will be excluded instead.
This can be used to blackout holidays, special events, or other dates when your regularly scheduled event will not occur. These blackout dates are just for the event specified. Add global date exceptions for every class in the [**Theatre Settings**](https://crowdwork.com/dashboard/theatres/0/edit).
{% endhint %}
{% hint style="success" %}
**Need to customize a specific date?** Once your recurring event is saved, you can override the title, poster image, or pricing for individual dates without affecting the rest of the series. See [Editing Specific Dates in a Series](https://docs.crowdwork.com/for-theatres/editing-specific-dates-in-a-series) for details.
{% endhint %}
{% hint style="info" %}
**Which date do patrons land on?** A recurring event's public page automatically pre-selects the **next upcoming date**, and patrons can pick any other available date from the list. How long sales stay open around each date follows your theatre's [Purchase Window](https://docs.crowdwork.com/for-theatres/customizing-your-theatre-settings#purchase-window) setting.
{% endhint %}
### Grouped-Package Classes
For a class that runs as a single course across several dates — a multi-week workshop, a camp, or a serial event — you can sell the entire run as one purchase. On the class edit screen, check **Dates are purchased as a grouped package**. Students pay once and are registered for the whole series; individual dates can't be purchased separately.
{% hint style="info" %}
**Grouped vs. drop-in is one setting for the whole listing.** The grouped-package setting is all-or-nothing per class — a listing is either fully grouped (one purchase covers the entire run) or fully per-date (students buy individual sessions, drop-in style). It can't be set per pricing tier. To offer **both** a full-package option and single-session purchases of the same content, create two separate class listings.
{% endhint %}
Currently, grouped-package classes behave as follows:
* **Registrations anchor to the first date.** A grouped purchase registers the student for the whole run, anchored to the first session date. Students don't pick a date at checkout — checkout shows the first date with an indication that more dates are included.
* **Sales close once the first session passes.** A grouped class stops selling after its first session date has passed, since it's sold as a complete run from the start.
{% hint style="warning" %}
**Switching this setting doesn't change existing registrations.** Turning the grouped-package setting on or off applies to new purchases only. Students who already registered keep exactly what they bought — earlier per-date buyers are not automatically expanded to the full run, and earlier grouped buyers are not split into individual sessions.
{% endhint %}
### Sales Window
* **Sales Start On...**: If you want to promote an event on the Public page but are not yet ready to allow ticket sales, you can limit the purchase window.
* **Sales End On...**: The date you want ticket sales to close for this event. After this time, patrons will no longer be able to purchase tickets. By default, patrons can purchase tickets until the event start time. To change this site wide setting, see [Theatre > Theatre Details > Purchase Window](https://docs.crowdwork.com/for-theatres/customizing-your-theatre-settings#purchase-window)
### Pricing and Tiers
* **Cost Tiers:** Specify how much your show or class will cost. You can add as many tiers as you need, by clicking the **+ Add Tier** button in the upper-right.
* Each tier you can specify the **Cost**, **Tier Name**, **Quantity for Tier**
* The **More Tier Options** section adds a few extra per-tier controls:
* **Tier Opens** and **Tier Closes** set when the tier is available to buy. Because dates repeat, these are relative amounts of time (days and hours) measured against each event date, so the tier always opens and closes at the right time no matter when the event runs. Use **Tier Closes** to create "Early Bird" pricing that ends ahead of the event.
* **Tier Password** requires a password to unlock that specific tier.
* **Confirmation Email Text** adds copy that's only included in the confirmation email when this tier is purchased — handy for tier-specific instructions like VIP entrance details.
* In addition, you can also set a **Maximum Global Quantity** that applies across all tiers for the event, and a **Maximum Purchase Quantity** that limits how many admissions a single patron can buy in one order.
{% hint style="info" %}
**Sold Out?** When your event reaches max capacity, patrons can join a waitlist to be notified if spots open up. Waitlists are enabled by default. See [Setting Up Waitlists](/for-theatres/setting-up-waitlists) for details.
{% endhint %}
{% hint style="info" %}
**How tiers appear to patrons:** On your public event page, tiers are displayed in a specific order to help patrons find what's available. Tiers that are currently available for purchase appear first, followed by tiers with an upcoming purchase window that hasn't opened yet, and finally any sold-out tiers appear last.
{% endhint %}
* **Enable "Pay What You Want" pricing**: When enabled, this feature lets patrons pay an amount they choose for their event ticket.
### **Fine-Tune**
The Fine-Tune section gathers the final details that affect how your event is found, presented, and accessed.
The Fine-Tune section on the event edit screen showing URL Slug, Checkout Button Label, External Purchase Link, and Access fields
* **URL Slug**: Customize the public URL for this event. The current URL is shown below the field (e.g., `crowdwork.com/e/your-event-slug`). If the slug you choose is already in use, a unique ID will be added automatically. Useful for memorable links in printed materials, email campaigns, or social posts. *Note: Editing this field is only available after saving your event.*
* **Checkout Button Label** *(optional)*: Override the default button text — "Get Tickets" for shows, "Enroll" for classes — with your own wording. CrowdWork lets you sell access to whatever your patrons need, so use this field to better reflect what they're signing up for. [See below for ideas and use cases.](https://docs.crowdwork.com/for-theatres/creating-a-show-or-class#checkout-button-label-ideas)
* **External Purchase Link** *(optional)*: This field is used to link to an external website that isn't CrowdWork.
* **Access**: Choose how patrons can reach this event.
* **Public** is the default choice, meaning your event is normally listed on your Public page.
* **Unlisted** means that, while your event won't be visible on your Public page, it will be accessible for someone with the event's URL.
* **Password** means that the specified password is required to access the event page.
{% hint style="info" %}
#### Checkout Button Label Ideas
Match the wording to the nature of the event so patrons know exactly what they're getting. A few starting points:
* `RSVP` or `Reserve Your Spot` for a free community event
* `Join for Free` for an open-access livestream
* `Pre-Order Now` for an advance-sale window
* `Register to Watch` for a webinar-style event
* `Book Now` for a coaching session or scheduled appointment
* `Claim Your Comp` for a complimentary ticket flow
* `Join Waitlist` for a sold-out event placeholder
Keep it short — two or three words usually scans best.
{% endhint %}
### Enrollment Requirements
The Enrollment Requirements section lets you require that a patron meet certain conditions before they can purchase this show or class — most commonly a prerequisite, like requiring Level 1 before someone can enroll in Level 2.
It has three fields:
* **Tags granted on purchase**: tags added to the patron's account when they purchase this event
* **Tags required to purchase**: tags the patron must already hold in order to purchase. Leave empty for no requirement
* **Message when requirements aren't met**: an optional message shown at checkout to a patron who isn't yet eligible
{% hint style="info" %}
**Setting up a prerequisite?** See [Conditional Enrollments](/for-theatres/conditional-enrollments) for the full walkthrough, including how to grant a tag to a patron who completed the prerequisite offline.
{% endhint %}
### Confirmation Email
The Confirmation Email section customizes the receipt each patron gets after they buy. Add copy to the **Specific Details** field — event-specific notes like directions, what to bring, or a thank-you message — and it appears only on this event's confirmation email. Any global descriptions set in your [**Theatre Settings**](https://crowdwork.com/dashboard/theatres/0/edit) are included automatically as well.
{% hint style="info" %}
**Tier-specific confirmation text.** Individual pricing tiers can carry their own confirmation copy too — see **Confirmation Email Text** under More Tier Options in the [Pricing and Tiers](https://docs.crowdwork.com/for-theatres/creating-a-show-or-class#pricing-and-tiers) section above.
{% endhint %}
### Automatic Reminder Emails
Alongside the confirmation email, CrowdWork automatically sends each patron a reminder shortly before their event — generally the day before or the morning of. It goes out on its own for both shows and classes, so there's nothing to switch on, schedule, or write.
The reminder arrives with the subject **"Reminder: \[Event Name] is coming up!"** and includes:
* The event name, with its date and time
* The patron's order and admission details, so they can show the email when they arrive
* Your venue information
* The event description, along with any global show or class description from your [**Theatre Settings**](https://crowdwork.com/dashboard/theatres/0/edit)
Because the reminder pulls the same details as the rest of your event listing, keeping the name, venue, and descriptions accurate is what keeps the reminder accurate — including for an individual date in a recurring series, which uses that date's own details.
{% hint style="info" %}
**Who receives one:** the patron who placed the order, as long as their admission is still active. Reminders aren't sent for orders you've fully refunded, or for events you've paused or archived.
{% endhint %}
## Pausing and Reactivating a Show or Class
Every show and class has a **status** that controls whether patrons can find and buy it. You can change it at any time — pausing and reactivating never deletes anything and never affects existing sales.
* **Active** — visible on your Public page and open for sales.
* **Paused** — hidden from your Public page and not purchasable. Nothing is lost; reactivate whenever you're ready.
* **Archived** — retired for good while keeping every record. See [Archiving Instead of Deleting](https://docs.crowdwork.com/for-theatres/creating-a-show-or-class#archiving-instead-of-deleting) below.
### Pause or reactivate an event
1. Go to the [**Shows**](https://crowdwork.com/dashboard/shows) or [**Classes**](https://crowdwork.com/dashboard/classes) dashboard.
2. Click the **⋮** menu on the right side of the event's row.
3. Select **Pause Show** (or **Pause Class**) to take it offline, or **Activate Show** (or **Activate Class**) to bring it back.
You can also change the status from the event's edit screen: click the status button in the upper-right — labeled with the current status, such as **Show Active** — which offers **Activate**, **Pause**, **Archive**, and, for events with no sales yet, **Delete**.
{% hint style="info" %}
**Changing several events at once.** On the [**Shows**](https://crowdwork.com/dashboard/shows) or [**Classes**](https://crowdwork.com/dashboard/classes) dashboard, use **Actions → Edit Status** to pause, activate, or archive multiple events in a single step.
{% endhint %}
{% hint style="info" %}
**Managing who's attending.** To email your ticket holders or students directly, move patrons to a different date, or free up a seat with Standby, use the Admissions table on the event's page — see [Managing Admissions](https://docs.crowdwork.com/for-theatres/managing-admissions).
{% endhint %}
## Duplicating a Show or Class
Instead of building a similar show or class from scratch, you can duplicate an existing one and adjust just the details that change — a new run of a recurring show, a repeat session of a class, or a template you reuse often.
1. Go to the [**Shows**](https://crowdwork.com/dashboard/shows) or [**Classes**](https://crowdwork.com/dashboard/classes) dashboard.
2. Find the show or class you want to copy, and click the **⋮** menu on the right side of its row.
3. Select **Duplicate**.
> **Direct links:** [Shows Dashboard](https://crowdwork.com/dashboard/shows) | [Classes Dashboard](https://crowdwork.com/dashboard/classes)
{% hint style="info" %}
**No confirmation step.** Duplicating happens immediately when you click it — the copy is created right away and you're returned to your list with a confirmation message.
{% endhint %}
### What Carries Over
The duplicate is a full copy of the original's settings:
* **Name**: the original name with "**copy**" appended (e.g. "Friday Night Improv copy"). The duplicate gets its own new URL slug automatically.
* **Description, poster images, and tags**
* **Schedule**: the recurrence pattern, every date in the series, and any excluded dates
* **Pricing and Tiers**: all cost tiers, including cost, quantity, and any tier-specific options
* **Fine-Tune settings**: Checkout Button Label, External Purchase Link, Access, and capacity
{% hint style="warning" %}
**Dates copy over exactly as-is.** The duplicate's schedule starts out identical to the original's — same dates and times. If you don't update the schedule before activating it, you'll end up with two listings for the same date. Edit the duplicate's dates before publishing it.
{% endhint %}
### What Doesn't Carry Over
* **Sales, tickets, and registrations**: the duplicate starts with zero sales — none of the original's orders, tickets, or registrations are copied.
{% hint style="info" %}
**The duplicate starts Paused.** A new duplicate is created with its status set to Paused, so it won't be visible to patrons or open for sales. Review and update its details — especially the schedule — then activate it from the same **⋮** menu when it's ready to go live.
{% endhint %}
## Deleting a Show or Class
If an event should never have existed at all — a test listing, or a duplicate created by mistake — you can delete it permanently. Deletion is reserved for events with no sales activity yet; once tickets or registrations exist, the event is part of your sales history, so you would archive it instead.
1. Go to the [**Shows**](https://crowdwork.com/dashboard/shows) or [**Classes**](https://crowdwork.com/dashboard/classes) dashboard and click the event to open its details page.
2. Click **Edit Show** (or **Edit Class**).
3. On the edit screen, click the status button in the upper-right — it's labeled with the event's current status, such as **Show Active** or **Class Paused**.
4. Select **Delete Show** (or **Delete Class**) at the bottom of the menu, then confirm.
{% hint style="danger" %}
**Deleting is permanent.** There is no trash or undo — the event and its schedule are removed for good. If you might want the event or its records again, choose **Archive** from the same status menu instead.
{% endhint %}
### When Delete Is Available
To protect your sales records, the **Delete** option only appears in the status menu for events with no activity:
* **Shows**: no tickets have been issued — sold, comped, or otherwise.
* **Classes**: no students have registered.
* **No discount codes apply to the event** — including discounts that cover all shows, all classes, or one of the event's tags, not just codes created for this specific event.
If you don't see the Delete option, one of the conditions above applies — archive the event instead.
### Archiving Instead of Deleting
Archiving retires an event while keeping every ticket, registration, order, and report intact. Choose **Archive Show** (or **Archive Class**) from the same status menu on the edit screen. An archived event is hidden from your public page and from the default dashboard view, and its public URL is released so a future event can reuse it. Use the status filter on the [**Shows**](https://crowdwork.com/dashboard/shows) or [**Classes**](https://crowdwork.com/dashboard/classes) dashboard to find archived events later.
{% hint style="info" %}
**Event not happening as planned?** If an event with existing sales is called off, pause or archive it to stop sales and remove it from your public page, then take care of your patrons: [issue refunds](https://docs.crowdwork.com/for-theatres/issuing-refunds), and email your ticket holders directly from the event's [Admissions table](https://docs.crowdwork.com/for-theatres/managing-admissions) (or reach a broader audience with [Email Marketing](https://docs.crowdwork.com/for-theatres/email-marketing)).
{% endhint %}
{% hint style="info" %}
**Removing a single date, not the whole event?** To take one date out of a recurring series, add it to the **No Shows on...** (or **No Classes on...**) field in the event's [Schedule](https://docs.crowdwork.com/for-theatres/creating-a-show-or-class#schedule-and-end-date) instead of deleting anything. To change details for just one date, see [Editing Specific Dates in a Series](https://docs.crowdwork.com/for-theatres/editing-specific-dates-in-a-series).
{% endhint %}
# Editing Specific Dates in a Series
Customize individual dates within a recurring show or class — change the title, image, or pricing for specific performances without affecting the rest of the series.
When you run a recurring show or class, sometimes a particular date needs its own identity. Maybe one night features a guest performer, a holiday edition has special pricing, or a single session covers a different topic. **Edit Specific Dates** lets you customize individual occurrences within a series — changing the title, description, venue, images, pricing, or confirmation email for just that date — while everything else continues to inherit from the original event.
{% hint style="info" %}
**This feature is for recurring events only.** If your event is set to "Once," there are no additional dates to customize. Edit Specific Dates appears on the edit screen for events with a Daily, Weekly, or Monthly schedule, or events with multiple dates added via **+ Add Dates**.
{% endhint %}
🎬 **Watch: Editing specific dates in a series**
{% embed url="" %}
***
## How It Works
When you edit a specific date, CrowdWork creates a **date-level override** for that occurrence. Here's what that means in practice:
**What you can customize per date:**
* **Name** — Give a specific performance its own title (e.g., "Friday Late-Night Special")
* **Description** — Write a unique description for that date
* **Venue** — Assign a different venue, or toggle the "Venue Only" display setting
* **Poster Images** — Upload different images for that date
* **Pricing** — Override cost tiers (including tier names, prices, quantities, open/close windows, and passwords), set a different Maximum Global Quantity or Maximum Purchase Quantity, or toggle Pay What You Want on or off
* **Confirmation Email** — Customize the confirmation email content patrons receive for that date
**What stays the same:**
Everything you don't explicitly change on a specific date continues to use the original event's settings — sales window, access controls, tags, and scheduling details carry over automatically.
{% hint style="success" %}
**Think of it like a layer.** The original event is the base. Editing a specific date places a thin layer on top that replaces only the fields you change. Remove the override, and the date reverts to the original settings.
{% endhint %}
***
## Editing a Specific Date
**Navigation:** *Dashboard → Shows (or Classes) → Edit your event*
1. Open the event you want to modify and click **Edit**
2. On the edit screen, click the **Edit Specific Dates** button
3. You'll see a list of upcoming dates for this event. Select the date you want to customize.
4. Make your changes — update the name, description, venue, images, pricing, or confirmation email
5. Save your changes
{% hint style="info" %}
**Past dates:** The date list focuses on upcoming performances but also includes a few recent past dates, in case you need to review or adjust a recent override.
{% endhint %}
{% hint style="success" %}
**Bulk editing:** You can select multiple dates at once using the checkboxes in the date list. Any changes you save will apply to all selected dates — useful when several performances share the same override (e.g., a three-week guest residency).
{% endhint %}
***
## How Overrides Appear Elsewhere
Once a date has been customized, the overridden values flow through to the rest of CrowdWork:
**For patrons:**
* The purchase flow displays the overridden name, description, images, and pricing for that date
* Confirmation emails reflect the customized details
* Patrons see the experience you've tailored for that specific performance
**For admins:**
* **Orders:** When a patron purchases a ticket or registration for an overridden date, the order shows the overridden title as the line item. The original event name is preserved in the order details so you can always trace it back to the series.
* **Filtering:** Searching or filtering by the original event name returns orders for all dates in the series, including overridden ones. You don't need to search separately for each customized date.
{% hint style="info" %}
**Tip:** If you edit a date after tickets have already been sold for it, existing orders will reflect the updated information. Keep this in mind when making changes to dates that already have purchases.
{% endhint %}
***
## Removing an Override
If you no longer need a date to be customized, you can remove the override to revert that date back to the original event's settings:
* Open the event
* Click the blue **Edit Specific Dates** button
* Select the date(s) you wish to reset back to the defaults
Customizations are cleared immediately for the selected events.
{% hint style="warning" %}
**If a date is removed from the series schedule entirely** (for example, by changing the recurrence pattern or adding it to the exclusion list), any override associated with that date is also removed.
{% endhint %}
***
## Common Use Cases
**Guest performers or special editions** — Keep your regular weekly show running as-is but give the night with a guest headliner its own title and poster image.
**Holiday or themed performances** — Run a "New Year's Eve Special" with premium pricing on one date without creating a separate event or disrupting the rest of your series.
**Variable class topics** — If each session in a recurring class covers a different subject, give each date its own title so students know what to expect before purchasing.
**Promotional pricing for a single date** — Offer a discounted "preview night" or a premium "opening night" tier on just one occurrence.
**Cancelling a single performance** — Stop sales for one date in the series without touching the rest. See [Stopping Sales on a Single Date](https://docs.crowdwork.com/for-theatres/editing-specific-dates-in-a-series#stopping-sales-on-a-single-date) below.
***
## Stopping Sales on a Single Date
Weather, illness, a venue conflict — sometimes one date in a series has to come off sale while the rest of the run continues. There are two ways to do that, and they look very different to a patron.
### Option 1: Remove the Date from the Series
Add the date to **No Shows on...** (**No Classes on...** for a class) on the event itself — the field that appears under Schedule once an event repeats. See [Schedule and End Date](https://docs.crowdwork.com/for-theatres/creating-a-show-or-class#schedule-and-end-date). The date is dropped from the series entirely: it disappears from your public page, the date picker, and your calendar as though it had never been scheduled.
To take a date out of *every* event at once — a venue closure, a holiday — use **Exclude Specific Dates for All Shows** in [Theatre Settings](https://docs.crowdwork.com/for-theatres/customizing-your-theatre-settings) instead. That one is theatre-wide and rebuilds the schedule for every event you have.
{% hint style="warning" %}
**Excluding a date deletes that date's customizations — but not its tickets.**
Saving regenerates the event's schedule and re-applies your exclusions. Two things follow:
* **Tickets already sold are safe.** Orders and admissions are untouched, and patrons keep the purchase in their account history. Nothing is refunded or cancelled for you.
* **Per-date customizations are not.** Any override saved on the excluded date — custom name, poster, pricing, confirmation email — is deleted along with the date, and re-adding the date later does not bring it back.
The excluded date also leaves your dashboard's list of dates, so if admissions are still attached to it, work with them from the patron's profile or the Tickets / Registrations screens rather than from the event's date view.
{% endhint %}
### Option 2: Keep the Date Visible but Unbuyable
If you'd rather patrons still see the date — and see that something changed — override its capacity instead:
1. Open **Edit Specific Dates** and select the date.
2. Under **Pricing**, set **Maximum Global Quantity** to **0**. (Setting every cost tier's quantity to 0 has the same effect — the single Maximum Global Quantity field is just fewer clicks.)
3. Save. Sales stop for that date only — every other date in the series is untouched.
{% hint style="warning" %}
**Patrons will see "Sold Out", not "Cancelled".**
There is no cancelled state for a single date today, so a zero-capacity date shows the same Sold Out button a genuinely full house would. Two things follow:
* If you [collect waitlist submissions](https://docs.crowdwork.com/for-theatres/setting-up-waitlists), the button reads **Sold Out — Join Waitlist**, and patrons will sign up for a date that isn't coming back. Expect to clear those out.
* The date stays in your public date picker and calendar. It simply can't be purchased.
{% endhint %}
{% hint style="success" %}
**Say it in the title.** Pair the capacity override with a **Name** override on the same date — "CANCELLED — Friday, September 12" — so anyone who lands on it understands what happened instead of assuming you sold out.
{% endhint %}
### Which One Should You Use?
Both work whether or not you have already sold tickets, and neither one refunds or notifies anybody — that part is yours to handle either way. What actually differs is what patrons see and what you keep:
| | Remove the date | Zero capacity |
| -------------------------- | ------------------------------------------------ | --------------------------------------------- |
| What patrons see | Nothing — the date is gone from your public page | The date, marked Sold Out |
| Tickets already sold | Kept, and still in the patron's account | Kept, and still in the patron's account |
| The date in your dashboard | Removed from the event's date list | Stays, so you can still work with it per-date |
| That date's overrides | Deleted permanently | Kept |
| Undo | Re-add the date; its overrides don't come back | Set the quantity back |
A rough steer: if you want the date to stop existing — a run that was never really on sale, a holiday, a venue closure — removing it is the tidier result. If patrons need to *see* that a specific performance was cancelled, keeping it visible at zero capacity with a renamed title tells them that directly. Either way, contact anyone already holding tickets yourself, with [Issuing Refunds](https://docs.crowdwork.com/for-theatres/issuing-refunds) and by [emailing the attendees](https://docs.crowdwork.com/for-theatres/managing-admissions#contacting-attendees) for that date.
***
## FAQs
What can I customize on a specific date?
You can override the **name**, **description**, **venue** (including the Venue Only display toggle), **poster images**, **pricing** (cost tiers, Maximum Global Quantity, Maximum Purchase Quantity, and Pay What You Want), and the **confirmation email** content. Everything else — sales window, access controls, tags, and scheduling — stays shared across all dates in the series.
How do I cancel or stop sales for just one date?
Two ways. Add the date to **No Shows on...** on the event and it's removed from the series entirely — but any per-date customizations on it are deleted with it. Or set that date's **Maximum Global Quantity** to **0** in Edit Specific Dates and it stays on your calendar as **Sold Out**, which is the better choice once tickets are out. Full comparison: [Stopping Sales on a Single Date](https://docs.crowdwork.com/for-theatres/editing-specific-dates-in-a-series#stopping-sales-on-a-single-date).
What happens to existing orders if I change an override?
Existing orders will reflect the updated override information. If you change the title on an overridden date, orders for that date will display the new title.
Can I search for orders from an overridden date?
Yes. Filtering by the original event name returns all orders across the series, including those for overridden dates. You don't need to search by the overridden title separately.
Does this work for both shows and classes?
Yes. Edit Specific Dates is available for any recurring event — shows and classes alike.
***
## Related Tasks
| Task | Guide |
| ---------------------------------------- | -------------------------------------------------------------------------------------------------------------- |
| Create a recurring show or class | [Creating a Show or Class](https://docs.crowdwork.com/for-theatres/creating-a-show-or-class) |
| Exclude specific dates from the schedule | [Creating a Show or Class — Excluding Dates](https://docs.crowdwork.com/for-theatres/creating-a-show-or-class) |
| Move a patron to a different date | [Managing Admissions](https://docs.crowdwork.com/for-theatres/managing-admissions) |
| Exchange a patron to a different event | [Managing Exchanges](https://docs.crowdwork.com/for-theatres/managing-exchanges) |
# Customizing Your Theatre Settings
This page describes how to customize your theatre details.
## Customize Your Theatre
You can customize your theatre information, ticketing details, and how you collect and track patron information on the **Edit Theatre** page. Navigate to the Edit Theatre page by using the left navigation menu to expand **Theatre**, then click [**Theatre Details**](https://crowdwork.com/dashboard/theatres/0/edit).
> **Direct link:** [Edit Theatre Settings](https://crowdwork.com/dashboard/theatres/0/edit)
* **Name**: The name of your organization. Used in the event URL.
* **Email**: The email connected to your account.
* **Domain**: The subdomain used in your CrowdWork URL. For example,
* Your Shows link would be:
* Your Classes link would be:
* **Address**: Physical address of your theatre.
* **Timezone**: The timezone that every event time in your account is entered and displayed in. This single setting controls all of them — see [Timezone](https://docs.crowdwork.com/for-theatres/customizing-your-theatre-settings#timezone) below.
***
* **Logo**: The logo is displayed in the upper-right of your [Public page](https://www.crowdwork.com/v/testtheatrefordocumentation/shows).
* **Hero Image**: The large background image is displayed on your [Public page](https://www.crowdwork.com/v/testtheatrefordocumentation/shows).
***
* **Exclude Specific Dates for All Shows**: Prevent shows from occurring on specific dates (i.e. no shows on January 1st). This is a global list that will override any evetns scheduled for dates listed here.
***
### **Timezone**
Your theatre has **one** timezone, and it decides how every event time in your account is entered, stored, and displayed. There is no separate timezone on an individual show, class, or date — they all follow this one setting.
> **Direct link:** [Edit Theatre Settings — General](https://crowdwork.com/dashboard/theatres/0/edit#section-general)
{% hint style="warning" %}
**Changing this setting changes the clock time of every event you have already scheduled.**
Event times are stored as absolute moments and shown in your theatre's timezone, so switching the setting re-labels all of them at once. Switch a theatre from Central to Pacific and an 11:00 AM class starts reading 9:00 AM — and the same shift applies to purchase windows and date exceptions.
If you need to change your timezone, change it **first**, then go back through your scheduled events and re-set their times.
{% endhint %}
**Three things that are easy to assume, and aren't true:**
* **Your address does not set your timezone.** Address and Timezone are independent fields — nothing converts one into the other. A theatre with a New York address and a Central timezone runs on Central time, and CrowdWork will never flag the mismatch.
* **If you never picked one, it's Central.** Timezone falls back to Central Time when it's left blank. If your event times look like they're an hour or three off, check this field first.
* **Your own computer's timezone doesn't matter.** When you type a start time on the event form, it's saved as that exact clock time in your theatre's timezone. Typing 7:00 PM on a laptop in Berlin still saves 7:00 PM theatre time.
**Two things you can count on:**
* Event times are shown in your theatre's timezone with the abbreviation attached — `11:00 AM CDT` — on your event pages, in your dashboard, and in the emails your patrons receive.
* Recurring events keep their local clock time across daylight saving. A weekly 7:00 PM class is still 7:00 PM after the clocks change in November — it doesn't drift to 6:00 PM.
#### Running an Event in Another Timezone
Because there's only one timezone per theatre, an event that physically happens somewhere else has to be entered **converted into your theatre's timezone**.
**Worked example.** A New York theatre — Timezone set to Eastern — is running a 7:00 PM show in New York and a 7:00 PM show in Los Angeles on the same night.
* The New York show is entered as **7:00 PM**. Nothing special.
* The Los Angeles show has to be entered as **10:00 PM**, because 7:00 PM Pacific is 10:00 PM Eastern.
* The public event page will then label that Los Angeles show `10:00 PM EDT` — not `7:00 PM PDT`. There is currently no way to change that label.
{% hint style="success" %}
**Say the real local time in your own words.** Since the time label always follows your theatre's timezone, put the event's actual local start time in the event description or in the event name — "Doors 7:00 PM Pacific" — so patrons buying tickets aren't left doing the conversion themselves.
{% endhint %}
#### Timezone Conversion Table
Find the row for when your event really starts, then read across to your theatre's Timezone setting. That's the time to type into the event form.
| Event's real start time | Theatre set to Eastern | Theatre set to Central | Theatre set to Mountain | Theatre set to Pacific |
| ----------------------- | ---------------------- | ---------------------- | ----------------------- | ---------------------- |
| 11:00 AM Eastern | 11:00 AM | 10:00 AM | 9:00 AM | 8:00 AM |
| 11:00 AM Central | 12:00 PM | 11:00 AM | 10:00 AM | 9:00 AM |
| 11:00 AM Mountain | 1:00 PM | 12:00 PM | 11:00 AM | 10:00 AM |
| 11:00 AM Pacific | 2:00 PM | 1:00 PM | 12:00 PM | 11:00 AM |
| 7:00 PM Eastern | 7:00 PM | 6:00 PM | 5:00 PM | 4:00 PM |
| 7:00 PM Central | 8:00 PM | 7:00 PM | 6:00 PM | 5:00 PM |
| 7:00 PM Mountain | 9:00 PM | 8:00 PM | 7:00 PM | 6:00 PM |
| 7:00 PM Pacific | 10:00 PM | 9:00 PM | 8:00 PM | 7:00 PM |
| 8:00 PM Eastern | 8:00 PM | 7:00 PM | 6:00 PM | 5:00 PM |
| 8:00 PM Central | 9:00 PM | 8:00 PM | 7:00 PM | 6:00 PM |
| 8:00 PM Mountain | 10:00 PM | 9:00 PM | 8:00 PM | 7:00 PM |
| 8:00 PM Pacific | 11:00 PM | 10:00 PM | 9:00 PM | 8:00 PM |
Only the four main US zones are shown, and the gap between them is a whole number of hours — so any other curtain time shifts by the same amount. A 6:30 PM Pacific show in an Eastern theatre is entered as 9:30 PM, the same three-hour jump as the 7:00 PM row.
{% hint style="info" %}
**About the other US zones.** The Timezone picker also offers Alaska, Hawaii, Arizona, and Indiana (East). The four zones in the table above shift together for daylight saving, so their offsets hold year-round — but **Arizona and Hawaii don't observe daylight saving**, so their gap to the others changes by an hour in the spring and again in the fall. If either is involved, check the offset for your specific dates rather than reusing a number from last season.
{% endhint %}
{% hint style="info" %}
**Running events in more than one timezone?** Per-event timezones aren't available yet — one theatre means one timezone. This is a limitation we're actively working on. If your theatre runs events across timezones, [let us know](https://docs.crowdwork.com/contacting-support) so your use case gets counted.
{% endhint %}
***
### **Global Show and Class Descriptions**
This text is added below each respective description and on customer emails. It is ideal for refund information, parking info, or anything you'd want included in every show or class. You can input rich-formatted text and text formatting (bolding, lists, links, etc.).
{% hint style="info" %}
**Need help using the text editor?** See [Using the Rich Text Editor](https://docs.crowdwork.com/for-theatres/using-the-rich-text-editor) for a full guide to formatting, links, and more. Note that images and file attachments are not available in the Global Description fields.
{% endhint %}
***
### **Service Fees**
**How would you like service fees handled?**
By default, fees are passed onto the customer. If the ticket price is $10, fees are $1.64, so the customer pays $11.64, and the theatre gets $10.
You also have the option to absorb the fees if you'd like. Absorbing means if the ticket price is $10, fees are $1.64, so the customer pays $10, and the theatre gets $8.36.
{% hint style="info" %}
**Pass Along to Customer:** All fees are passed onto customer, and you get full ticket amount
**Absorb All:** Customer pays face-value of tickets, and fees are taken from ticket value
**Absorb Shows:** Fees are only absorbed for shows, class fees are passed to customer
**Absorb Classes:** Fees are only absorbed for classes, show fees are passed to customer
{% endhint %}
***
### **Purchase Window**
**Ticket Purchasing Window**: By default, ticket sales will end at the start time of an event. Here you can specify how many minutes before the start of an event that ticket sales should close. Use negative numbers (i.e. -20) to close purchasing after the show has started.
{% hint style="warning" %}
**How this field works:**
* A **positive** number (e.g. **30**) closes sales 30 minutes **before** the event start time.
* A **negative** number (e.g. **-30**) closes sales 30 minutes **after** the event start time.
This setting controls exactly when ticket sales close for every event, so keep the value small and intentional — think minutes or hours, not weeks. Your public event pages always highlight an event's **next upcoming date**, but an excessively large negative number keeps long-past dates purchasable, which can fill a recurring event's date list with dates that have already happened. If you want to allow late sales, a value like **-30** (sales stay open half an hour after start) does the job.
{% endhint %}
***
### **Surcharges**
Surcharges are applied to the ticket amount prior to donations or service fees. Surcharges are not added to free shows or classes.
**Show Surcharge Amount**
* Type: Percent or Dollars.
**Class Surcharge Amount**
* Type: Percent or Dollars
***
### **Donation Options**
Accept donations from your patrons — at checkout, on a dedicated public Donations page, or both.
**Collect Donations**: Choose where patrons can donate.
| Option | Description |
| -------------------- | --------------------------------------------------------------------------------------- |
| **Disabled** | Donations are turned off entirely. |
| **Everywhere** | Donations appear at checkout **and** on your dedicated public Donations page. |
| **Only Events** | Donations appear during ticket and registration checkout only — not on the public page. |
| **Only Public Page** | Donations appear only on your dedicated Donations page — not at checkout. |
**Donation Campaign Text**: A custom message displayed on your dedicated public Donations page to let supporters know what their donations support — like an upcoming season, a community outreach program, or general operating support.
{% hint style="info" %}
**Want a full walkthrough?** See [Setting Up Donations](/for-theatres/setting-up-donations) for guidance on configuring donation settings, sharing your Donations page, tracking contributions, and getting notified when donations come in.
{% endhint %}
***
### **Additional Features**
* **Collect Phone Numbers**: Enable the ability to include phone numbers during the checkout flow.
* **Collect Newsletter Opt-Ins**: Enable the ability to allow customers to opt-in to newsletters during the checkout flow. Opted-in patrons become the audience for newsletters and promotions — see [Email Marketing](https://docs.crowdwork.com/for-theatres/email-marketing).
* **Collect Waitlist Submissions**: Enable the ability to allow patrons to join a waitlist for sold-out events. When enabled, a "Join Waitlist" button automatically appears when an event reaches max capacity. Options include Everywhere (default), Only Shows, Only Classes, or Do Not Collect. See [Setting Up Waitlists](/for-theatres/setting-up-waitlists) for complete details.
***
### **Email Communication**
**Theatre Contact Email**: The address CrowdWork uses whenever a patron — or CrowdWork itself — needs to reach your theatre by email. It's set in the [General section of your Edit Theatre page](https://crowdwork.com/dashboard/theatres/0/edit#section-general), and it drives more than its name suggests:
* **Patron replies land here.** When a patron replies to an order confirmation, event reminder, gift card or donation receipt, membership confirmation, or a direct message you send from CrowdWork, the reply goes to this address.
* **It appears in your email footers** — the "you can reach \[Your Theatre] at…" line at the bottom of patron emails.
* **It's the default Reply-to for email campaigns** — though each campaign can set its own Reply-to as you build it.
* **Payment plan notifications arrive here.** CrowdWork emails this address when a patron's payment plan installment succeeds or fails.
* **New promotions start with it** as their public contact address.
{% hint style="info" %}
**Point it at the inbox that should hear from patrons.** If replies to receipts and reminders should reach your box office rather than a general info@ address, change this field — every future confirmation and reminder will direct replies there. Just remember the payment plan notifications follow it too.
{% endhint %}
{% hint style="info" %}
**The sending address doesn't change.** Patron emails are always sent *from* — that's part of what keeps deliverability strong for every theatre on CrowdWork. Your Theatre Contact Email controls where *replies* go, not the From address patrons see.
{% endhint %}
> **Direct link:** [Edit Theatre Settings — General](https://crowdwork.com/dashboard/theatres/0/edit#section-general)
**CC Email Addresses**: Addresses that are automatically copied on the direct emails you send to patrons from CrowdWork — the messages you send to selected ticket holders from the [Admissions table](https://docs.crowdwork.com/for-theatres/managing-admissions#contacting-attendees), and the invitations you send to waitlist subscribers from [your waitlist](https://docs.crowdwork.com/for-theatres/setting-up-waitlists). Add as many as you like — pick a staff address from the dropdown, or type any other address and press Enter.
> **Direct link:** [Edit Theatre Settings — Email Communication](https://crowdwork.com/dashboard/theatres/0/edit#section-email)
This is how a box office keeps its own record of what went out to patrons, without anyone having to remember to copy themselves on each message.
{% hint style="warning" %}
**These are CC, not BCC — and there is no BCC option.**
The addresses you list appear in the headers of every message that goes out, so recipients can see them. Use an address you're comfortable showing patrons.
You also get **one copy per recipient**, not one copy per send: emailing 80 patrons puts 80 copies in each CC'd inbox. A mail rule that files them into a folder is worth setting up before you turn this on.
{% endhint %}
{% hint style="info" %}
**This setting does not apply to email campaigns.** Marketing campaigns sent through [Email Marketing](https://docs.crowdwork.com/for-theatres/email-marketing) ignore it — deliberately, since a per-recipient CC on a campaign to your whole list would bury your inbox. To see a campaign before it goes out, [send yourself a test email](https://docs.crowdwork.com/for-theatres/email-marketing/building-a-campaign) instead.
{% endhint %}
**Email Header Logo** (optional): An image shown at the top of your marketing emails in place of your theatre logo. Leave it blank and your logo is used.
***
### **Custom Tracking Pixels**
Add custom HTML to the header of your [Public pages](https://www.crowdwork.com/v/testtheatrefordocumentation/shows). It's great for adding tracking pixels from Google, Facebook, etc.
{% hint style="success" %}
**CrowdWork fires checkout events automatically.** Once you paste your pixel base code here, CrowdWork sends standard e-commerce events (like `purchase`, `add_to_cart`, and more) to Google, Meta, TikTok, and other platforms — no additional code needed. See [Tracking Pixels & Conversion Events](https://docs.crowdwork.com/for-theatres/tracking-pixels-and-conversion-events) for the full list of events and platform setup details.
{% endhint %}
# Using the Rich Text Editor
Learn how to use the rich text editor in CrowdWork to format descriptions, add images, embed YouTube or Vimeo videos, and attach files.
CrowdWork uses a rich text editor in several places across the Dashboard — including show and class descriptions, confirmation email fields, and global descriptions in Theatre Settings. This guide covers everything you can do with it.
{% hint style="info" %}
**Where you'll find the editor:** Show and class **Descriptions** • Show and class **Confirmation Email** fields • **Global Show/Class Descriptions** in [Theatre Settings](https://crowdwork.com/dashboard/theatres/0/edit) • **Membership Tier Descriptions**
{% endhint %}
***
## The Toolbar
The rich text editor toolbar. The attachment button (paperclip) is only available in Show/Class Description and Confirmation Email fields.
| Button | Name | What it does |
| ------------------------------------------------------------------- | --------------- | -------------------------------------------------------------------------------------------------------------- |
| **B** | Bold | Makes selected text bold |
| *I* | Italic | Makes selected text italic |
| ~~S~~ | Strikethrough | Draws a line through selected text |
| | Link | Attaches a URL to selected text — also triggers the video embed prompt when a YouTube or Vimeo URL is detected |
| **TT** | Heading | Toggles selected text between heading and body text size |
| " " | Blockquote | Formats selected text as an indented block quote |
| `<>` | Code | Formats selected text as inline monospace code |
| ☰ | Bullet List | Creates an unordered (bulleted) list |
| 1☰ | Numbered List | Creates an ordered (numbered) list |
| ⇐☰ | Decrease Indent | Moves the current list item one level to the left |
| ☰⇒ | Increase Indent | Moves the current list item one level to the right, creating a nested sub-list |
| | Attach File | Opens a file picker to upload an image directly into the editor |
| ↩ | Undo | Undoes the last action |
| ↪ | Redo | Redoes the last undone action |
{% hint style="info" %}
**The attachment button** **is only available in Show Description, Class Description, Show Confirmation Email, and Class Confirmation Email fields.** The Global Show/Class Descriptions and Membership Tier Description fields support text formatting only.
{% endhint %}
***
## Adding Images
Images can be added to Show and Class **Descriptions** and **Confirmation Email** fields. There are three ways to do it — use whichever is easiest for your workflow.
### Method 1: Use the Attachment Button
1. Click the **paperclip** icon in the toolbar
2. Select your image file from your computer
3. The image inserts immediately at the cursor position
### Method 2: Drag and Drop
1. Open your file manager or desktop so you can see both it and the editor
2. Drag your image file directly into the editor
3. Drop it where you want it to appear
### Method 3: Copy and Paste
1. Copy any image to your clipboard (right-click → Copy Image, or use a screenshot tool)
2. Click inside the editor where you want the image
3. Paste with **Ctrl+V** (Windows) or **⌘V** (Mac)
{% hint style="warning" %}
**Images are not supported** in the Global Show Description, Global Class Description, or Membership Tier Description fields. These fields support text formatting only.
{% endhint %}
***
## Embedding a YouTube or Vimeo Video
You can embed a video directly into a show or class description so it appears as a playable video on your event's public page. The embed option is a bit subtle — here's exactly how it works.
1. Type some text in the description that you want to use as the link (e.g., "Watch the trailer")
2. Select (highlight) that text
3. Click the **Link** button in the toolbar
4. Paste a YouTube or Vimeo video URL into the link field
5. CrowdWork will detect that it's a video link and display a prompt: **"This looks like a link to a YouTube video. Would you like to embed it?"**
6. Click **Yes, embed it**
7. The video will appear as an embedded player in the editor
After pasting a YouTube or Vimeo URL as a link, this prompt appears. Click "Yes, embed it" to add an inline video player.
{% hint style="success" %}
**This works with both YouTube and Vimeo URLs.** Just paste the standard video URL — the embed detection is automatic.
{% endhint %}
{% hint style="warning" %}
**Video embeds do not work in confirmation emails.** Email applications don't support embedded video players, so any embed you add to a Confirmation Email field may not display correctly for recipients.
**Recommended workaround for emails:** Take a screenshot of your video (with a play button visible), insert that screenshot as an image in the email, and link the image to your video URL. Patrons see a recognizable video thumbnail, click it, and are taken directly to the video.
{% endhint %}
***
## Related Tasks
| Task | Guide |
| ----------------------------------------------------- | ------------------------------------------------------------------------------------------------------------------------------------- |
| **Create a show or class** | [Creating a Show or Class](https://docs.crowdwork.com/for-theatres/creating-a-show-or-class) |
| **Customize global descriptions and email content** | [Customizing Your Theatre Settings](https://docs.crowdwork.com/for-theatres/customizing-your-theatre-settings) |
| **Set up a confirmation email for livestream events** | [Selling Tickets to Livestream Events](https://docs.crowdwork.com/the-academy/crowdwork-academy/selling-tickets-to-livestream-events) |
| **Manage membership tier descriptions** | [Setting Up Memberships](https://docs.crowdwork.com/for-theatres/setting-up-memberships) |
# Embedding a Widget
This page describes how to embed CrowdWork widgets into your website.
CrowdWork offers multiple ways to showcase your upcoming events directly on your website. These embeddable widgets make integrating your shows and classes easy. Once embedded, your shows and classes will update automatically.
***
### What Are Widgets?
Widgets are components that display your shows and classes on your website. All widgets:
* Auto-sync with your Dashboard
* Link directly to booking pages
* Can be filtered by tags
* Are customizable with your own CSS
* Use responsive design for all screen sizes
To get started, go to [**Theatre > Embeds**](https://crowdwork.com/dashboard/embeds) in your Dashboard menu to find your widget code.
{% hint style="warning" %}
**Using Squarespace? WordPress? Weebly? Wix?**
If your website uses a CMS or website editing tool, check out our [Platform-Specific Embedding Guides](/the-academy/crowdwork-academy/embedding-widgets-on-specific-platforms) to find step-by-step instructions for your particular website platform
{% endhint %}
### Widget Types
Widgets are available in two formats, **Calendar** view and **Card** view. Both views are available for shows, classes, or shows & classes combined, letting you choose the best format for each page on your site.
Calendar View
Calendar View features:
Familiar monthly calendar layout showing all upcoming events
Desktop: full calendar grid
Mobile: scrollable list
Preview details on hover
Past events appear dimmed
Commonly used for:
Main "Shows" schedule pages
Complete event listings
Combined shows & classes calendar
Card View
Card View features:
Visual cards with event images
Multiple cards per row on desktop, single column on mobile
Option to display all recurring event dates instead of just the next upcoming
Commonly used for:
Main "Classes" page
Homepage features
Special events & promotions
Combined shows & classes display
### Getting Started with Widget Embedding
To get started, go to [**Theatre > Embeds**](https://crowdwork.com/dashboard/embeds) in your Dashboard menu to find your widget code.
The default widget code displayed is ready for use - just copy and paste it into your website to display all your public classes, shows, or both combined. Or use the customization options below to create filtered views and specialized displays for a specific tag or starting month.

{% hint style="info" %}
**Widget Tips**
* You can embed **multiple widgets on the same page**.
* You can even **embed widgets on other websites** than your own! Customize the widget, copy the code and share it with performer's personal websites and local event sites to expand your reach - *and all ticket sales still flow through your account*.
* **Calendar views are taller** than card views and need more vertical space available on your website to display properly.
* **Widgets automatically stay in sync** with changes made to events in your Dashboard.
{% endhint %}
### Customization Options
Make unique widgets the way you want them!
The best and easiest way to create custom widgets is using the controls in your Dashboard. Simply select your preferences for content type, tag, starting month, or day of week - the code snippet will update automatically with the correct parameters. Copy and then paste the code where you want it to display on your website.

{% hint style="success" %}
**Using Squarespace? WordPress? Weebly? Wix?**
We've created easy-to-follow guides for embedding CrowdWork widgets on popular website platforms. Follow these [Platform-Specific Embedding Guides](/the-academy/crowdwork-academy/embedding-widgets-on-specific-platforms) for a smooth setup:
* [GoDaddy Website Builder](/the-academy/crowdwork-academy/embedding-widgets-on-specific-platforms/godaddy-site-builder-embed-guide)
* [Squarespace](/the-academy/crowdwork-academy/embedding-widgets-on-specific-platforms/squarespace-embed-guide)
* [Weebly](/the-academy/crowdwork-academy/embedding-widgets-on-specific-platforms/weebly-embed-guide)
* [Wix](/the-academy/crowdwork-academy/embedding-widgets-on-specific-platforms/wix-embed-guide)
* [WordPress](/the-academy/crowdwork-academy/embedding-widgets-on-specific-platforms/wordpress-embed-guide) (including [Elementor, Divi & page builders](/the-academy/crowdwork-academy/embedding-widgets-on-specific-platforms/wordpress-page-builders-embed-guide))
[**Start here to find your website platform**](/the-academy/crowdwork-academy/embedding-widgets-on-specific-platforms). Don't see what you need? [Contact us for assistance](/contacting-support).
{% endhint %}
#### Choosing Content Type
You can choose what types of events your widget displays:
1. Go to [**Theatre > Embeds**](https://crowdwork.com/dashboard/embeds) in your Dashboard menu
2. Use the "Content Type" dropdown to select:
* **Shows** - Display only your shows
* **Classes** - Display only your classes
* **Shows & Classes** - Display all events intermingled in chronological order
3. Select your preferred view (Calendar or Cards)
4. Copy the updated code and paste it into your website
{% hint style="info" %}
The Shows & Classes option is perfect for creating a comprehensive events calendar or homepage widget that showcases your entire schedule.
{% endhint %}
#### Filtering by Tag
To display only events with a specific tag (see [Tags](https://docs.crowdwork.com/for-theatres/tags) for how to create and assign them):
1. Go to [**Theatre > Embeds**](https://crowdwork.com/dashboard/embeds) in your Dashboard menu
2. Choose your content type (Shows, Classes, or Shows & Classes)
3. Select your preferred view (Calendar or Cards)
4. Find the "Filter by Public Tag" dropdown and select your desired tag
5. Copy the updated code and paste it into your website
{% hint style="info" %}
Only one tag can be used per widget.
{% endhint %}
#### Setting a Specific Start Month
To have your calendar initially display a specific month:
1. Go to [**Theatre > Embeds**](https://crowdwork.com/dashboard/embeds) in your Dashboard menu
2. Choose your content type (Shows, Classes, or Shows & Classes)
3. Select "Calendar" view
4. Use the "Starting Calendar Month" option to select your desired month
5. Copy the updated code and paste it into your website
{% hint style="info" %}
Starting on a specific month can be helpful if you're using a widget to promote an upcoming event far in advance, such as a festival this summer or classes this fall.
**Date format:** The Dashboard generates the correct date automatically when you use the picker. If editing the code manually, use the format `YYYY-MM-DD` (e.g., `data-start-date="2026-05-01"`).
{% endhint %}
#### Setting the Start Day of Week
To choose which day the calendar week starts on:
1. Go to [**Theatre > Embeds**](https://crowdwork.com/dashboard/embeds) in your Dashboard menu
2. Choose your content type (Shows, Classes, or Shows & Classes)
3. Select "Calendar" view
4. Use the "Starting Calendar DOW" dropdown to select your preferred starting day
5. Copy the updated code and paste it into your website
#### Setting a Rolling Day Limit
By default, widgets display all future events with no time cutoff. Use the Rolling Day Limit to restrict a Calendar or Cards widget to only show events within a set number of days from today.
1. Go to [**Theatre > Embeds**](https://crowdwork.com/dashboard/embeds) in your Dashboard menu
2. Choose your content type (Shows, Classes, or Shows & Classes)
3. Select your preferred view (Calendar or Cards)
4. Use the "Rolling Day Limit" dropdown to select:
* **No Limit** — Display all upcoming events (default)
* **Today** — Display only today's events
* **Next 3 Days** — Display events within the next 3 days
* **Next 7 Days** — Display events within the next 7 days
5. Copy the updated code and paste it into your website
{% hint style="info" %}
**Calendar view changes appearance with a rolling day limit.** Instead of a standard monthly calendar grid, the widget switches to a rolling day-range view — for example, "Next 7 Days" always shows the current 7-day window, starting from today.
{% endhint %}
{% hint style="success" %}
Rolling day limits are great for homepage "what's on this week" sections, venue lobby displays, or any context where only near-term events are relevant.
{% endhint %}
#### Display All Recurring Event Dates
By default, Cards widgets display only the next upcoming occurrence of recurring events. You can change this to show a card for every scheduled date:
1. Go to [**Theatre > Embeds**](https://crowdwork.com/dashboard/embeds) in your Dashboard menu
2. Choose your content type (Shows, Classes, or Shows & Classes)
3. Select "Cards" view
4. Check the "Display all dates instead of the next upcoming" checkbox
5. Copy the updated code and paste it into your website
{% hint style="info" %}
This option only applies to 🃏 Cards view. 🗓️ Calendar view always displays all occurrences of recurring events.
{% endhint %}
{% hint style="warning" %}
Heads up! This will show a separate card for each date of your recurring events. *Great for highlighting all available dates*, but keep in mind this can create **many similar-looking cards** and **may slow down your page** if you have lots of recurring events.
{% endhint %}
#### Creating Additional Custom Widgets
With the customization options above, you can create as many unique widgets as you'd like. You can:
* **place multiple widgets on a single page** (display Shows & Classes on the same page);
* **place widgets on multiple websites, even other than your own**! (give the embed code to a local blog or featured performers to place the listing of events on their sites, and the sales still flow through your CrowdWork account!);
{% hint style="success" %}
**Creative Uses for Custom Widgets**
Here are some great ways theatres use additional custom widgets on their sites:
* **Organize by Experience Level:** Tag classes with skill levels ("L1", "Beginner", etc). Add level-specific widgets to sections of your classes page OR dedicated Level pages.
* **Feature Teams & Teachers:** Tag shows and classes with teams, performers, teachers. Embed performance calendars on team/teacher bios or personal websites
* **Market Special Events:**
* Free Events: Tag "FREE", create a dedicated intro/trial page
* Season Preview: Use start-date widgets to preview upcoming seasons
* New Student Specials: Tag beginner classes & pair with discount codes
* **Comprehensive Event Display:** Use Shows & Classes widgets to provide a unified calendar on your site
* **Recurring Event Promotion:** Use "Display all dates" for Cards to showcase all occurrences of popular recurring classes or shows
{% endhint %}
### For Advanced Users: Widget Code Reference
{% hint style="danger" %}
*To create widgets, visit* [***Theatre > Embeds***](https://crowdwork.com/dashboard/embeds) *in your Dashboard and use the customization controls. While manual code editing is possible, we strongly recommend using the customizer to ensure proper formatting and avoid errors. The following information about manual customization is provided for reference.*
{% endhint %}
The Dashboard's widget customizer provides access to all the configuration options that are available. However, for those comfortable editing HTML, you can manually customize widget code.
{% hint style="warning" %}
**Before You Start...**
* **Sample Code:** The widget code snippets provided on this page are just samples – find & customize your theatre's code in the Dashboard under [**Theatre > Embeds**](https://crowdwork.com/dashboard/embeds) to access your embed codes
* **Custom Editing:** If you make edits by hand, remember that:
* Starting Day of Week (`data-start-dow`) requires a single digit and zero means Sunday
* Starting Month dates (`data-start-date`) must be in the format: `YYYY-MM-DD` (e.g., `2026-05-01`)
* Rolling Day Limit (`data-days`) accepts: `1`, `3`, or `7`
* Tag names are ***case-sensitive*** and must match exactly
* The `data-all-dates` attribute only applies to Cards widgets
* **Code Formatting**: You can format the widget code however you like:
* putting it all on one line (as shown in your Dashboard & preferred, especially for WordPress, Squarespace, etc.); or
* splitting it across multiple lines (as shown on this page for easier reading);
* however, did we say yet that *we always recommend copying it directly from your Dashboard?* :smile\_cat:
{% endhint %}
#### Basic Structure
Here's a breakdown of all available configuration options:
{% code fullWidth="true" %}
```html
```
{% endcode %}
#### Content Type Selection (Advanced)
Choose which types of events to display:
{% code fullWidth="true" %}
```html
```
{% endcode %}
#### Filtering by Tag (Advanced)
To display only events with a specific tag:
1. Start with the code sample below or copy the default code from your Dashboard at [**Theatre > Embeds**](https://crowdwork.com/dashboard/embeds) and be sure to add your account details in `data-theatre="yourtheatre"`
2. For the `data-category="YourTagName"` attribute, enter a ***single case-sensitive public tag*** (e.g., "Comedy" not "comedy")
<!-- Show calendar filtered by tag -->
<div><script id="fw_script" src="https://crowdwork.com/embed.js?v=X"
  data-theatre="yourtheatre"
  data-type="shows"
  data-view="calendar"
  data-category="YourTagName">
</script></div>

<!-- Class cards filtered by tag -->
<div><script id="fw_script" src="https://crowdwork.com/embed.js?v=X"
  data-theatre="yourtheatre"
  data-type="classes"
  data-view="cards"
  data-category="YourTagName">
</script></div>

<!-- All events (shows & classes) cards filtered by tag -->
<div><script id="fw_script" src="https://crowdwork.com/embed.js?v=X"
  data-theatre="yourtheatre"
  data-type="all"
  data-view="cards"
  data-category="YourTagName">
</script></div>
#### Calendar Customization (Advanced)
For calendar views, you can customize the Starting Month or Starting Day of Week:
1. Start with a code sample below or copy the default code from your Dashboard at [**Theatre > Embeds**](https://crowdwork.com/dashboard/embeds) and be sure to add your account details in `data-theatre="yourtheatre"`
2. **Starting Month**: Set which month the calendar initially displays using the `data-start-date="2025-06-01"` attribute, enter the date in the format `YYYY-MM-DD`
3. **Starting Day of Week**: Choose which day the calendar week starts on using the `data-start-dow="1"` attribute, enter a single digit for the desired start day:
* `data-start-dow="0"` for Sunday
* `data-start-dow="1"` for Monday
* `data-start-dow="2"` for Tuesday
* `data-start-dow="3"` for Wednesday
* `data-start-dow="4"` for Thursday
* `data-start-dow="5"` for Friday
* `data-start-dow="6"` for Saturday
#### Cards Customization: Display All Dates (Advanced)
For Cards widgets, you can choose to display all dates of recurring events instead of just the next upcoming occurrence:
{% hint style="info" %}
The `data-all-dates="true"` attribute only works with Cards view. Calendar view always shows all recurring event dates.
{% endhint %}
#### Combined Customization (Advanced)
You can combine multiple customization options as desired:
Need help implementing these widgets? [Contact us](/contacting-support) for assistance!
[^1]: **Display a Specific Tag**
*- tag names are case-sensitive and must match exactly*
*- remove to display All Shows or All Classes*
[^2]: **Starting Month**
\- attribute: `data-start-date`
\- date format: *YYYY-MM-DD* (e.g., `2026-05-01`)
[^3]: **Starting Day of Week**
\- attribute: `data-start-dow`
*0 = Sunday*
*1 = Monday*
*2 = Tuesday*
*3 = Wednesday*
*4 = Thursday*
*5 = Friday*
*6 = Saturday*
[^4]: **Display All Dates**
*Cards view only - shows all recurring event dates instead of just the next upcoming*
[^5]: **Rolling Day Limit**
\- attribute: `data-days`
*Limits the widget to events within the next N days from today. Valid values: 1, 3, or 7*
*When applied to Calendar view, the widget switches from a monthly grid to a rolling day-range view*
# Tracking Pixels & Conversion Events
Set up tracking pixels from Google, Meta, TikTok, and other platforms to measure ad performance, track conversions, and build retargeting audiences from your CrowdWork checkout flows.
CrowdWork automatically fires standard e-commerce events at key moments during checkout — when a patron views an event, adds tickets, applies a discount code, and completes a purchase. These events are sent to all major tracking platforms simultaneously, so you can measure which ads and campaigns are actually driving ticket sales.
This works across all three checkout flows: **shows**, **memberships**, and **gift cards**.
{% hint style="success" %}
**No custom event code required.** You only need to install your platform's base pixel snippet. CrowdWork handles firing the right events at the right time — your tracking platform picks them up automatically.
{% endhint %}
***
## Installing Your Tracking Pixel
To start tracking, add your platform's base pixel code (sometimes called an initialization snippet) to the **Custom Tracking Pixels** field in your Theatre Settings.
> **Direct link:** [Theatre Details](https://crowdwork.com/dashboard/theatres/0/edit)
1. Go to **Dashboard → Theatre → Theatre Details**
2. Scroll to the **Custom Tracking Pixels** section
3. Paste your pixel base code into the field
4. Click **Save**
The code you paste here is injected into the header of your [public pages](https://www.crowdwork.com/v/testtheatrefordocumentation/shows) — the same pages where patrons browse and purchase tickets. This is where your tracking platform's initialization snippet goes.
{% hint style="info" %}
**What to paste:** Each tracking platform provides a base snippet you install once. This is usually a small block of JavaScript that initializes the pixel on your pages. You do **not** need to add individual event tracking code — CrowdWork fires the events for you. See [Platform Setup Notes](https://docs.crowdwork.com/for-theatres/tracking-pixels-and-conversion-events#platform-setup-notes) below for links to each platform's setup instructions.
{% endhint %}
{% hint style="warning" %}
**Multiple pixels are fine.** You can paste code for Google, Meta, TikTok, and any other platform into the same field — they all work simultaneously and won't conflict with each other.
{% endhint %}
***
## Checkout Events Reference
CrowdWork fires the following events during checkout. These are standard e-commerce event names recognized by Google Analytics 4, Google Ads, Meta (Facebook), TikTok, and other platforms.
| Event | Trigger | Description |
| ------------------ | ---------------------------- | ---------------------------------------------------------------------- |
| `view_item` | Page load | Patron lands on an event page |
| `begin_checkout` | Checkout modal opens | Patron opens the ticket purchase modal |
| `add_to_cart` | Tier incremented or selected | Patron adds tickets by increasing quantity or selecting a tier |
| `remove_from_cart` | Tier decremented | Patron reduces ticket quantity |
| `add_payment_info` | "Next" button clicked | Patron advances past ticket selection to payment |
| `apply_discount` | Valid discount code applied | Patron successfully applies a discount code |
| `apply_gift_card` | Valid gift card applied | Patron successfully applies a gift card |
| `purchase` | Successful payment | Patron completes checkout (works with both Square and Stripe payments) |
***
## Events by Checkout Flow
Not every checkout flow fires every event. Here's what's available in each:
| Event | Shows | Memberships | Gift Cards |
| ------------------ | :---: | :---------: | :--------: |
| `view_item` | ✅ | ✅ | ✅ |
| `begin_checkout` | ✅ | — | — |
| `add_to_cart` | ✅ | ✅ | — |
| `remove_from_cart` | ✅ | — | — |
| `add_payment_info` | ✅ | — | — |
| `apply_discount` | ✅ | ✅ | — |
| `apply_gift_card` | ✅ | — | — |
| `purchase` | ✅ | ✅ | ✅ |
The shows checkout has the most complete event coverage because it has the most steps in its checkout flow. Memberships and gift cards have simpler flows and fire the events that apply to their process.
{% hint style="info" %}
**Why no gift card support on memberships?** Memberships require a card on file for recurring billing, so gift cards cannot be used as a payment method for membership purchases.
{% endhint %}
***
## Platform Setup Notes
CrowdWork pushes events to all of the following interfaces simultaneously. You only need the platforms you're using — install the base snippet for each and CrowdWork handles the rest.
### Google Tag Manager / GA4
CrowdWork pushes events to the `dataLayer` using Google's Enhanced E-Commerce format. If you use Google Tag Manager, these events are available as triggers without any additional tag configuration beyond your standard GTM container snippet.
If you use standalone Google Analytics 4 (via `gtag.js`) instead of GTM, events are also pushed directly through the `gtag` interface.
**Get your base snippet:** [Set up and install Tag Manager](https://support.google.com/tagmanager/answer/6103696) | [Set up Analytics for a website](https://support.google.com/analytics/answer/9304153)
### Meta (Facebook) Pixel
CrowdWork maps checkout events to Meta's standard events — for example, `add_to_cart` maps to Meta's `AddToCart`, and `purchase` maps to `Purchase`. If you've installed the Meta Pixel base code, these conversions are tracked automatically.
**Get your base snippet:** [Meta Pixel implementation guide](https://developers.facebook.com/docs/meta-pixel/get-started)
### TikTok Pixel
CrowdWork maps checkout events to TikTok's standard events — for example, `purchase` maps to TikTok's `CompletePayment`. Install your TikTok Pixel base code and conversions are tracked automatically.
**Get your base snippet:** [Get started with TikTok Pixel](https://ads.tiktok.com/help/article/get-started-pixel)
### Other Platforms
Any tracking platform that listens to the `dataLayer` or provides a standard JavaScript interface will receive these events. If you use a platform not listed above, install its base snippet in the Custom Tracking Pixels field and check whether it picks up standard e-commerce events from the `dataLayer`.
***
## Common Questions
Do I need to add any event tracking code myself?
No. CrowdWork fires all checkout events automatically. You only need to install the base pixel snippet for your tracking platform(s). No custom event code, no `dataLayer.push()` calls, and no manual conversion setup is needed on your end.
Will this work with the tracking pixel I already have installed?
Yes. If you've already pasted a pixel base code into your Custom Tracking Pixels field, CrowdWork's events will work with it immediately — no changes needed on your part. Your existing pixel will automatically pick up the new events.
Can I track which ads are driving ticket sales?
Yes — that's one of the primary use cases. The `purchase` event fires on every completed checkout, which means your ad platform (Google Ads, Meta Ads, TikTok Ads) can attribute sales back to specific campaigns. Set up conversion tracking in your ad platform using the `purchase` event, and you'll see which ads are generating actual revenue.
Can I use this for retargeting?
Yes. Events like `view_item` and `begin_checkout` tell your ad platform when someone looked at an event or started checkout but didn't finish. You can build retargeting audiences from these events — for example, showing ads to people who viewed a show page but didn't purchase.
Can I use multiple tracking platforms at the same time?
Yes. Paste all of your pixel base snippets into the same Custom Tracking Pixels field. CrowdWork fires events to all supported platforms simultaneously — they won't conflict with each other.
Do these events fire when patrons check out from an embedded widget on my website?
Checkout events fire during the checkout process on CrowdWork-hosted pages. When a patron clicks through from an embedded widget on your website, they are directed to your CrowdWork public pages to complete their purchase, and events fire during that checkout. Your tracking pixel base code installed in Theatre Settings covers these CrowdWork-hosted pages. For tracking visitor activity on your own website where widgets are embedded, use your own site's analytics setup independently.
I use Google Tag Manager. Do I need to set up custom tags for these events?
Not necessarily. CrowdWork pushes events to the `dataLayer` in Google's Enhanced E-Commerce format, which GTM recognizes natively. You may want to create tags and triggers in GTM to forward specific events to other platforms or to customize how they appear in your reports, but the events themselves are available in your `dataLayer` without any GTM configuration.
Where do I find the Custom Tracking Pixels field?
Go to **Dashboard → Theatre → Theatre Details** and scroll to the **Custom Tracking Pixels** section. Or use this direct link: [Theatre Details](https://crowdwork.com/dashboard/theatres/0/edit). See [Customizing Your Theatre Settings](https://docs.crowdwork.com/for-theatres/customizing-your-theatre-settings#custom-tracking-pixels) for more about your Theatre Settings page.
***
## Related Tasks
| Task | Guide |
| ----------------------------------- | -------------------------------------------------------------------------------------------------------------- |
| **Configure your Theatre Settings** | [Customizing Your Theatre Settings](https://docs.crowdwork.com/for-theatres/customizing-your-theatre-settings) |
| **Embed widgets on your website** | [Embedding a Widget](https://docs.crowdwork.com/for-theatres/embedding-a-widget) |
| **View your sales analytics** | [Sales Analytics](https://docs.crowdwork.com/for-theatres/reports-and-analytics/sales-analytics) |
| **Set up discount codes** | [Setting Up Discount Codes](https://docs.crowdwork.com/for-theatres/setting-up-discount-codes) |
| **Set up gift cards** | [Setting Up Gift Cards](https://docs.crowdwork.com/for-theatres/setting-up-gift-cards) |
| **Set up memberships** | [Setting Up Memberships](https://docs.crowdwork.com/for-theatres/setting-up-memberships) |
***
## Need Help?
If you need assistance setting up your tracking pixels or verifying that events are working correctly, [contact our support team](https://docs.crowdwork.com/contacting-support) — we're happy to help!
# Tags
Understand how to get the most from Tags and how they can help you manage your events
Tags are an excellent method to manage your shows and classes. They allow you to group your events on the Public pages, but also manage them internally. With tags you can easily assign discounts and more, and better organize your shows and classes.
{% hint style="info" %}
**Tags are the new Categories**
If you were familiar with Categories, Tags have replaced that concept and improved upon it. With Tags, you can now assign internal and external tags. Plus easily find and edit them in once place.
{% endhint %}
### Creating a new Tag
Tags can be created one of two ways:
* Created via the [**Tags**](https://crowdwork.com/dashboard/tags) page
* Created when editing a new show or class
We'll walk through both ways here.
> **Direct link:** [Tags Dashboard](https://crowdwork.com/dashboard/tags)
### Creating a Tag from the Tags page
On the [**Tags**](https://crowdwork.com/dashboard/tags) page, you can easily create a new tag and assign the following values:
* Name: what you want the tag to be called
* Type: if you want the tag to be internal or public
* Public tags are used to group your assigned show or class together into a group
* Internal tags are not shown publicly, and are great for assigning discounts or more
The table for all Tags
Viewing all Tags
Creating or editing a new Tag
### Sorting and Ordering Tags
By default, your public tags are displayed in alphabetical order. If you'd like to control the order they appear in on your public pages — for example, to put a featured season or genre at the top — you can switch to manual ordering.
On the [**Tags**](https://crowdwork.com/dashboard/tags) page:
1. Click **Manually Order** in the sort toggle at the top of the tag list
2. Drag any public tag to your preferred position using the handle on the left side of the row
3. Your custom order is saved automatically
To return to alphabetical sorting at any time, click **Sort Alphabetically**.
{% hint style="info" %}
**Manual ordering applies to your public tags.** Those are the ones patrons see grouped on your public pages, so theirs is the order that matters. Internal tags are always listed alphabetically, and the Internal Tags table has no drag handles.
{% endhint %}
### Creating a new Tag from a Show or Class
You can also add or create a new Tag from the Show or Class form. To do that, simply scroll to the bottom of the form and you'll see the Tags section.
Click "Add Tag" to open the modal
Choose to add or create a new Tag
### Tagging Patrons
Tags can be applied to patrons as well as to events. Tagging a patron is how you record something about them that you want to act on later — that they've completed a prerequisite class, that they're a company member, or any other grouping you track.
To add a tag to a patron, open their record in [**Customers**](https://crowdwork.com/dashboard/customers) or [**Students**](https://crowdwork.com/dashboard/students), click **Edit**, and use the **Tags** section. Their current tags are also listed on their profile page.
Patron tags are always **internal** tags, so they're never shown on your public pages.
{% hint style="info" %}
**Tags can gate purchases.** A show or class can grant a tag when a patron purchases it, and can require that a patron already hold certain tags before they're allowed to purchase — which is how prerequisites work. See [Conditional Enrollments](/for-theatres/conditional-enrollments).
{% endhint %}
# Conditional Enrollments
Require patrons to meet prerequisites before they can purchase a show or class, using tags granted at checkout.
Conditional Enrollments let you require that a patron meet certain conditions before they can purchase a show or class. The most common use is a prerequisite: making sure everyone enrolling in Level 2 has already completed Level 1.
It works through [Tags](/for-theatres/tags). An event can **grant** a tag when a patron purchases it, and an event can **require** that a patron already hold certain tags before they're allowed to purchase. Chain those two together and you have a prerequisite.
{% hint style="info" %}
**A quick example.** Level 1 grants the tag **Level 1 Complete**. Level 2 requires the tag **Level 1 Complete**. A student who buys Level 1 automatically becomes eligible for Level 2 — you don't have to track it by hand.
{% endhint %}
## Setting up Enrollment Requirements
Enrollment Requirements live on the show or class form, in the **Enrollment Requirements** section.
1. Go to [**Shows**](https://crowdwork.com/dashboard/shows) or [**Classes**](https://crowdwork.com/dashboard/classes) in the Dashboard and open the event you want to edit.
2. Scroll to the **Enrollment Requirements** section.
3. Fill in the fields described below, then save.
### Tags granted on purchase
Any tags you choose here are added to the patron's account when they purchase this event. This is what marks a patron as having completed something.
Select an existing tag, or type a new name to create one on the spot.
### Tags required to purchase
The patron must already hold **all** of the tags you list here in order to purchase. If you list two tags, holding just one of them is not enough.
Leave this field empty if the event has no requirements — that's the default, and it's how every existing event behaves.
### Message when requirements aren't met
This optional message is shown at checkout to a patron who is missing a required tag. Use it to tell them what to do next.
A message like *"You must complete Level 1 before enrolling in Level 2. Email us if you've taken Level 1 elsewhere."* is far more useful than the generic fallback, which simply says the patron doesn't meet the enrollment requirements.
{% hint style="success" %}
**Write the message for the patron who is stuck.** They can't complete the purchase, so the message is your only chance to tell them how to become eligible — or who to contact.
{% endhint %}
## Enrollment tags are internal tags
The tags used for Enrollment Requirements are always **internal** tags, including any new ones you create from the event form. Internal tags aren't shown on your public pages, so a prerequisite tag won't appear to patrons browsing your season.
You can see and rename them alongside your other tags on the [**Tags**](https://crowdwork.com/dashboard/tags) page.
## Granting a tag manually
Patrons don't only earn prerequisites through your online checkout. Someone may have taken Level 1 last season, at another theatre, or paid at the box office. You can add the tag to their record directly.
1. Open the patron's record — [**Customers**](https://crowdwork.com/dashboard/customers) for show ticket buyers, [**Students**](https://crowdwork.com/dashboard/students) for class registrants.
2. Click **Edit**.
3. In the **Tags** section, add the tag they should hold.
4. Save. They're now eligible for any event requiring that tag.
A patron's current tags are listed on their profile page, so you can check at a glance what someone is eligible for.
{% hint style="info" %}
**Tags are added to patrons on their record, not on a single order.** Once a patron holds a tag, they hold it for every future purchase.
{% endhint %}
## How patrons are matched
At checkout, CrowdWork looks up the patron by the email address they enter and checks the tags on that record. Capitalization doesn't matter.
Because the match is by email, a patron who checks out with a different address than the one on their existing record won't be recognized as holding their tags. If a patron reports they can't purchase something they should be eligible for, the email address is the first thing to check — and adding the tag to the record they're actually using resolves it immediately.
{% hint style="warning" %}
**Requirements apply to first-time buyers too.** A patron with no prior record with your theatre holds no tags, so they can't purchase an event that requires one until you add the tag to their record. This is what makes a prerequisite a real prerequisite — but it's worth knowing before you add a requirement to a high-volume show.
{% endhint %}
## Granting and requiring happen at online checkout
Tags are granted, and requirements are enforced, when a patron completes a purchase through your public pages.
Admissions you create yourself from the Dashboard — box office sales, comps, and anything you add to an event directly — are handled separately. When you add a patron to an event this way, add any tag they should earn to their record at the same time, using the steps in [Granting a tag manually](#granting-a-tag-manually) above. That keeps the patron eligible for the next event in the sequence.
## Related Tasks
| Task | Guide |
| -------------------------------------- | -------------------------------------------------------------------- |
| Create and organize tags | [Tags](/for-theatres/tags) |
| Create a show or class | [Creating a Show or Class](/for-theatres/creating-a-show-or-class) |
| Add admissions from the Dashboard | [Issuing Comps](/for-theatres/issuing-comps) |
| Offer a discount to a group of patrons | [Setting Up Discount Codes](/for-theatres/setting-up-discount-codes) |
# Custom Checkout Fields
This page explains how to create, manage, and get the most from custom checkout fields on your events.
Checkout Fields are extra customizable fields used to collect important information during checkout. You can create as many as you'd like, and arrange and edit however best suits your needs.
## Creating a new field
To create a new field, navigate to the "Checkout Fields" dropdown on the left-hand sidebar and select [**Edit Fields**](https://crowdwork.com/dashboard/custom-fields). From there, click the big blue [**Add New Checkout Field**](https://crowdwork.com/dashboard/custom-fields/new) in the upper right corner. You'll then be presented by the creation form:
> **Direct link:** [Custom Checkout Fields](https://crowdwork.com/dashboard/custom-fields)
Create a new field form
Here you have a few options:
* A dropdown where you can select which shows, classes, or tags you want to assign this field to.
* A dropdown to select a Field Type. The three types of fields are:
* **Text Input**: Used for freeform text input. Great for names or other general information.
* **Checkbox**: Used to opt in or out of things. Great for consents or opting into additional things.
* **Dropdown**: Used to list per-defined options. Great for having the user select things such as how they heard about your event or selecting something specific.
* A checkbox to make the field required to submit an answer
* Field name
* Field description (optional)
You can also pause, activate, or archive a field.
## Managing fields
Once you've created a few fields, you'll see them populated in tables:
View your custom fields
Here you can easily view, edit, and manage your fields.
{% hint style="info" %}
**Field Order**
You can easily arrange your fields to appear in a specific order by simply clicking and dragging the far-left four-way arrow icon.
{% endhint %}
## Viewing Submissions
Once you've added a few fields and people have submitted answers to them, they'll appear in the [**Submissions**](https://crowdwork.com/dashboard/custom-fields/responses) section of the "Checkout Field" dropdown on the left-hand side. Here you can filter and export.
> **Direct link:** [Custom Field Submissions](https://crowdwork.com/dashboard/custom-fields/responses)
{% hint style="info" %}
**Exporting**
In addition to exporting submissions on the "Checkout Field Submissions" page, submissions are also included on the Ticket and Registration exports.
{% endhint %}
# Setting Up Point of Sale (POS)
Welcome to the CrowdWork POS (Point-of-Sale) app guide. This article will walk you through setting up and using our free companion mobile app for your theater's in-person ticketing.
## One-Time Setup Process
Our point-of-sale (POS) app is designed to seamlessly integrate with your theatre's account, providing a unified platform for all sales channels. The app is free to set up and use, mirroring the fee structure of our online platform - with a flat $1 per ticket + standard credit card processing fees.
{% hint style="success" %}
**Quick Fee Summary**
* $1 service fee applied to each ticket sold
* Standard credit card processing fees apply
* Free events and cash transactions have no fees
* Fees can be passed to patrons or absorbed by your theater
{% endhint %}
Here's how to get started:
1. **Connect** your CrowdWork account to your Square account for payment processing. More information here.
2. **Download** the CrowdWork POS app on your tablet or mobile device from the [Apple App Store](https://apps.apple.com/us/app/crowdwork/id6444920144) or [Google Play Store](https://play.google.com/store/apps/details?id=com.fourthwalltickets\&gl=US).
## Understanding Fees: Online vs. In-Person
**Fees are the same for all sales: $1 per ticket + standard credit card processing**
> **Example:** A patron purchasing 3 tickets will incur a $3 service fee (3 × $1) plus standard credit card processing fees.
Whether online and in-person sales, the method for handling fees is the same.
Each transaction is distributed as follows:
* The **tickets subtotal**, immediately transferred to your Square account.
* A **$1 fee per ticket**, transferred directly to CrowdWork.
* Standard **credit card processing fees**, assessed directly by Square.
{% hint style="success" %}
**Cash transactions and free tickets never incur fees.** Whether issued online or recorded in-person through our POS app, no fees are assessed on cash sales or free tickets.
{% endhint %}
POS app icon
## Download the Free POS App
The CrowdWork Point-of-Sale (POS) application is available for free download on both Android and iOS devices. The app is compatible with a wide range of devices, including tablets, iPads, Galaxy devices, and iPhones. To find it in your device's app store, search for "CrowdWork" or select your app store here:
| | |
| :---------------------------------------------------------------------------------------------------------------------------------------: | :--------------------------------------------------------------------------------------: |
| [](https://play.google.com/store/apps/details?id=com.fourthwalltickets\&gl=US) | [](https://apps.apple.com/us/app/crowdwork/id6444920144) |
| [Google Play Store](https://play.google.com/store/apps/details?id=com.fourthwalltickets\&gl=US) | [Apple App Store](https://apps.apple.com/us/app/crowdwork/id6444920144) |
{% hint style="success" %}
**The perfect combo for a unified workflow!**
* Use **our website** for adding, editing and managing show and class details.
* Use **our POS app** for making in-person sales and checking-in your ticket holders.
*And... our website is mobile-friendly. So if you do need to edit shows and classes on the fly, just* [*visit your Dashboard*](https://www.crowdwork.com/dashboard) *from any device!*
{% endhint %}
## Using the POS App
After setting up classes and shows within your CrowdWork [Dashboard](https://www.crowdwork.com/dashboard), your active upcoming events will be available for in-person sales and for checking-in ticket holders.
### Accepting Credit Cards In-Person
In order to swipe credit cards or accept tap-to-pay for in-person sales using our POS app, you'll need Square hardware connected to your tablet or mobile device. The CrowdWork POS app is compatible with all official Square card readers, but **does not currently work with Square Terminals**.
{% hint style="warning" %}
**Not all Square devices are compatible.** Our POS app works with Square Readers and the Square Stand, but does not work with Square Terminal, Register, Kiosk, or Handheld. See our [Square Hardware Compatibility Guide](https://docs.crowdwork.com/for-theatres/setting-up-point-of-sale-pos/square-hardware-compatibility-guide) for the full list and recommendations.
{% endhint %}
### Selling Tickets In-Person
{% hint style="info" %}
**Taking a phone order or selling tickets for a future event?** The POS app displays a limited number of upcoming events to keep load times fast. For phone sales or events that don't appear in the app, open the customer's profile in the Dashboard, click **Edit Customer**, then use the **+ Add Tickets** button instead — you can collect card or cash payment there too. See [Adding Tickets for a Patron](/for-theatres/adding-tickets-for-a-patron).
{% endhint %}
After signing in to the POS app, you'll be greeted with a list of your active upcoming shows and classes.
1. Begin by selecting a show or class.
2. Next, select the desired number of tickets.
3. Finally, record the transaction as Card, Cash, Free, Custom or Custom with Fees; then following the Square prompts, if required.
4. Your new ticket holders will now be displayed (and automatically checked-in!) in the "Tickets Sold" section at the bottom of the event screen.
### Checking-in Ticket Holders
Using the POS app to view a show or class will display all in-person and online transactions for that event.
Select the tick mark next to the ticket holders you wish to check-in:
* **Light indicators are UNCHECKED**. The ticket/group is *not* checked-in.
* **Dark bordered indicators are PARTIAL CHECK-INS**. Some tickets in the group have been checked-in, some have not. Expand to view specific ticket status.
* **Dark indicators are CHECKED**. The entire group of tickets *is* checked-in.
If a patron has purchased multiple tickets in one transaction, those tickets will be grouped, allowing you to check the entire party in with one tap. If needed you can expand the grouped tickets to individually check-in specific ticket holders.
Expand or collapse grouped ticket transactions in the POS app
Tickets can be checked-in via the POS app or the website in your CrowdWork Dashboard. Check-ins will be synced between the POS app and Dashboard. In the POS app the 'Refresh Purchases' button will ensure your app is aware of the latest website sales.
Refreshing Purchases and Checkin-in via the POS app
Checking-in via the Dashboard
***
## 🤔 FAQs
### What fees do you collect?
The fee structure for all sales, whether in-person or online, is **$1 per ticket + standard credit card processing fees**. By default, these fees are charged to your patrons, although you can choose to absorb them by adjusting your theatre's settings.
### How do fees work for group purchases?
When patrons purchase multiple tickets in a single transaction, each ticket incurs a separate $1 service fee. For example, a purchase of 4 tickets would have a $4 service fee (plus standard processing fees).
### **Which transactions incur fees?**
All credit card transactions, whether online or in-person, incur the same fees: **$1 per ticket + standard credit card processing fees**. Free tickets and cash transactions never incur fees.
### How do I issue a complimentary (free) ticket at the door?
When recording a sale in the POS app, select **Free** as the payment type. The ticket is issued at $0 with no fees and is automatically marked as checked in. You can optionally enter the patron's name and email. For other ways to issue complimentary tickets — including via a patron's profile, a discount code, or a free membership — see [Issuing Complimentary & Free Tickets (Comps)](/for-theatres/issuing-comps).
### How much does it cost to use the app?
**The POS app is free to download and use** with no additional fees other than the standard $1 per ticket plus any applicable credit card processing fees.
***
## Need Help?
Of course, we’re always here to help. If you have any questions, [contact our support team](/contacting-support).
# Square Hardware Compatibility Guide
## What Works with CrowdWork POS
Our POS app works with most Square devices that connect to mobile phones and tablets. If you can use it with Square's Point of Sale app on your phone or iPad, it'll work with CrowdWork POS too.
{% hint style="success" %}
**New to Square?** Square accounts are free and often even come with a free card reader when you sign up. That's usually all you need to get started! [Sign up for Square](http://squareup.com/i/FOURTHWTIX).
{% endhint %}
### Compatible Square Devices
| Device | Image | CrowdWork POS Support | Best For |
| -------------------------------------------------------------------------------------------------------------------------------- | ------------------------------------------------------------------- | --------------------- | ------------------------------------------------------------------------ |
| [**Square Reader for Contactless and Chip**](https://squareup.com/shop/hardware/us/en/products/chip-credit-card-reader-with-nfc) | | ✅ **Full Support** | Most theatres - accepts chips, tap, and contactless payments |
| [**Square Reader for Magstripe**](https://squareup.com/us/en/hardware/reader) | | ✅ **Full Support** | Basic setups (free with new accounts, but magstripe is being phased out) |
| [**Square Stand**](https://squareup.com/us/en/hardware/stand) | | ✅ **Full Support** | Fixed iPad setups at box office or concession stands |
### Which Square Devices Are Not Compatible?
The following Square devices run only Square's own software and do not support any third-party apps like CrowdWork POS. If you have one of these, you'll also need a compatible Square Reader or Stand to use separately for CrowdWork transactions — [see the table above for supported options](#compatible-square-devices).
* ❌ **Square Kiosk**
* ❌ **Square Terminal**
* ❌ **Square Register**
* ❌ **Square Handheld**
{% hint style="info" %}
**Already own a Square Terminal?** Many theatres used a Terminal before switching to CrowdWork. You can keep using it for non-CrowdWork transactions, but you'll need a compatible Reader or Stand (listed above) for CrowdWork POS sales.
{% endhint %}
## Which Reader Is Right for You?
The best Square device for your theatre depends on how often you're running events and how much you're selling at the door.
### 🎭 **Just Getting Started**
**Recommended**: Square Reader for Magstripe (free with new Square accounts)
If you're putting on a handful of shows a year and just need a way to take card payments at the door, the free magstripe reader that comes with a new Square account is all you need. Pair it with our [POS app](https://docs.crowdwork.com/for-theatres/setting-up-point-of-sale-pos) on your phone or tablet and you're ready to sell.
* Free with most new Square accounts
* Connects to any phone or tablet via Bluetooth
* Great for occasional in-person sales
{% hint style="info" %}
**Note:** Magstripe-only cards are being phased out, but this reader still works well for getting started. You can always upgrade to the contactless reader later.
{% endhint %}
### 🎭🎭 **Running Shows Regularly**
**Recommended**: Square Reader for Contactless and Chip
If you're running shows every week or two, the contactless chip reader is a worthwhile upgrade. It accepts tap-to-pay, chip cards, and Apple/Google Pay — which means faster transactions at the door. Use it with our [POS app](https://docs.crowdwork.com/for-theatres/setting-up-point-of-sale-pos) on a phone or tablet.
* Accepts chips, tap, and contactless payments
* Portable — works anywhere you can bring a phone or tablet
* Perfect for lobby sales, check-ins, and walk-up purchases
### 🎭🎭🎭 **High-Volume or Expanding Beyond Tickets**
**Recommended**: Square Stand (with iPad) or multiple Square Readers
If you're doing a lot of in-person sales, running multiple events per week, or planning to sell merchandise and concessions alongside tickets, a more permanent setup pays off. The Square Stand gives your box office a professional, fixed countertop station. Pair it with additional Readers for mobile sales during busy periods.
* Fixed countertop setup for a dedicated box office
* Professional appearance for patrons
* Add portable Readers for lobby, concessions, or merchandise sales
* Multiple devices let you handle rush periods without bottlenecks
### Getting Started
Ready to set up? Head over to our [Setting Up Point of Sale (POS)](https://docs.crowdwork.com/for-theatres/setting-up-point-of-sale-pos) guide for step-by-step instructions on connecting Square, downloading the app, and making your first sale.
{% hint style="info" %}
**Need help choosing hardware?** [Contact our support team](https://docs.crowdwork.com/contacting-support) — we're happy to discuss what setup works best for your specific theatre needs.
{% endhint %}
### Frequently Asked Questions
**Can I use multiple Square devices?** Absolutely! Many theatres use different devices for different situations - a Stand at the box office and Readers for mobile sales.
**What if I already have an incompatible Square device?** You can keep using it for non-CrowdWork transactions. To use CrowdWork POS, you'll need a compatible Reader or Stand — see the [compatible devices list above](#compatible-square-devices).
**Do I need special accessories?** The basic readers work great on their own. Consider accessories like receipt printers or cash drawers based on your specific needs.
**What about older Square devices?** Older readers may have limited functionality. We recommend the current generation devices for the best experience.
# Managing Admissions
Learn how to view, edit, and manage ticket and class admissions from the event overview page, including moving patrons between dates, using Standby status, and contacting attendees.
The Admissions section on each event's overview page is your central hub for managing who's attending your shows and classes. From here you can view attendance, move patrons between dates, mark tickets as Standby, and communicate directly with attendees.
***
## Finding the Admissions Table
1. Navigate to **Shows** or **Classes** in your Dashboard sidebar
2. Click on the event you want to manage
3. Scroll down to the **Admissions** section
The Admissions table displays all tickets (for shows) or registrations (for classes) for the selected event.
***
## Understanding the Admissions Overview
Above the Admissions table, you'll see key stats for the selected date:
| Stat | Description |
| ------------------ | ------------------------------------------------------------------------------ |
| **Total Sold** | Total tickets or registrations sold for this occurrence |
| **Waitlist Count** | Number of patrons on the waitlist (click "View More" to see the full waitlist) |
| **Tier Counts** | Breakdown by ticket tier, showing sold vs. capacity for each |
### Filtering by Date
If your event has multiple occurrences (dates/times), use the **Filter By Date** dropdown in the top right of the Admissions section to switch between them. This lets you view admissions for a specific performance or class session.
***
## The Admissions Table
The table displays all admissions for the selected occurrence with the following columns:
| Column | Description |
| ----------------- | ---------------------------------------------------------- |
| **Checkbox** | Select one or more admissions for bulk actions |
| **Order ID** | The unique order number (click to view full order details) |
| **Name** | Patron's name |
| **Date** | The occurrence date and time |
| **Tier** | Which ticket tier they purchased |
| **Date Created** | When the order was placed |
| **Status** | Current status (Paid/Active, Refunded, or Standby) |
| **Actions (•••)** | Individual actions menu (Edit, Send Email, etc.) |
***
## Selecting and Editing Admissions
You can select one or more admissions to perform bulk actions.
### Selecting Admissions
1. Check the box to the left of any admission you want to modify
2. Select multiple admissions by checking multiple boxes
3. Use the checkbox in the header row to select all visible admissions
### Using the Actions Menu
After selecting one or more admissions, click the **Actions** button at the top right of the table. Available actions include:
* **Edit** — Modify the selected admissions (change date or status)
* **Send Email** — Contact the selected patrons directly
Steps to Edit an Admission from an Event Overview
***
## Editing Admissions
The Edit function allows you to move patrons to a different date or change their admission status.
### Moving Patrons to a Different Date
{% hint style="warning" %}
**Same event only.** The steps below move a patron between dates of the **same** show or class. To move a patron to a **completely different event**, see [Managing Exchanges](https://docs.crowdwork.com/for-theatres/managing-exchanges) instead — or click the patron's name in the Admissions table to go directly to their profile.
{% endhint %}
🎬 [Watch: Moving patrons between dates and events (1:37)](https://cln.sh/mXKG5CYH)
If a patron needs to attend a different occurrence of the same event:
1. Check the box next to their admission
2. Click **Actions** → **Edit**
3. In the modal, use the **Select Date** dropdown to choose a new occurrence
4. Click **Confirm Changes**
{% hint style="info" %}
**Tip:** Check "Send updated confirmation emails" if you want the patron to receive an automatic notification about their new date.
{% endhint %}
{% hint style="warning" %}
**Note:** Editing admissions may render old QR codes obsolete. New ones will be generated automatically.
{% endhint %}
{% hint style="success" %}
**Need to move a patron to a completely different show or class?** Click the patron's name anywhere it appears — in this Admissions table, on the Tickets or Registrations screen, or in Customers or Students — to open their profile. Then click **Edit** → select the admission → **Actions** → **Edit**. From there you can change the event, date, and tier. Full instructions: [Managing Exchanges](https://docs.crowdwork.com/for-theatres/managing-exchanges)
{% endhint %}
### Changing Admission Status
Admissions can have one of the following statuses:
| Status | Description |
| --------------- | ------------------------------------------------------------ |
| **Paid/Active** | The default status for valid, active admissions |
| **Standby** | The admission is on file but doesn't count toward capacity |
| **Refunded** | The admission has been refunded (set via the refund process) |
#### What is Standby?
**Standby** is a special status that keeps the admission record on file but removes it from your capacity counts. This is useful when:
* A patron can't attend but you're not ready to issue a full refund
* You want to hold their information while freeing up their seat
* The patron might want to be moved to a different date later
* You need to temporarily release a spot for waitlisted patrons
{% hint style="success" %}
**Standby vs. Refund:** Use Standby when you want to keep the patron's record on file without their ticket counting against capacity. Use Refund when you're returning their payment and fully canceling their admission. See [Issuing Refunds](/for-theatres/issuing-refunds) for refund instructions.
{% endhint %}
### How to Mark an Admission as Standby
1. Check the box next to the admission you want to modify
2. Click **Actions** → **Edit**
3. Change the **Status** dropdown from "Paid/Active" to "Standby"
4. Click **Confirm Changes**
The admission will remain in your records but won't count toward tier quantities or capacity caps, freeing up that spot for other patrons (including those on your [waitlist](/for-theatres/setting-up-waitlists)).
Edit Selected Admissions modal
***
## Contacting Attendees
Need to reach out to specific patrons? You can email them directly from the Admissions table.
### Sending Emails to Selected Patrons
1. Check the boxes next to the patrons you want to contact
2. Click **Actions** → **Send Email**
3. Compose your message in the email form (confirm the email adheres to our policies)
4. Click **Send Email**
This is useful for:
* Notifying patrons of schedule changes
* Sending reminders before the event
* Communicating important venue information
* Following up after moving someone to Standby
{% hint style="info" %}
**Want a copy of what you send?** Add your box office address to **CC Email Addresses** in [Theatre Settings — Email Communication](https://docs.crowdwork.com/for-theatres/customizing-your-theatre-settings#email-communication) and it's copied on every email you send from here. Note that it's a CC, so patrons can see the address, and you get one copy per recipient.
{% endhint %}
Steps to Email Attendees from an Event Overview
Steps to Email Attendees from an Event Overview
***
## Individual Admission Actions
For actions on a single admission, click the three dots **•••** at the right end of any row. Options include:
* **Order Details** — See the full order details
* **View Custom Submissions** — See the custom checkout fields related to this admission (if any)
* **Issue Refund** — Begin the refund process (see [Issuing Refunds](/for-theatres/issuing-refunds))
Steps to access individual admission actions from an Event Overview
***
## Checking In Attendees
When it comes time to check-in your patrons, instead of using the event overview and admissions table, you'll check in attendees from the Dashboard or using the CrowdWork POS mobile app.
### Check-In from the Dashboard
* **Shows** - Visit the [Tickets](https://crowdwork.com/dashboard/tickets) screen and select the ✅ checkmark next to the ticket.
* **Classes** - Visit the [Registrations](https://crowdwork.com/dashboard/registrations) screen and select the ✅ checkmark next to the registration.
### Check-In from the POS App
The CrowdWork POS app is designed for easy check-in at the door:
* View all ticket holders for an event
* Tap to check in individuals or entire groups
* Check-ins sync automatically between the app and Dashboard
For detailed instructions, see [Setting Up Point of Sale (POS)](/for-theatres/setting-up-point-of-sale-pos).
***
## Related Tasks
| Task | Guide |
| ------------------------------------------------------ | ---------------------------------------------------------------------------- |
| **Issue a refund** | [Issuing Refunds](/for-theatres/issuing-refunds) |
| **Move patron to different event** | [Managing Exchanges](/for-theatres/managing-exchanges) |
| **Add new tickets for a patron** | [Adding Tickets for a Patron](/for-theatres/adding-tickets-for-a-patron) |
| **Issue complimentary or free tickets** | [Issuing Complimentary & Free Tickets (Comps)](/for-theatres/issuing-comps) |
| **Invite waitlisted patrons** | [Setting Up Waitlists](/for-theatres/setting-up-waitlists) |
| **Leave an internal note on a show, class, or patron** | [Staff Notes](https://docs.crowdwork.com/for-theatres/staff-notes) |
| **Check in at the door** | [Setting Up Point of Sale (POS)](/for-theatres/setting-up-point-of-sale-pos) |
***
## FAQs
Can I edit multiple admissions at once?
Yes! Select multiple admissions using the checkboxes, then click Actions → Edit. All selected admissions will be updated with the same changes (new date or status).
What happens when I mark someone as Standby?
Their admission stays on file but no longer counts toward your capacity. The seat becomes available for purchase by others. You can change them back to Paid/Active at any time, or move them to a different date.
Can I undo a Standby status?
Yes. Select the admission, click Actions → Edit, and change the Status back to "Paid/Active." Note that if the event is now at capacity, this may put you over your limit.
Does editing an admission change the payment?
No. Moving a patron to a different date or changing their status does not affect their payment. Refunds or additional charges must be handled separately. See [Issuing Refunds](/for-theatres/issuing-refunds).
Can I move someone to a different date of the same show or class?
Yes. From the event overview page, scroll to the Admissions table, select the patron's admission, click **Actions** → **Edit**, and choose the new date. See [Moving Patrons to a Different Date](https://docs.crowdwork.com/for-theatres/managing-admissions#moving-patrons-to-a-different-date) above.
Can I move someone to a completely different show or class?
Yes. Click the patron's name to open their profile, then click **Edit** → select the admission → **Actions** → **Edit**. From the edit modal you can change the event, date, and tier. Full instructions: [Managing Exchanges](https://docs.crowdwork.com/for-theatres/managing-exchanges).
Can I move a show ticket to a class, or a class registration to a show?
No. Show tickets can only be moved to other shows, and class registrations can only be moved to other classes. If you need to cancel one and create the other, issue a refund on the original admission and then add a new ticket or registration from the patron's profile. See [Issuing Refunds](https://docs.crowdwork.com/for-theatres/issuing-refunds) and [Adding Tickets for a Patron](https://docs.crowdwork.com/for-theatres/adding-tickets-for-a-patron).
How do I see who's on the waitlist?
Click "View More" below the Waitlist Count in the Admissions overview, or navigate to [**Waitlist**](https://crowdwork.com/dashboard/waitlist) in your Dashboard sidebar. See [Setting Up Waitlists](/for-theatres/setting-up-waitlists) for complete waitlist management instructions.
Can I check people in from the website?
Yes, visit either [Tickets](https://crowdwork.com/dashboard/tickets) (for Shows) or [Registrations](https://crowdwork.com/dashboard/registrations) (for classes). However, the POS mobile app provides a better experience for check-in at the door. Check-ins sync between the app and Dashboard automatically. See [Setting Up Point of Sale (POS)](/for-theatres/setting-up-point-of-sale-pos).
Can I add new tickets for a patron and collect payment at the same time?
Yes. From any customer's profile, click the blue **Edit Customer** button, then click the **+ Add Tickets** button to open the Add Tickets modal. You can select the event, date, and tier, then optionally collect payment by card or cash — including entering card details directly for phone sales. See [Adding Tickets for a Patron](/for-theatres/adding-tickets-for-a-patron) for full instructions.
***
## Need Help?
If you have questions about managing admissions or need assistance with a specific situation, [contact our support team](/contacting-support).
# Adding Tickets for a Patron
How to add tickets or class registrations directly from a customer's profile in the Dashboard, including how to collect payment by card or cash for phone sales and off-site transactions.
Admins can add tickets — or class registrations — to any patron's account directly from the Dashboard — no need to use the public event page or the POS app. This is the recommended method for phone sales, walk-up requests, or any situation where you need to create a ticket and optionally collect payment in a single step.
> **Direct links:** [Customers](https://crowdwork.com/dashboard/customers) • [Students](https://crowdwork.com/dashboard/students)
***
## When to Use This
* Taking a ticket or registration order over the phone
* Adding complimentary or manually-arranged tickets for shows or classes
* Selling tickets for events far enough in the future that they may not appear in the POS app
* Any time you want to collect card or cash payment while creating the ticket record
{% hint style="info" %}
**POS app vs. Dashboard:** The POS app is optimized for in-person check-ins and door sales of events happening within the next week. The Dashboard is better suited for phone orders, future events, and situations where you want a full order record tied to a patron profile.
{% endhint %}
***
## Step 1: Edit the Patron
Navigate to [Customers](https://crowdwork.com/dashboard/customers) or [Students](https://crowdwork.com/dashboard/students) in your Dashboard sidebar. You can search by name or email to locate the patron.
* Click the **patron's name** (left-most column) or the **View** link (right-most column)
* Then, click the **Edit** button atop their profile
If the patron doesn't have an account yet, create one first by clicking:\
[**+ Add New Customer**](https://crowdwork.com/dashboard/customers/new) **–or–** [**+ Add New Student**](https://crowdwork.com/dashboard/students/new)
***
## Step 2: Open the Add Tickets Modal
On the patron's edit screen, click the **+ Add Tickets** button.
{% hint style="info" %}
**Adding a class registration instead?** On the Student edit screen, this same button is labeled **+ Add Registration**.
{% endhint %}
A modal will appear with all the fields needed to create the ticket and, optionally, collect payment.
***
## Step 3: Select Event, Date, and Tiers
1. Use the **Event** dropdown to select the show or class. Events are grouped by Active, Paused, and Archived.
2. Once an event is selected, a **Date** dropdown will appear — choose the specific occurrence the patron will attend.
3. **Tier quantity dropdowns** will appear for each available ticket tier, showing the tier name and price. Set the quantity for each tier the patron wants.
***
## Step 4: Set Status and Order
**Status** controls how the ticket is recorded:
Status
Description
Paid/Active
Default. Ticket is active and counts toward tier quantities and capacity.
Standby
Ticket is on file but does not count toward tier quantities or capacity caps. Useful for reservations or waitlist holds.
**Existing Order (optional):** By default, a new order will be created. If you want to add these tickets to an existing order for this customer, use the dropdown to select it.
***
## Step 5: Collect Payment (Optional)
Payment collection is optional. If you're adding complimentary tickets or recording an offline transaction, leave **Collect Payment** unchecked and skip to Step 6.
To collect payment, check the **Collect Payment** checkbox. This enables the payment section.
### Choosing a Payment Method
Select **Card** or **Cash** using the toggle:
* **Card** — Enter the patron's card details directly in the form. Ideal for phone sales where the patron reads their card number to you.
* **Cash** — Records the transaction as a cash payment. No card entry required.
### Custom Amount (Optional)
Leave the **Collect custom amount** field blank to charge the calculated cart total based on the tiers selected. Enter a dollar amount to override and charge a specific amount instead.
### Absorb Fees (Card payments only)
Check **Absorb fees** if you want to cover the service fees yourself rather than passing them to the patron. ***This overrides your theatre's global fee settings for this single transaction*** — useful when you want to offer a courtesy to a specific patron without changing your theatre-wide defaults.
When fees are absorbed, the **Service Fees** line in the breakdown will show the amount as "(absorbed)" and the **Total to Charge** will reflect only the ticket price.
### Fee Breakdown
Before submitting, review the fee summary:
Line Item
Description
Subtotal
Total ticket price before fees
Surcharge
Any surcharge configured for your theatre
Service Fees
CrowdWork and credit card processing fees combined
Deposit Amount
The amount deposited to your account after fees
Total to Charge
The amount the patron will be charged
***
## Step 6: Send Confirmation Email (Optional)
Check **Send confirmation email** if you want the patron to receive an order confirmation. The confirmation is sent to the email address on their customer profile.
***
## Step 7: Submit
Click **Add Tickets** to complete the transaction. The tickets will appear in the patron's order history and in your Tickets or Registrations screens.
***
## Related Tasks
| Task | Guide |
| ----------------------------------------- | ------------------------------------------------------------------------------------------------------ |
| **Issue a refund** | [Issuing Refunds](https://docs.crowdwork.com/for-theatres/issuing-refunds) |
| **Edit or exchange an existing ticket** | [Managing Exchanges](https://docs.crowdwork.com/for-theatres/managing-exchanges) |
| **Manage admissions from the event page** | [Managing Admissions](https://docs.crowdwork.com/for-theatres/managing-admissions) |
| **Issue complimentary or free tickets** | [Issuing Complimentary & Free Tickets (Comps)](https://docs.crowdwork.com/for-theatres/issuing-comps) |
| **Sell tickets in person at the door** | [Setting Up Point of Sale (POS)](https://docs.crowdwork.com/for-theatres/setting-up-point-of-sale-pos) |
***
## FAQs
Can I add tickets to an event that's already sold out?
Yes. Adding tickets through the Dashboard bypasses the public ticket purchase flow, so you can add tickets regardless of whether the event shows as sold out on your public page. Be aware this will put you over your set capacity.
What's the difference between Paid/Active and Standby?
Paid/Active is the normal status — the ticket is valid and counts toward your tier quantities and capacity caps. Standby keeps the ticket record on file but it doesn't count toward capacity. Use Standby for holds, tentative reservations, or when a patron might attend but you're not ready to confirm their spot.
Does absorbing fees here change my theatre's global fee settings?
No. The Absorb fees checkbox on this form applies only to this single transaction. Your theatre-wide fee settings in Theatre Details are not affected.
Why isn't the Collect Payment checkbox enabled yet?
The payment section becomes active once you've selected an event and at least one tier quantity. Select your event, date, and tier quantities first, then the Collect Payment option will become available.
Can I use this for phone sales?
Yes, this is one of the primary use cases. Select Card as the payment method and enter the patron's card details as they read them to you over the phone. The transaction is processed immediately and a confirmation email can be sent to the patron.
Why use this instead of the POS app for phone sales?
The POS app displays a limited number of upcoming events to keep load times fast, so events further in the future may not appear there. The Dashboard Add Tickets modal shows all active events. It also creates a full order record tied to the customer profile, which is useful for tracking and reporting.
***
Have questions or need help with a specific situation? [Contact our support team](https://docs.crowdwork.com/contacting-support).
# Issuing Complimentary Tickets (Comps)
How to issue complimentary (comp) tickets in CrowdWork — via the POS app, directly from a customer's profile in the Dashboard, a 100% discount code, or a free membership.
Sometimes you want to give a patron a ticket at no charge — whether it's a complimentary seat for a performer or staff member, a free ticket for a donor or VIP, a courtesy pass for a guest, or a comp for someone whose experience didn't go as planned. In the theater industry these are commonly called **comps**, but the process is the same regardless of why you're giving them out.
The same applies to class registrations — a comp for a workshop, an audit spot for a longer class, or a free pass to an open mic or improv jam listed as a class in your system all work exactly the same way.
CrowdWork gives you four ways to assign free or complimentary tickets, depending on your situation.
{% hint style="info" %}
**Four ways to give out free tickets — jump to the one that fits:**
* [**POS App**](https://docs.crowdwork.com/for-theatres/issuing-comps#method-1-via-the-pos-app) — Quickest for walk-ins and same-day door comps
* [**Customer Profile in Dashboard**](https://docs.crowdwork.com/for-theatres/issuing-comps#method-2-via-a-patron-profile-in-the-dashboard) — Best when the patron already exists in your system
* [**Discount Code**](https://docs.crowdwork.com/for-theatres/issuing-comps#method-3-via-a-100-discount-code) — Best for advance comps, or letting patrons claim their own free tickets online
* [**Free Membership**](https://docs.crowdwork.com/for-theatres/issuing-comps#method-4-via-a-free-membership) — Best for recurring comps to performers, staff, friends, and family who attend regularly
{% endhint %}
***
## Method 1: Via the POS App
**Best for:** Walk-ins at the door, same-day complimentary tickets, quick in-person issuance.
{% hint style="warning" %}
**Note on event availability:** The POS app loads a limited number of upcoming events. For shows further in the future, use the Dashboard method or a discount code instead.
{% endhint %}
When recording a transaction in the POS app, simply select **Free** as the payment type. The ticket is issued at no charge and is automatically marked as checked in.
**Steps:**
1. Open the CrowdWork POS app and select the event
2. Add the ticket(s) to the transaction
3. When prompted for payment, select **Free**
4. Optionally enter the patron's name and/or email
5. Complete the transaction — the ticket is issued and checked in automatically
{% hint style="success" %}
**No fees on free tickets.** Free tickets issued through the POS app are never charged a service fee. [See POS fee details.](https://docs.crowdwork.com/for-theatres/setting-up-point-of-sale-pos)
{% endhint %}
***
## Method 2: Via a Patron Profile in the Dashboard
**Best for:** Patrons already in your system, assigning a complimentary ticket to a specific account, or when you want the ticket tied to an order on their profile. Works for both shows and classes.
**Navigation:** [Dashboard → Customers](https://crowdwork.com/dashboard/customers) –or– [Dashboard → Students](https://crowdwork.com/dashboard/students)
{% hint style="warning" %}
**The patron must exist in your system first.** If they're not already listed in your Customers or Students, create their profile via **Dashboard → Customers/Students → Add New** before continuing.
{% endhint %}
**Steps:**
1. Go to [**Customers**](https://crowdwork.com/dashboard/customers) (for tickets) or [**Students**](https://crowdwork.com/dashboard/students) (for class registrations).\
If the patron isn't there yet, use [**+ Add New Customer**](https://crowdwork.com/dashboard/customers/new) first.
2. Click the patron's name (or the **View** link) to open their profile
3. Click the blue **Edit Customer** button
4. Click the **+ Add Tickets** button
5. In the modal, select the **Event**, **Date**, and set the **tier quantity**
6. Leave **Collect Payment** unchecked
7. Optionally check **Send confirmation email**
8. Click **Add Tickets** — the ticket is issued at $0 with no charge to the patron
{% hint style="success" %}
**Leaving "Collect Payment" unchecked issues the ticket as a complimentary at $0.** No charge is applied to the patron.
{% endhint %}
For the full step-by-step walkthrough of the Add Tickets modal — including order assignment, status options, and all available fields — see [Adding Tickets for a Patron](https://docs.crowdwork.com/for-theatres/adding-tickets-for-a-patron).
***
## Method 3: Via a 100% Discount Code
**Best for:** Advance complimentary tickets, recurring free tickets for staff, performers, or friends and family, or when you want patrons to claim and manage their own seats online without you adding each one manually.
**Navigation:** [Dashboard → Discount Codes → + Create New Discount](https://crowdwork.com/dashboard/discounts/new)
This method lets you create a 100% off discount code that patrons enter at checkout like any other promo code. It's especially useful when you want to hand off the process — patrons check out normally online and apply the code themselves, selecting their own seats and receiving all the usual confirmations.
{% hint style="info" %}
**Tip — pair this with a custom Checkout Button Label.** If you're sharing a comp link directly with recipients (especially on an unlisted event set up specifically for comps), update the **Checkout Button Label** in the Fine-Tune section to read `Claim Your Comp` or `Reserve Your Comp`. The action feels more intentional and matches what's being offered. See [Creating a Show or Class](https://docs.crowdwork.com/for-theatres/creating-a-show-or-class#fine-tune) for details.
{% endhint %}
**Steps:**
1. Go to [**Discount Codes**](https://crowdwork.com/dashboard/discounts) in your Dashboard
2. Click **+ Create New Discount**
3. Configure the code:
* **Apply Discount** — select which events, pricing tiers, tags, or membership tiers the code applies to. You can also use the **Exclude Specific Events or Tiers** field to carve out exceptions from a broader selection.
* **Discount Code** — create a memorable code (e.g., `STAFF2025` or `PERFORMER`)
* **Discount Amount** — enter `100`
* **Discount Type** — select **Percent**
4. Optionally restrict usage to keep things controlled:
* **Max Number of Uses** — limits total redemptions across all patrons
* **Max Number of Uses per Customer** — useful for limiting to, say, 2 free tickets per person
* **Date Start / Date End** — restrict to a specific run or season
5. Click **Save**
6. Share the code with whoever you'd like to give free tickets to — they check out online and enter the code at checkout to bring their total to $0
{% hint style="success" %}
**Patrons check out normally.** The discount code brings their total to $0 and they receive all the usual confirmation emails and ticket management options — no extra work on your end for each individual.
{% endhint %}
For full details on configuring discount codes, see [Setting Up Discount Codes](https://docs.crowdwork.com/for-theatres/setting-up-discount-codes).
***
## Method 4: Via a Free Membership
**Best for:** Performers, cast, crew, staff, friends and family, or any group of patrons who need ongoing complimentary access across your season — and you want them to manage their own reservations without any admin effort on your end.
**Navigation:** [Dashboard → Memberships → Manage Tiers → + Create New Membership Tier](https://crowdwork.com/dashboard/memberships/tiers/new)
This is the most powerful option for recurring comps. A free membership ($0 price) lets enrolled patrons reserve their own complimentary seats directly through the normal checkout flow — they log in, browse your shows, and check out at $0 for eligible events. You control which shows are included, how many times per billing period they can use it, and who can even enroll. They handle everything themselves.
{% hint style="success" %}
**This is the lowest-effort option for recurring comps.** Once the membership tier is set up, patrons self-serve completely. No individual tickets to add, no codes to distribute for each show — they book themselves and you stay out of it.
{% endhint %}
**Steps:**
1. Go to [**Memberships → Manage Tiers**](https://crowdwork.com/dashboard/memberships/tiers) in your Dashboard
2. Click **+ Create New Membership Tier**
3. Configure the tier:
* **Name** — something clear, like `Performer Comp Pass` or `Staff Access`
* **Price** — set to `$0.00` for a fully complimentary membership
* **Cadence** — choose how often the membership renews (Monthly is common; Yearly works well for a full season)
* **Event Access** — select which shows, classes, or tags are included. Members can get one free ticket per event date for each tagged event
* **Max Uses per Renewal** *(optional)* — set a number if you want to limit how many shows they can comp per billing period; leave blank for unlimited
* **Password** *(optional but recommended)* — set a password so only people you share it with can enroll, keeping the membership invite-only
4. Click **Save**
5. Share your membership page URL (and the password, if set) with whoever should have access — they sign up themselves and are immediately able to reserve free tickets for included shows
**How it works for the patron:**
* They sign up for the membership on your public membership page
* When logged into their CrowdWork account, eligible shows show a $0 price at checkout
* They reserve their own seat like any other ticket purchase — no special process
* They get all the normal confirmation emails and can manage their tickets from their account
{% hint style="info" %}
**One free ticket per event date.** By default, memberships allow one complimentary ticket per date per event. If your show runs multiple performances on the same day, the membership covers entry to one of those performances. Members can purchase additional tickets at regular price in the same transaction if needed.
{% endhint %}
For full details on setting up memberships, see [Setting Up Memberships](https://docs.crowdwork.com/for-theatres/setting-up-memberships).
***
## Choosing the Right Method
| Situation | Recommended Method |
| ------------------------------------------------------------------------ | ----------------------------------------------------------------------------------------------------------------------------------------------------------------------------------------------------------------------------------- |
|
Box office walk-in, day of show, or event within the next week
| [POS App](https://docs.crowdwork.com/for-theatres/issuing-comps#method-1-via-the-pos-app) |
| Adding a free ticket to a patron's account | [Customer Profile](https://docs.crowdwork.com/for-theatres/issuing-comps#method-2-via-a-patron-profile-in-the-dashboard) |
| One-time or short-run advance comps | [Customer Profile](https://docs.crowdwork.com/for-theatres/issuing-comps#method-2-via-a-patron-profile-in-the-dashboard) or [Discount Code](https://docs.crowdwork.com/for-theatres/issuing-comps#method-3-via-a-100-discount-code) |
| Free tickets for friends, family, or donors | [Discount Code](https://docs.crowdwork.com/for-theatres/issuing-comps#method-3-via-a-100-discount-code) or [Free Membership](https://docs.crowdwork.com/for-theatres/issuing-comps#method-4-via-a-free-membership) |
| Recurring comps for performers, cast, or crew | [Free Membership](https://docs.crowdwork.com/for-theatres/issuing-comps#method-4-via-a-free-membership) |
| Staff with ongoing complimentary access | [Free Membership](https://docs.crowdwork.com/for-theatres/issuing-comps#method-4-via-a-free-membership) |
| Patron wants to self-serve and pick their own seats | [Discount Code](https://docs.crowdwork.com/for-theatres/issuing-comps#method-3-via-a-100-discount-code) or [Free Membership](https://docs.crowdwork.com/for-theatres/issuing-comps#method-4-via-a-free-membership) |
***
## Need Help?
Have questions about issuing complimentary tickets or a specific situation you're not sure how to handle? [Our support team is always ready to help.](https://docs.crowdwork.com/contacting-support)
# Managing Exchanges
This page explains how to move customers and students between different shows, classes, or dates.
Whether you need to switch a ticket from one show to another, move students to different classes, or shift registrations to new dates, the process is the same. This guide will help you handle common customer requests like trading tickets, transferring between classes, rescheduling, or updating session dates. While the terminology may vary (switching, moving, trading, transferring, or exchanging), the steps remain consistent for both show tickets and class registrations.
Theatre Dashboard main menu
{% hint style="info" %}
**Quick date change within the same event?** If you just need to move a patron to a different date or time of the same show or class, you can do that directly from the event's Admissions table without visiting the patron's profile. See [Moving Patrons to a Different Date](https://docs.crowdwork.com/for-theatres/managing-admissions#moving-patrons-to-a-different-date).
**Moving to a different event entirely?** You're in the right place — follow the steps below.
{% endhint %}
🎬 [Watch: Moving patrons between dates and events (1:37)](https://cln.sh/mXKG5CYH)
{% hint style="success" %}
**Find the Person First.** The quickest path for any exchange is:\
*Find the customer/student → Edit → Select ticket/registration → Actions → Edit*
{% endhint %}
### 🎟️ For SHOWS – Changing a customer's ticket:
1. From the Dashboard menu select either **Tickets** or **Customers**
2. Click the name of the ticket holder, then the blue **Edit Customer** button.
3. In the Purchases table, select the **checkbox** to the left of the ticket you want to change
4. Click the **Actions** button at the top right of the table
5. Select **Edit** from the dropdown menu
6. In the Edit modal, select the new ticket details and click **Update Selected Admissions**
### 🎓 For CLASSES – Changing a student's registration:
1. From the Dashboard menu select either **Registrations** or **Students**
2. Click the name of the student, then the blue **Edit Student** button.
3. In the Purchases table, select the **checkbox** to the left of the registration you want to change
4. Click the **Actions** button at the top right of the table
5. Select **Edit** from the dropdown menu
6. In the Edit modal, select the new registration details and click **Update Selected Admissions**
{% hint style="info" %}
* Exchanges must be for the same type (ticket for ticket, registration for registration)
* Consider setting up a clear exchange policy and timeframe for your venue
* You can also move patrons between dates of the same event directly from the [Admissions table](/for-theatres/managing-admissions) on the event overview page
* You can select multiple tickets/registrations at once to edit them in bulk
{% endhint %}
{% hint style="warning" %}
**Changing show tickets or class registrations does not change the payment.**\
*Refunds or additional charges must be handled separately.* See [Issuing Refunds](/for-theatres/issuing-refunds).
{% endhint %}
***
## What You Can Change
When editing admissions, you have the following options:
Option
Description
Event
Move the ticket/registration to a completely different show or class
Date
Change which occurrence (date/time) the patron will attend
Tier
Switch to a different ticket tier (e.g., General to VIP)
Status
Set to Paid/Active (default) or Standby
{% hint style="info" %}
**What is Standby?** Standby keeps the admission on file but doesn't count toward tier quantities or capacity caps. This is useful when a patron can't attend but you're not ready to issue a refund. See [Managing Admissions](/for-theatres/managing-admissions#what-is-standby) for more details.
{% endhint %}
### Additional Options
* **Send updated confirmation emails** — Check this box if you want the patron to receive an automatic notification with their updated ticket details
* **QR codes** — Editing admissions may render old QR codes obsolete. New ones will be generated automatically.
***
## Detailed Instructions
Select the name of the person on the: Tickets or Customers screen (for Shows); or Registrations or Students screen (for Classes)
On their profile, click the blue Edit button: Edit Student; or Edit Customer
In the Purchases table, (1) select the checkbox to the left of the ticket or registration you want to change. (2) Then click the Actions button at the top right and (3) select Edit.
In the Edit modal, select the new event, date, tier, and/or status. Click Update Selected Admissions when done.
***
## FAQs
Can I move someone to a different date of the same show or class?
Yes. The fastest way is from the event's Admissions table: select the admission, click **Actions** → **Edit**, and choose the new date. You don't need to visit the patron's profile for same-event date changes. See [Managing Admissions](https://docs.crowdwork.com/for-theatres/managing-admissions#moving-patrons-to-a-different-date).
Can I move someone to a completely different show or class?
Yes. Find the patron on the Customers or Students screen (or click their name anywhere it appears), click **Edit**, select the admission, then **Actions** → **Edit**. In the edit modal you can change the event, date, and tier. Follow the [step-by-step instructions above](https://docs.crowdwork.com/for-theatres/managing-exchanges#detailed-instructions).
Can I move a show ticket to a class, or a class registration to a show?
No. Tickets can only be exchanged for other show tickets, and registrations can only be exchanged for other class registrations. If you need to switch between types, refund the original and create a new admission. See [Issuing Refunds](https://docs.crowdwork.com/for-theatres/issuing-refunds) and [Adding Tickets for a Patron](https://docs.crowdwork.com/for-theatres/adding-tickets-for-a-patron).
Does an exchange change the payment or order?
No. Moving a patron to a different event, date, or tier does not change the original payment. The order remains a record of the original transaction. Refunds or additional charges must be handled separately. See [Issuing Refunds](https://docs.crowdwork.com/for-theatres/issuing-refunds).
Why can't I change the event from the order screen?
Orders are financial records of the original transaction — they capture what was purchased and what was paid. To change which event a patron attends, edit their **admission** (from their profile or from the event's Admissions table), not the order itself.
***
## Related Tasks
| Task | Guide |
| ------------------------------------- | --------------------------------------------------------------------------------- |
| **Issue a refund** | [Issuing Refunds](/for-theatres/issuing-refunds) |
| **Manage admissions from event page** | [Managing Admissions](/for-theatres/managing-admissions) |
| **Use Standby status** | [Managing Admissions: Standby](/for-theatres/managing-admissions#what-is-standby) |
| **Invite waitlisted patrons** | [Setting Up Waitlists](/for-theatres/setting-up-waitlists) |
***
## Need Help?
If you need assistance with a complex exchange situation or with anything at all, [contact our support team](/contacting-support) whenever you need!
# Issuing Refunds
This guide will walk you through the process of issuing refunds from various screens within the CrowdWork platform.
## **How to Issue Refunds**
CrowdWork provides multiple options for issuing refunds to your patrons. In general, refunds can be initiated throughout your account by:
1. Clicking the three dots "•••" to the right of any order
2. Selecting "Issue Refund"
3. [Completing the "Refund Confirmation" form](#finalizing-a-refund)
Read below for details on initiating refunds from specific screens:
* [Orders Screen](#initiating-refunds-from-the-orders-screen)
* [Tickets/Registrations Screen](#initiating-refunds-from-other-screens)
* [Show/Class Details Screen](#initiating-refunds-from-other-screens)
* [Customer/Student Details Screen](#initiating-refunds-from-other-screens)
***
### **Initiating Refunds from the Orders Screen**
1. Navigate to the "Orders" screen from your Dashboard menu.\
2. Locate the order you wish to refund and click the "**View**" link on the far right.\
3. On the order details screen, click the "Issue Refund" button in the top right. \

4. [Continue in the "Refund Confirmation" dialog to complete the refund](#finalizing-a-refund).
### **Initiating Refunds from Other Screens**
In addition to the Orders screen, here are the most common ways to locate an order you wish to refund...
* **Customer or Student Details Screens**:\
Click the "**View**" link to the right of the customer/student to see their orders. Click the three dots "•••" next to the order you wish to refund. Select then [complete the "Refund Confirmation" form](#finalizing-a-refund).\

* **Tickets and Registrations Screens** and\
**Details Screen of a Specific Show or Class**:\
In the list of tickets/registrations, click the three dots "•••" to the right of the order you wish to refund. Select then [complete the "Refund Confirmation" form](#finalizing-a-refund).\

{% hint style="info" %}
**On mobile devices and smaller screens**, you may need to horizontally scroll to see the full table, including the "**View**" link and three dots "•••" options.
{% endhint %}
### Finalizing a Refund
1. In the "Refund Confirmation" display:
* **To issue a complete refund**:\
Press the blue "Issue Full Refund" button\
* **To issue a partial refund:**
1. Select "Issue Partial Refund"\
2. Enter the custom amount\
3. Press the blue "Issue Partial Refund" button\
2. The refund will be submitted for processing immediately after clicking either blue "Issue Refund" button.
Issuing Full Refunds
Issuing Partial Refunds
### Additional Refund Options
The "Refund Confirmation" dialog offers three extra options alongside the amount. Each is a checkbox you tick *before* issuing the refund, each is off unless you check it, and each appears only when it applies to that particular order.
#### Refund to a Gift Card
Rather than sending money back to the patron's original payment method, you can issue the refund as a new gift card. In the "Refund Confirmation" dialog, check **"Create and refund to a new gift card instead of the original payment method."**
CrowdWork creates a new gift card carrying the refunded amount, and no money is returned to the original card. The patron redeems it by entering the code in the **Gift card code** field at checkout and clicking **Apply**. Any balance they don't spend stays on the card for a future purchase.
{% hint style="info" %}
**Don't see this option?** It only appears when Gift Cards are turned on for your theatre — otherwise the dialog shows a prompt to enable them. See [Setting Up Gift Cards](/for-theatres/setting-up-gift-cards).
{% endhint %}
#### Cancel Remaining Payment Plan Installments
When the order was bought on a payment plan and still has payments scheduled, the dialog offers **"Cancel \[number] remaining payment plan installments."** Checking it marks those upcoming (and paused) installments as Canceled, so the patron won't be charged again.
Installments the patron has already paid aren't affected by this checkbox — refund those using the refund amount itself.
{% hint style="warning" %}
**A refund does not cancel a payment plan on its own.** If you issue the refund without checking this box, the patron's remaining installments stay scheduled and will keep being charged. For help reading a patron's payment plan statuses or handling a failed payment, see [Helping Your Patrons](/for-theatres/helping-your-patrons).
{% endhint %}
#### Email the Patron Their Refund Details
To let the patron know the refund went through, check **"Email refund details automatically."** CrowdWork sends them a summary with the subject "Your refund for Order #\[number]" showing what was refunded and where it went.
The email adapts to the choices above: if you refunded to a gift card it includes the code and how to use it, and if you canceled remaining installments it tells them so.
{% hint style="info" %}
This option appears only when the patron has an email address on file. It isn't sent unless you check the box, so tick it any time you want the patron notified — otherwise the refund happens quietly.
{% endhint %}
### **Recognizing Refunded Orders**
**Partial refunds**, including the amount, are only noted on the details screen of an order.
**Full refunds** will be reflected throughout your account wherever the order is displayed, including the following places:
* On the **Details Screen of an Order**, full refunds will be marked as "Refunded" and will include the amount refunded.
* On the **Orders** overview screen, full refunds will be marked as "Refunded" in the Status column.
* On the **Tickets** or **Registrations** screens, and on the details screen of a specific **Show** or **Class**, the list of orders will display "Refunded" below the customer's name.
Refund status on Order Details screen
Refund status on the Orders screen
Refund status below a customer's name
### **Notes on Refund Processing**
{% hint style="info" %}
**A few things to keep in mind when issuing refunds**:
* Refunds go back to the original payment method by default — or to a new gift card if you choose [that option](#refund-to-a-gift-card)
* Refunds to credit or debit cards can take 7-10 business days to appear
* Remaining payment plan installments keep running unless you [cancel them as part of the refund](#cancel-remaining-payment-plan-installments)
* The patron is only emailed about the refund if you [check that option](#email-the-patron-their-refund-details)
* Refunds can only be issued up to the original amount charged
* Full refunds will be noted with "Refunded" status in order lists and on the details screen of an order
* Partial refunds will only be noted on the details screen of an order
{% endhint %}
***
Issuing refunds in CrowdWork is a straightforward process that can be done from multiple places within our application. You can process refunds for your patrons quickly and easily. And as always, if you need help, [our support team](/contacting-support) is here for you.
{% hint style="info" %}
**Not ready to refund?** If a patron can't attend but you want to keep their record on file without blocking the seat, consider using [Standby status](/for-theatres/managing-admissions#what-is-standby) instead. This frees up capacity without fully canceling their admission.
{% endhint %}
# Helping Your Patrons
A troubleshooting playbook for theatre admins — resolve the most common patron issues quickly and directly from your Dashboard.
Our support team is always here when you need us, but many common patron issues can be resolved even faster right from your Dashboard. This guide is organized by what your patron is telling you, so you can find the answer fast and get back to running your theatre.
{% hint style="success" %}
**Top 5 things that resolve most patron issues:**
1. **Check which email they used.** The #1 cause of "missing" tickets is the patron used a different email at checkout than the one they're checking now.
2. **You can resend confirmation emails.** Find their order in your Dashboard and resend it — you don't need to wait for them to do it.
3. **You can update a patron's email address.** Find the patron in your Dashboard, edit their profile, and correct the email.
4. **"Try a private/incognito browser window."** Browser extensions (coupon finders, ad blockers, shopping tools) cause most checkout and refund button issues. A private window disables them.
5. **Patrons can manage their own account** at [crowdwork.com/account](https://crowdwork.com/account) — email changes, password resets, payment method updates, and resending confirmations.
{% endhint %}
***
## "My patron didn't receive their confirmation email"
This is the most common issue theatres hear about. There are two possible causes — the email went to spam, or the patron used the wrong email at checkout.
{% hint style="info" %}
**Confirmation emails come from your theatre's own sending address**, not from a CrowdWork address — so when a patron searches their inbox or spam folder, have them search for *your* email address.
{% endhint %}
### What you can do
1. **Look up the patron's order** in your Dashboard — if the order exists, the purchase went through
2. **Resend the confirmation email** directly from the order: find the order → click **View** → click **Re-send Confirmation Email**
3. **Check which email is on the order.** If it doesn't match what the patron expected, that's the problem — see ["My patron used the wrong email"](https://docs.crowdwork.com/for-theatres/helping-your-patrons#my-patron-used-the-wrong-email-at-checkout) below
Message to send your patron
*If the order email looks correct, send:*
Hi! Your tickets are confirmed — I just resent your confirmation email. If you don't see it in the next few minutes, please check your spam or junk folder for an email from us at \[YOUR THEATRE'S EMAIL ADDRESS]. If you still can't find it, let me know and I'll help.
*If you suspect a wrong email, send:*
Hi! I found your order, but it looks like the email on your purchase might have a typo. I've updated it to \[CORRECT EMAIL] and resent your confirmation. You should receive it shortly. If you'd like to update your account yourself for future purchases, you can log in at [crowdwork.com/account](https://crowdwork.com/account), click Settings, and correct your email there.
***
## "My patron used the wrong email at checkout"
Patrons frequently enter a typo (`.con` instead of `.com`, transposed letters, missing characters) or use a different email than they intended. The confirmation email was delivered — just to the wrong address.
{% hint style="danger" %}
**Do NOT tell the patron to check their spam folder** when the issue is a wrong email address. The email went to an entirely different address — it won't be in their spam folder.
{% endhint %}
### What you can do
1. **Find the patron's order** in your Dashboard by searching for their name or the incorrect email
2. **Update their email address** from the patron's profile in your Dashboard
3. **Resend the confirmation email** — it will now go to the corrected address
### Patron self-service option
If the patron knows the wrong email they used, they can fix it themselves:
1. Log in at [crowdwork.com/account](https://crowdwork.com/account) using the **incorrect** email + the password they created at checkout
2. Click the email address at the top → **Settings** → update to the correct email
3. Go to **My Orders** → select the show → click **Re-send Confirmation Email**
These steps are also written up for patrons in [FAQs for Ticket Holders: Oops! I Signed Up with the Wrong Email Address](https://docs.crowdwork.com/for-ticket-holders/faqs-for-ticket-holders#oops-i-signed-up-with-the-wrong-email-address) — handy to send as a link.
Message to send your patron
Hi! It looks like your tickets were purchased under a different email address. Here's how to fix it:
1. Go to [crowdwork.com/account](https://crowdwork.com/account) and log in with the email you used at checkout (even if it has a typo) and the password you created during purchase
2. Click your email address at the top of the page, then select "Settings"
3. Update your email to the correct one and save
4. Then go to My Orders, click the show name, and hit "Re-send Confirmation Email"
There's also a step-by-step help guide you can follow: [Oops! I Signed Up with the Wrong Email Address](https://docs.crowdwork.com/for-ticket-holders/faqs-for-ticket-holders#oops-i-signed-up-with-the-wrong-email-address). If you can't remember which email you used or can't log in, just let me know and I can update it for you from our end.
***
## "My patron can't log in or find their tickets"
This usually means one of three things: the patron forgot their password, they're logging in with a different email than the one used at checkout, or they have two separate accounts.
### What you can do
1. **Look up the patron** in your Dashboard by searching their name or email — this tells you which email their order is under
2. **Let them know which email to use** to log in
3. If needed, **update their email** on the order so everything is under one account
### Patron self-service option
1. Try a password reset at [crowdwork.com/users/password/new](https://crowdwork.com/users/password/new) — if they receive the reset email, the email address is correct
2. If no reset email arrives, they likely used a different email at checkout
Message to send your patron
Hi! Your tickets are safe — let's get you logged in. First, try resetting your password at [crowdwork.com/users/password/new](https://crowdwork.com/users/password/new) using the email you think you used at checkout.
If you get the reset email, you're all set — just follow the link to create a new password, then log in and you'll find your tickets under My Orders. If you don't receive a reset email, you may have used a different email when you purchased. Let me know and I can look up which email your order is under.
{% hint style="warning" %}
**Edge case — patron logs in and sees the theatre Dashboard instead of their tickets:** This happens when the patron's account also has Dashboard access. Have them click their email in the upper right and select **My Orders** to switch to the patron view. You can also send them the patron-facing walkthrough: [When I Login All I See is "Your Theatre Dashboard"](https://docs.crowdwork.com/for-ticket-holders/faqs-for-ticket-holders#when-i-login-all-i-see-is-your-theatre-dashboard--cant-find-my-ticket-order).
{% endhint %}
***
## "My patron wants a refund"
Refund policy is entirely up to your theatre — CrowdWork does not process patron refunds on your behalf. You have full control over refunds from your Dashboard.
### What you can do
1. Go to **Dashboard → Orders** → find the order → click **View**
2. Click **Issue Refund** and choose full or partial refund
3. The refund is sent back to the patron's original payment method automatically (or check the box in the refund modal to refund onto a new gift card instead)
{% hint style="info" %}
**Card refunds can take up to 7–10 business days** to appear on the patron's statement. Let them know so they aren't worried if it doesn't show immediately.
{% endhint %}
For the complete refund walkthrough including partial refunds and finding orders from multiple screens, see [Issuing Refunds](https://docs.crowdwork.com/for-theatres/issuing-refunds).
Message to send your patron
Hi! I've processed a refund for your order. The refund will be returned to your original payment method — please allow 7–10 business days for it to appear on your statement. Let me know if you have any other questions!
***
## "My patron wants to change their ticket to a different date or show"
You can move patrons between dates or shows directly from your Dashboard — no need to refund and repurchase.
### Quick date change (same show)
The fastest path for moving a patron to a different date of the same event:
1. Go to the event's overview page in your Dashboard
2. Scroll to the **Admissions** table
3. Check the box next to the patron's ticket → **Actions** → **Edit**
4. Select the new date → **Confirm Changes**
### Different show or class entirely
1. Go to **Dashboard → Customers** (or **Students**) → find the patron → **Edit**
2. In the Purchases table, check the ticket → **Actions** → **Edit**
3. Change the event, date, and/or tier → **Update Selected Admissions**
For the full walkthrough, see [Managing Exchanges](https://docs.crowdwork.com/for-theatres/managing-exchanges).
Message to send your patron
Hi! I've moved your ticket to \[NEW DATE/SHOW]. You're all set — no need to do anything else on your end. Enjoy the show!
***
## "My patron's payment plan failed"
When a patron's card is declined, the system automatically retries once a day (the Enrolled Plans table shows each installment's retry count). After the third failed attempt, that installment is marked **Failed**, any remaining installments are marked **Canceled**, and your theatre is notified by email.
### What you can do
1. Go to **Dashboard → Payment Plans → Enrolled Plans** → find the patron's plan
2. If the payment status is **Failed** or **Canceled**, click **•••** next to the installment and choose **Mark Upcoming** — this also resets the retry counter
3. Contact the patron and ask them to update their card — the system will retry on the next scheduled date
{% hint style="info" %}
**Pausing vs. Canceling:** Use **Mark Paused** when the patron needs more time but plans to pay later. Use **Mark Canceled** when the payment won't be collected at all. See [Setting Up Payment Plans](https://docs.crowdwork.com/for-theatres/setting-up-payment-plans) for full details on managing enrolled plans.
{% endhint %}
### Patron self-service: updating their card
Patrons manage their own cards at [crowdwork.com/account/payment-methods](https://crowdwork.com/account/payment-methods). Cards are grouped by theatre and by purpose (Payment Plans and Enrolled Memberships). If a patron has no card on file, they can click "Add Card" under the relevant heading to add one; if they already have a card, they can click "Replace Card" to update it. The system will use the card for the next scheduled charge. The patron-facing walkthrough is in the [Patron's Guide to Payment Plans: Add or Update Your Payment Method](https://docs.crowdwork.com/for-ticket-holders/patrons-guide-to-payment-plans#add-or-update-your-payment-method).
Each payment plan or membership charges the specific card saved for it — if that card is declined, the system does not automatically fall back to the patron's other cards. The patron needs to replace that card for the next scheduled charge to go through.
Message to send your patron
Hi! It looks like the recent payment for your payment plan wasn't able to go through. No worries — here's how to fix it:
1. Go to [crowdwork.com/account/payment-methods](https://crowdwork.com/account/payment-methods)
2. Click "Replace Card" and enter your updated payment information
3. Save your changes
Once your card is updated, we'll automatically charge the next scheduled payment. There's a full guide here if you'd like more detail: [Patron's Guide to Payment Plans: Add or Update Your Payment Method](https://docs.crowdwork.com/for-ticket-holders/patrons-guide-to-payment-plans#add-or-update-your-payment-method).
If you have any questions about your remaining balance, you can view your full payment plan details by logging in at [crowdwork.com/account](https://crowdwork.com/account), clicking the Order ID for this purchase, and scrolling down to "Payment Plan Details."
***
## "My patron is having trouble completing checkout"
Most checkout issues are caused by browser extensions or hidden form validation errors — not by a problem with the patron's payment.
### Common causes and fixes
**Browser extensions interfering:** Coupon finders, shopping tools, and ad blockers can prevent the checkout form from submitting. The "Purchase Tickets" button may appear to do nothing.
**Hidden validation errors:** Required fields (like credit card details) may have error messages that appear higher up in the checkout modal. On smaller screens, patrons may not see them without scrolling up.
### What to tell your patron
1. **Try again in a private/incognito browser window** — this disables extensions and is the most common fix
2. **Scroll up inside the checkout popup** to check for any red error messages above the purchase button
3. If neither works, try a completely **different browser or device**
Message to send your patron
Hi! Sorry to hear you're having trouble checking out. This is usually caused by a browser extension (like a coupon finder or ad blocker) interfering with the checkout form. Here's what to try:
1. Open a private/incognito browser window (Ctrl+Shift+N in Chrome, or Cmd+Shift+N on Mac)
2. Go to the event page and try your purchase again
3. If the "Purchase Tickets" button still doesn't respond, scroll up inside the checkout popup — there may be an error message you need to address (like a missing field)
If none of that works, try a completely different browser (Firefox, Safari, Edge) or a different device. Let me know if you're still having trouble!
***
## "My patron has a gift card issue"
### Gift card + credit card not working together
If a patron applies a gift card and the remaining balance won't charge to their credit card, this is most likely a browser extension issue.
**Fix:** Have the patron try the purchase in a **private/incognito browser window**.
### Patron has multiple gift cards
Only one gift card can be used per transaction. If a patron has two gift cards, you can combine them:
1. Go to **Dashboard → Gift Cards** → click [**Create New Gift Card**](https://crowdwork.com/dashboard/gift-cards/new)
2. Set the value to the combined balance of both cards
3. Open each original card and click **Pause Gift Card** so it can no longer be redeemed
4. Share the new gift card code with the patron
### Applying a gift card to an existing payment plan
There's no built-in way to apply a gift card to an active payment plan. As a workaround:
1. Manually mark the appropriate payment installment(s) as **Paid** (from the Enrolled Plans page)
2. Set the gift card balance to $0 in your Gift Cards dashboard
3. If the gift card value doesn't match an installment exactly, issue a partial refund for the difference
For full gift card setup and redemption details, see [Setting Up Gift Cards](https://docs.crowdwork.com/for-theatres/setting-up-gift-cards).
***
## "My patron's name is wrong on their ticket"
The name on a ticket comes from the patron's account profile. If a family member previously used that email, the old name may still be attached.
### What you can do
1. Find the patron in your **Dashboard → Customers** (or **Students**)
2. Click their name → **Edit** their profile
3. Update the **Name** field and save
Message to send your patron
Hi! I've updated the name on your account. Your tickets should now show the correct name. Let me know if you need anything else!
***
## "My patron was charged twice"
This can happen if the checkout page appeared to hang or spin and the patron refreshed the page, resulting in a duplicate order.
### What you can do
1. Go to **Dashboard → Orders** and search for the patron
2. Verify whether two separate orders exist for the same event
3. Refund the duplicate order — see [Issuing Refunds](https://docs.crowdwork.com/for-theatres/issuing-refunds)
Message to send your patron
Hi! I can see the duplicate charge on our end. I've refunded the extra order — please allow 7–10 business days for it to appear back on your statement. Your original tickets are still valid and ready to go!
***
## "My refund button is stuck on 'Refunding...'"
If you click the refund button and it stays stuck on "Refunding..." without completing, this is almost always caused by a browser extension disconnecting the form.
### What you can do
1. **Try again in a private/incognito browser window** — this fixes the issue in most cases
2. **Check the order afterward** — even if the button appeared stuck, the refund may have actually processed. Go to **Dashboard → Orders** → find the order → verify whether the refund went through
3. If the refund didn't process, try again in the incognito window
{% hint style="warning" %}
**This affects admin operations too, not just patron checkout.** If you regularly experience stuck buttons or unresponsive forms in your Dashboard, try disabling browser extensions or working in a private window.
{% endhint %}
***
## "It's showtime and my patron can't find their ticket!"
When a patron's show is tonight and they're panicking about missing tickets, the fastest resolution is the simplest one.
### What to tell your patron
**Just show up and give the box office your name.** Your theatre has every purchase on record in the Dashboard. A patron who appears in person with their name or email can be verified and admitted on the spot. There's no need to have a digital ticket in hand.
### If you want to verify before they arrive
Look up the patron in your **Dashboard → Customers** (or **Students**) screen to confirm their order exists. When they arrive, check them in from the [Tickets screen](https://crowdwork.com/dashboard/tickets) (filter by the event) or the POS app.
***
## Reminder: Use the Right Screen for Check-In
{% hint style="danger" %}
**The checkboxes on the Admissions table are NOT for check-in.** Those checkboxes are for selecting tickets to edit or email — they don't save when you navigate away.
{% endhint %}
Actual check-in happens from:
1. **Dashboard →** [**Tickets**](https://crowdwork.com/dashboard/tickets) (for shows) or [**Registrations**](https://crowdwork.com/dashboard/registrations) (for classes) — click the ✅ checkmark next to the patron's name
2. **The CrowdWork POS app** — tap to check in individuals or groups. Check-ins sync between the app and Dashboard automatically. For detailed check-in instructions, see [Managing Admissions: Checking In Attendees](https://docs.crowdwork.com/for-theatres/managing-admissions#checking-in-attendees).
***
## When to Contact CrowdWork Support
A few situations are best handled by our support team:
| Situation | Why it needs CrowdWork |
| -------------------------------------------------------- | ----------------------------------------------------------------------------------------------------------------------------------------------------------------------------------------------------------------------------------------------------------------------------------------- |
| **Patron locked out by two-factor authentication (2FA)** | A patron who's lost access to their authenticator app can't log in to turn 2FA off themselves — CrowdWork support can help after verifying their identity. Point them to [Two-Factor Authentication (2FA)](https://docs.crowdwork.com/account-and-security/two-factor-authentication-2fa) |
| **Patron requests account deletion** | Account deletions are handled by CrowdWork — point the patron to [How Do I Delete My Account?](https://docs.crowdwork.com/for-ticket-holders/faqs-for-ticket-holders#how-do-i-delete-my-account) or [Contacting Support](https://docs.crowdwork.com/contacting-support) |
| **Persistent technical bug** | If the same issue keeps happening after trying incognito and different browsers, [let us know](https://docs.crowdwork.com/contacting-support) so we can investigate |
{% hint style="info" %}
**Reminder: CrowdWork is the ticketing software — your theatre is the seller.** Patrons sometimes contact CrowdWork directly for refunds, exchanges, or event questions. We always redirect them back to the theatre, since you have the tools and authority to handle these. If a patron tells you "CrowdWork said to contact you," that's why.
{% endhint %}
***
## Related Tasks
| Task | Guide |
| ----------------------------------------------- | --------------------------------------------------------------------------------------------------------------- |
| **Issue a refund** | [Issuing Refunds](https://docs.crowdwork.com/for-theatres/issuing-refunds) |
| **Exchange or move a ticket** | [Managing Exchanges](https://docs.crowdwork.com/for-theatres/managing-exchanges) |
| **Manage admissions and check-in** | [Managing Admissions](https://docs.crowdwork.com/for-theatres/managing-admissions) |
| **Add tickets from the Dashboard** | [Adding Tickets for a Patron](https://docs.crowdwork.com/for-theatres/adding-tickets-for-a-patron) |
| **Leave an internal note on a patron or order** | [Staff Notes](https://docs.crowdwork.com/for-theatres/staff-notes) |
| **Manage payment plan installments** | [Setting Up Payment Plans](https://docs.crowdwork.com/for-theatres/setting-up-payment-plans) |
| **Gift card setup and redemption** | [Setting Up Gift Cards](https://docs.crowdwork.com/for-theatres/setting-up-gift-cards) |
| **Waitlist management** | [Setting Up Waitlists](https://docs.crowdwork.com/for-theatres/setting-up-waitlists) |
| **Patron-facing payment plan guide** | [Patron's Guide to Payment Plans](https://docs.crowdwork.com/for-ticket-holders/patrons-guide-to-payment-plans) |
| **Patron-facing membership guide** | [Member's Guide to Memberships](https://docs.crowdwork.com/for-ticket-holders/members-guide-to-memberships) |
***
## Need Help?
If you run into a situation this guide doesn't cover, [contact our support team](https://docs.crowdwork.com/contacting-support) from your Dashboard. We're here to help!
# Staff Notes
Leave internal, staff-only notes on customers, students, orders, shows and classes — who can read them, who can edit them, and where they appear in your reports and CSV exports.
Notes let your team leave short internal reminders on the records you already work in — "called about a refund, comped them," "wheelchair seating needed," "front row reserved for the director." They live on the patron, the order, or the event they're about, so the next person who opens that record sees them without having to ask anyone.
{% hint style="success" %}
**Patrons never see notes.**
Notes appear only inside your Dashboard, in your reports, and in the CSV files you download. There is no patron-facing page, confirmation email, or ticket that shows a note.
{% endhint %}
***
## Where You Can Leave a Note
Four kinds of records can be annotated. Each one has a **Notes** card on its page.
| Record | How to get there |
| ------------------------------------------------- | ----------------------------------------------------------------------------------------------------------------------------------- |
| **Customer** (a patron who bought show tickets) | [Dashboard → Customers](https://crowdwork.com/dashboard/customers) → click the patron's name |
| **Student** (a patron who registered for a class) | [Dashboard → Students](https://crowdwork.com/dashboard/students) → click the patron's name |
| **Order** | [Dashboard → Orders](https://crowdwork.com/dashboard/orders) → click **View** on the order |
| **Show or class** | [Dashboard → Shows](https://crowdwork.com/dashboard/shows) (or [Classes](https://crowdwork.com/dashboard/classes)) → open the event |
{% hint style="info" %}
**Not sure where a note belongs?**
Put it on the record it will still be true about later. Something about the person ("uses a wheelchair," "always calls ahead") belongs on their Customer or Student record, where it follows them to every future purchase. Something about one transaction ("comped after the cancelled Saturday show") belongs on the order.
{% endhint %}
***
## Adding a Note
1. Open the customer, student, order, show, or class
2. Scroll to the **Notes** card — on an order it's labeled **Order Notes**
3. Click **+ Add Note**
4. Type your note. Notes support basic formatting — bold, italic, lists, and links
5. Click **Save Note**
Your note is saved with your name and the date and time, and appears at the top of the card. Newest notes are always listed first.
***
## Editing and Deleting Notes
Under every note is a line showing who wrote it and when. When you're allowed to change that note, **Edit** and **Delete** appear on the same line.
* **You can edit and delete your own notes.**
* **Admins can edit and delete anyone's notes.**
* An edited note is marked **(edited)** next to its timestamp, so it's clear the text changed after it was written.
* Deleting asks you to confirm first, and can't be undone.
{% hint style="info" %}
**A note is edited where it was written.**
A patron's page also shows notes left on their orders, and those appear read-only there, labeled with the order they came from (*From Order #1234*). To change one, open that order and edit it from its **Order Notes** card.
{% endhint %}
***
## Who Can See and Add Notes
Notes follow the record they're attached to. Anyone on your staff who can open a record can read its notes and add new ones.
| Staff member | Can do |
| ---------------- | ---------------------------------------------------------------------- |
| Any staff member | Read every note on any record they can already open, and add new notes |
| Any staff member | Edit and delete the notes they wrote themselves |
| Admins | Edit and delete any note in the theatre |
{% hint style="warning" %}
**There is no separate permission setting for notes.**
Note access is exactly record access — a producer who can't see your Students can't read or add student notes either. To control who sees which notes, control which records that person can open, using [Custom Permissions](https://docs.crowdwork.com/for-theatres/managing-staff-and-users/custom-permissions).
{% endhint %}
Removing a staff member from your theatre does **not** delete the notes they wrote — your theatre's history stays intact. Their notes remain on the record, credited to **Deleted user**.
***
## Finding Notes Around Your Dashboard
You don't have to open a record to find out whether it has notes.
* **A notebook icon in your lists.** On the Customers, Students, Orders, Shows, and Classes screens, a small notebook icon appears next to any row that has notes. Click it for a read-only preview without leaving the list. A row with no icon has no notes.
* **A patron's page gathers everything about them.** It shows their own notes *plus* the notes left on their orders, so a remark typed while working one transaction still surfaces the next time someone looks that person up.
* **An order page shows both sides.** The **Order Notes** card holds notes about that transaction, and the patron panel alongside it has a **Notes** line linking to that patron's other notes — so you can check "is there anything I should know about this person?" without navigating away.
***
## Notes in Reports and Exports
### In reports
The transaction list behind your reports — **View Line Items** on any financial report — includes a **Notes** column. Because notes are free-form, the on-screen cell shows the opening of the text; click it to read the whole thing. The CSV download carries the full text.
On a transaction row, that column combines the notes on the order with the notes on the patron who placed it, answering one question: *is there anything I should know about this row?* For more on running and exporting reports, see [Reports Overview](https://docs.crowdwork.com/for-theatres/reports-and-analytics/reports-overview).
### In CSV exports
Four exports carry a `notes` column. It's always the last column before any custom checkout field columns, so it doesn't shift the position of anything you already rely on.
| Export | What the `notes` column contains |
| --------------------------- | -------------------------------------------------------------------------------------------------------------------------------------------- |
| **Customers** | That customer's own notes |
| **Students** | That student's own notes |
| **Orders** | The order's notes plus the purchaser's notes |
| **Tickets / Registrations** | The order's notes plus the purchaser's notes. These are order-level, so the same text repeats on every admission row belonging to that order |
When a record has more than one note, they're joined into a single cell, newest first, separated by a vertical bar (`|`) — the same way the exports already combine multi-value columns like items and tags. Formatting is stripped, so the cell reads as plain text. Full export details are in [Exporting Your Data](https://docs.crowdwork.com/for-theatres/exporting-your-data).
{% hint style="warning" %}
**Notes leave the Dashboard in exports.**
They're invisible to patrons, but they do travel into spreadsheets that get emailed to accountants, board members, and guest staff. Write them as internal business records — useful and factual — and keep sensitive personal details out of them.
{% endhint %}
***
## FAQs
Can patrons see my notes?
No. Notes are staff-only. They don't appear on any patron-facing page, in confirmation or reminder emails, or on tickets. The only places they appear are your Dashboard, your reports, and the CSV files you download.
Who can delete a note?
The person who wrote it, and any admin. Everyone else on your staff can read the note and add their own, but can't change or remove someone else's. Deleting can't be undone — if a note is wrong rather than obsolete, editing it leaves a clearer record.
What happens to notes when a staff member leaves?
They stay exactly where they are. Removing a user from your theatre doesn't remove their notes — the note keeps its text and its date, and the byline reads **Deleted user**. This is deliberate: a note explaining why a patron was comped two seasons ago is still worth having after the person who wrote it has moved on.
Where should I put a note about someone's seating needs?
On their **Customer** or **Student** record. Notes on the person follow them to every future order, and they show up in the notebook-icon preview on your Customers and Students lists — so the box office sees them next time, not just this time.
Can I format a note?
Yes — bold, italic, lists, and links all work, which is handy for longer notes about an ongoing situation. Formatting is kept on screen and stripped when notes are exported to CSV, where the cell reads as plain text.
***
## Related Tasks
| Task | Guide |
| --------------------------------------- | --------------------------------------------------------------------------------------------------------- |
| **Control who on your staff sees what** | [Custom Permissions](https://docs.crowdwork.com/for-theatres/managing-staff-and-users/custom-permissions) |
| **Invite and manage staff** | [Managing Staff & Users](https://docs.crowdwork.com/for-theatres/managing-staff-and-users) |
| **Export your data as CSV** | [Exporting Your Data](https://docs.crowdwork.com/for-theatres/exporting-your-data) |
| **Run and read financial reports** | [Reports Overview](https://docs.crowdwork.com/for-theatres/reports-and-analytics/reports-overview) |
| **Resolve a common patron issue** | [Helping Your Patrons](https://docs.crowdwork.com/for-theatres/helping-your-patrons) |
| **Group and label events** | [Tags](https://docs.crowdwork.com/for-theatres/tags) |
***
## Need Help?
If notes aren't behaving the way this guide describes, [contact our support team](https://docs.crowdwork.com/contacting-support) from your Dashboard. We're here to help!
# Exporting Your Data
Learn how to export your sales data, patron lists, tickets, registrations, and checkout field submissions from your CrowdWork dashboard.
CrowdWork lets you export your data as CSV files from several places in the dashboard — for accounting, mailing lists, attendance records, and more. This page covers all the available exports and where to find them.
{% hint style="info" %}
**This guide is for venues and ticket sellers.** If you are a customer looking to remove your data, please [contact our support team](/contacting-support) from the email address associated with your account.
{% endhint %}
{% hint style="info" %}
**Your staff notes come along in these exports.**
The Tickets, Registrations, Orders, Customers, and Students exports each carry a `notes` column holding the internal notes your team left on those records — always the last column, before any custom checkout field columns. See [Staff Notes](https://docs.crowdwork.com/for-theatres/staff-notes).
{% endhint %}
***
## Choosing What to Include in Your Export
When you export tickets, registrations, or orders, an **Export to CSV** window opens so you can choose what to include. Every option is selected by default — uncheck anything you don't need, then click **Download CSV**.
The Export to CSV window with its three optional toggles
| Option | What it adds |
| ---------------------------- | ----------------------------------------------------------------------------------------------------------------------------------------------------------------------------------------------------------------------------- |
| **Financial Data** | All financial columns — subtotal, discounts, gift cards, fees, net total, amount deposited, and refunds. |
| **Itemize Payment Plans** | A sub-option of Financial Data. Lists each payment plan installment on its own row, so every scheduled and completed payment is visible. Uncheck it to keep each payment plan order on a single row with its totals combined. |
| **Custom Field Submissions** | Adds a column for each custom checkout field, with the patron's response. |
### How rows are organized: the `row type` column
Because a single order can involve more than one transaction, the export uses a **`row type`** column. There are three types:
* **`purchase`** — The main row for an admission or order, carrying the event, tier, patron, and tag details. For standard orders, the financial totals live here too.
* **`payment plan`** — An itemized installment. These rows appear only when **Itemize Payment Plans** is checked. Each scheduled payment gets its own row, with the `payment plan status`, `payment due date`, and `paid on` columns filled in.
* **`refund`** — A refund issued against the order, with the refunded amount shown as a negative value in the `deposited` column. Refund rows appear whenever financial data is included, regardless of the Itemize setting.
On a payment plan order with itemizing on, the `purchase` row shows what was bought, and the `payment plan` rows beneath it (sharing the same `order id`) break out each installment's financials. The money lives on the installment rows — the `purchase` row's financial columns are intentionally left blank so amounts aren't double-counted. With itemizing off, that same order appears as a single `purchase` row with the installment totals combined.
| `order id` | `row type` | `tier name` | `net total` | `deposited` | `payment plan status` | `payment due date` |
| ---------- | -------------- | --------------- | ----------- | ----------- | --------------------- | ------------------ |
| 1042 | `purchase` | Workshop Series | | | | |
| 1042 | `payment plan` | | $100.00 | $100.00 | paid | Jan 15 |
| 1042 | `payment plan` | | $100.00 | | upcoming | Feb 15 |
{% hint style="success" %}
**Reconciling deposits:** To find the true net amount deposited for any order, add up the `deposited` column across all of its rows — installments add to it, and refunds subtract from it.
{% endhint %}
{% hint style="info" %}
**A note on payment plan fees:** Payment plans always pass processing fees to the patron, one charge per installment — even if your theatre normally absorbs fees. See [Setting Up Payment Plans](https://docs.crowdwork.com/for-theatres/setting-up-payment-plans) for details.
{% endhint %}
***
## Exporting Tickets or Registrations
You can export a list of all tickets or registrations for a specific show or class, including patron names, email addresses, ticket tiers, order dates, and custom checkout field responses.
> **Direct links:** [Tickets Dashboard](https://crowdwork.com/dashboard/tickets) | [Registrations Dashboard](https://crowdwork.com/dashboard/registrations)
**To export tickets or registrations for a specific event:**
1. Go to **Dashboard → Tickets** (or **Registrations**)
2. Use the **Filter by Name** dropdown to select a specific event
1. Optionally, use the **Filter by Date** dropdown to select a specific occurrence, or leave as-is to include all
2. Optionally, use the **Date Purchased Range** or **Event Date Range** options to filter further
3. Click **Export to CSV**, choose what to include, then **Download CSV**
The downloaded file includes one row per admission with patron details, financial data, and any custom checkout field responses collected at checkout. The Tickets and Registrations exports share the same column structure. For what each option does — and how payment plan installments and refunds appear as their own rows — see [Choosing What to Include in Your Export](https://docs.crowdwork.com/for-theatres/exporting-your-data#choosing-what-to-include-in-your-export).
Ticket & Registration Export — Column Reference
**Admission & Event Details**
| Column | Description |
| -------------- | ------------------------------------------------------------------------------------------------- |
| `admission id` | Unique identifier for this individual ticket or registration |
| `order id` | Identifier for the order this admission belongs to — multiple admissions can share the same order |
| `event id` | Unique identifier for the show or class |
| `event name` | Name of the show or class |
| `event time` | Scheduled date and time of the event occurrence |
| `tier name` | Name of the ticket or registration tier purchased |
| `tier cost` | Face-value price of the tier |
**Patron Information**
| Column | Description |
| -------------- | ---------------------------------------------------------------------------- |
| `patron name` | Name of the patron on this admission |
| `patron email` | Patron's email address |
| `patron phone` | Patron's phone number, if provided |
| `newsletter` | Whether the patron opted into your newsletter at checkout (`true` / `false`) |
**Transaction Details**
| Column | Description |
| -------------------- | ----------------------------------------------------------------------------------------------------- |
| `pay what you want?` | Whether this tier uses Pay What You Want pricing (`true` / `false`) |
| `transaction date` | Date and time of the transaction. On a `payment plan` installment row, this is the installment's date |
| `row type` | Whether the row is a `purchase`, a `payment plan` installment, or a `refund` |
| `status` | Current status of the admission: `paid` or `refunded` |
| `source` | How the admission was created: `online`, `pos`, or `manual` |
| `used` | Whether the ticket has been checked in / scanned (`true` / `false`) |
| `internal tags` | Tags visible only to your staff in the Dashboard |
| `public tags` | Tags visible to patrons |
**Financial — Pricing & Discounts**
| Column | Description |
| ------------------- | ---------------------------------------------------------------------------- |
| `subtotal` | Base ticket price before any discounts or fees are applied |
| `discount used?` | Whether a discount code was applied (`true` / `false`) |
| `discount code` | The discount code used, if any |
| `discount amount` | Dollar amount discounted from the tier cost |
| `gift card used?` | Whether a gift card was applied (`true` / `false`) |
| `gift card code` | The gift card code used, if any |
| `gift card amount` | Amount applied from a gift card |
| `membership amount` | Discount amount applied via a membership, if any |
| `surcharge` | Surcharge amount added when fees are passed through to the patron |
| `donation` | Donation amount collected at checkout, if your theatre has donations enabled |
**Financial — Fees**
| Column | Description |
| ---------------- | ---------------------------------------------------------------------------------------------------------------- |
| `CrowdWork fees` | CrowdWork's service fee on this admission |
| `processor fees` | Payment processor fee (e.g. Square) on this admission |
| `total fees` | Combined total of CrowdWork fees and processor fees |
| `fees handled` | How fees were handled at time of purchase: `passed_through` (patron pays fees) or `absorbed` (theatre pays fees) |
**Financial — Totals**
| Column | Description |
| -------------------- | ------------------------------------------------------------------------------------------------------------------------------------------ |
| `net total` | The amount after discounts, memberships, and credits are applied and surcharges are added, before fees and donations |
| `total without fees` | The order-level total before fees were added |
| `total charged` | Amount the patron actually paid, including any passed-through fees |
| `deposited` | Amount deposited to your account after fees (if absorbed) and donations. A `refund` row shows the refunded amount here as a negative value |
**Understanding the `deposited` column**
The `deposited` column is your best at-a-glance number for what lands in your account. It starts from the net total, adds donations, and subtracts fees if your theatre absorbs them. To get the net for an entire order, add up `deposited` across all of its rows — payment plan installments add to it, and refunds subtract from it.
**About refunds**
Refunds appear as their own `refund` row beneath the order they apply to, with the refunded amount shown as a negative value in the `deposited` column. This is true for both full and partial refunds.
**Payment Plan & Order Metadata**
| Column | Description |
| ---------------------------- | --------------------------------------------------------------------------------------------------------------------------------------------------------------------------------------------------------------- |
| `payment plan?` | Whether this admission was purchased via a payment plan (`true` / `false`) |
| `payment plan status` | On a `payment plan` row, the status of that installment: `upcoming`, `paid`, `failed`, or `canceled` (the values `pending` and `paused` may also appear in rare or legacy cases). Blank on non-installment rows |
| `payment due date` | On a `payment plan` row, when the installment is or was scheduled to be paid |
| `paid on` | On a `payment plan` row, when the installment was actually paid |
| `bundle purchase?` | Whether this admission was part of a bundle purchase (`true` / `false`) |
| `payment type` | How the patron paid: `free`, `card`, `cash`, or `manual`. For a payment plan, this lists the method used for each installment |
| `original bundled tier cost` | Original individual tier price when purchased as part of a bundle; `$0.00` when not a bundle purchase |
**Staff Notes**
| Column | Description |
| ------- | ----------------------------------------------------------------------------------------------------------------------------------------------------------------------------------------------------------------------------------------------------------------------------------------------------------------------------- |
| `notes` | Internal staff notes on the order and on the patron who placed it, as plain text. Multiple notes are separated by a vertical bar (`\|`), newest first. These are order-level, so the same text repeats on every admission row belonging to that order. See [Staff Notes](https://docs.crowdwork.com/for-theatres/staff-notes) |
**Custom Checkout Fields**
Any custom checkout fields you have created will appear as additional columns at the end of the export. Each field name becomes its own column header, and the patron's response appears as the value. See [Custom Checkout Fields](https://docs.crowdwork.com/for-theatres/custom-checkout-fields) for details on creating and managing these fields.
***
## Exporting Orders
The Orders export gives you every transaction across all your events in one file — ideal for accounting, bookkeeping, and end-of-period reconciliation. Where the Tickets and Registrations exports give you one row per admission, the Orders export works at the order level: one row per order, with the events and quantities summarized.
> **Direct link:** [Orders Dashboard](https://crowdwork.com/dashboard/orders)
**To export your orders:**
1. Go to **Dashboard → Orders**
2. Optionally use **Filter by Order ID** or **Dates Purchased** to narrow the results
3. Click **Export to CSV**, choose what to include, then **Download CSV**
The same options and `row type` behavior apply here — see [Choosing What to Include in Your Export](https://docs.crowdwork.com/for-theatres/exporting-your-data#choosing-what-to-include-in-your-export) for how payment plan installments and refunds appear as their own rows.
Order Export — Column Reference
**Order & Patron Details**
| Column | Description |
| ------------------ | ---------------------------------------------------------------------------------------------------------------------------------------------------------------------------------------------- |
| `order id` | Unique identifier for the order |
| `transaction date` | Date and time of the transaction |
| `patron name` | Name of the patron who placed the order |
| `patron email` | Patron's email address |
| `patron phone` | Patron's phone number, if provided |
| `newsletter` | Whether the patron opted into your newsletter at checkout (`true` / `false`) |
| `items` | Everything in the order — event names for tickets and registrations (each event listed once), plus any gift cards, donations, and memberships, separated by vertical bars |
| `quantity` | Number of admissions in the order |
| `events` | The event names for the tickets and registrations in the order only (each listed once); gift cards, donations, and memberships are not included here |
| `event times` | Scheduled date(s) and time(s) of those events |
| `row type` | Whether the row is a `purchase`, a `payment plan` installment, or a `refund` |
| `status` | Overall status of the order, combined from its admissions: `paid`, `refunded`, `standby`, or `partially refunded`. An order spanning multiple statuses shows them joined, e.g. `paid, standby` |
| `source` | How the order was created: `online`, `pos`, or `manual` |
| `internal tags` | Tags visible only to your staff in the Dashboard |
| `public tags` | Tags visible to patrons |
**Financial**
| Column | Description |
| -------------------- | ------------------------------------------------------------------------------------------------------------------------------------------ |
| `subtotal` | Base order total before any discounts or fees are applied |
| `discount used?` | Whether a discount code was applied (`true` / `false`) |
| `discount code` | The discount code used, if any |
| `discount amount` | Dollar amount discounted from the order |
| `gift card used?` | Whether a gift card was applied (`true` / `false`) |
| `gift card code` | The gift card code used, if any |
| `gift card amount` | Amount applied from a gift card |
| `membership amount` | Discount amount applied via a membership, if any |
| `surcharge` | Surcharge amount added when fees are passed through to the patron |
| `donation` | Donation amount collected at checkout, if your theatre has donations enabled |
| `CrowdWork fees` | CrowdWork's service fee on this order |
| `processor fees` | Payment processor fee (e.g. Square) on this order |
| `total fees` | Combined total of CrowdWork fees and processor fees |
| `net total` | The amount after discounts, memberships, and credits are applied and surcharges are added, before fees and donations |
| `total without fees` | The order total before fees were added |
| `total charged` | Amount the patron actually paid, including any passed-through fees |
| `deposited` | Amount deposited to your account after fees (if absorbed) and donations. A `refund` row shows the refunded amount here as a negative value |
| `fees handled` | How fees were handled: `passed_through` (patron pays fees) or `absorbed` (theatre pays fees) |
**Payment Plan & Metadata**
| Column | Description |
| --------------------- | --------------------------------------------------------------------------------------------------------------------------------------------------------------------------------------------------------------- |
| `payment plan?` | Whether the order was purchased via a payment plan (`true` / `false`) |
| `payment plan status` | On a `payment plan` row, the status of that installment: `upcoming`, `paid`, `failed`, or `canceled` (the values `pending` and `paused` may also appear in rare or legacy cases). Blank on non-installment rows |
| `payment due date` | On a `payment plan` row, when the installment is or was scheduled to be paid |
| `paid on` | On a `payment plan` row, when the installment was actually paid |
| `bundle purchase?` | Whether the order included a bundle purchase (`true` / `false`) |
| `payment type` | How the patron paid: `free`, `card`, `cash`, or `manual`. For a payment plan, this lists the method used for each installment |
**Staff Notes**
| Column | Description |
| ------- | ----------------------------------------------------------------------------------------------------------------------------------------------------------------------------------------------------------------------------- |
| `notes` | Internal staff notes on the order and on the patron who placed it, as plain text. Multiple notes are separated by a vertical bar (`\|`), newest first. See [Staff Notes](https://docs.crowdwork.com/for-theatres/staff-notes) |
**Custom Field Submissions**
If you include custom field submissions, each custom checkout field appears as an additional column at the end, with the patron's response as the value.
***
## Exporting Your Customer or Student List
You can export your full patron list — or a filtered subset — as a CSV. This is useful for newsletters, mailing lists, and patron outreach.
> **Direct links:** [Customers Dashboard](https://crowdwork.com/dashboard/customers) | [Students Dashboard](https://crowdwork.com/dashboard/students)
**To export all customers or students:**
1. Go to **Dashboard → Customers** (or **Students**)
2. Optionally use the **Filters** to narrow results by date, event, or other criteria
3. Click the **Export CSV** button
{% hint style="info" %}
**Customers vs. Students:** Customers are patrons who have purchased show tickets. Students are patrons who have registered for classes. Each has its own list and export. If you need both, export them separately and combine as needed.
{% endhint %}
Customer Export — Column Reference
| Column | Description |
| --------------------- | ------------------------------------------------------------------------------------------------------------------------------------------------------------------------------------------------- |
| `id` | Unique identifier for this customer record |
| `customer name` | Patron's name |
| `customer email` | Patron's email address |
| `phone` | Patron's phone number, if provided |
| `newsletter` | Whether the patron has opted into your newsletter (`true` / `false`) |
| `total purchases` | Total number of show ticket purchases by this patron |
| `total donations` | Total donation amount from this patron across all purchases |
| `first show purchase` | Date and time of this patron's first ticket purchase |
| `notes` | Internal staff notes on this customer, as plain text. Multiple notes are separated by a vertical bar (`\|`), newest first. See [Staff Notes](https://docs.crowdwork.com/for-theatres/staff-notes) |
Student Export — Column Reference
| Column | Description |
| ---------------------- | ------------------------------------------------------------------------------------------------------------------------------------------------------------------------------------------------ |
| `id` | Unique identifier for this student record |
| `student name` | Patron's name |
| `student email` | Patron's email address |
| `phone` | Patron's phone number, if provided |
| `newsletter` | Whether the patron has opted into your newsletter (`true` / `false`) |
| `total registrations` | Total number of class registrations by this patron |
| `first class purchase` | Date and time of this patron's first class registration |
| `notes` | Internal staff notes on this student, as plain text. Multiple notes are separated by a vertical bar (`\|`), newest first. See [Staff Notes](https://docs.crowdwork.com/for-theatres/staff-notes) |
***
## Exporting Custom Checkout Field Submissions
If you collect additional information from patrons during checkout using Custom Checkout Fields, you can export all responses from the Submissions page.
> **Direct link:** [Checkout Field Submissions](https://crowdwork.com/dashboard/custom-fields/responses)
1. Go to **Dashboard → Checkout Fields → Submissions**
2. Optionally filter by field or event
3. Click the **Export CSV** button
{% hint style="success" %}
**Also included in ticket and registration exports:** Custom checkout field responses are included in the Tickets and Registrations CSV exports as well — so if you're already pulling an event-level report, you don't need a separate export.
{% endhint %}
Custom Field Submissions Export — Column Reference
Each row represents one field response from one patron. If a patron answered multiple fields during checkout, each answer appears as its own row.
| Column | Description |
| ------------------- | ------------------------------------------------------------- |
| `id` | Unique identifier for this submission |
| `event name` | Name of the show or class this submission is associated with |
| `event time` | Scheduled date and time of the event occurrence |
| `event type` | Whether the event is a `show` or `class` |
| `customer name` | Patron's name (populated when the event is a show) |
| `customer email` | Patron's email (populated when the event is a show) |
| `customer phone` | Patron's phone (populated when the event is a show) |
| `student name` | Patron's name (populated when the event is a class) |
| `student email` | Patron's email (populated when the event is a class) |
| `student phone` | Patron's phone (populated when the event is a class) |
| `ticket id` | Associated ticket admission ID (populated for shows) |
| `registration id` | Associated registration admission ID (populated for classes) |
| `submitted at` | Date and time the field response was submitted |
| `field name` | Name of the custom checkout field |
| `field description` | Description text of the custom checkout field, if any |
| `field required` | Whether the field was required at checkout (`true` / `false`) |
| `value` | The patron's response |
***
## Viewing Sales Reports and Analytics
Exports aren't the only way to see your numbers — CrowdWork has two built-in views, both under **Analytics** in your Dashboard sidebar:
* **Analytics (Charts)** — a visual overview of your sales performance: revenue totals, ticket counts, and trends over time. See [Sales Analytics](https://docs.crowdwork.com/for-theatres/reports-and-analytics/sales-analytics).
* **Reports** — accounting-ready financial reports (settlements, donations, gift-card liability, and more), each with its own line-item CSV export. See [Getting Started with Reports](https://docs.crowdwork.com/for-theatres/reports-and-analytics).
> **Direct links:** [Analytics Dashboard](https://crowdwork.com/dashboard/analytics) | [Reports Dashboard](https://crowdwork.com/dashboard/reports)
{% hint style="info" %}
**Need to share analytics access?** You can give a board member or stakeholder read-only access to your Analytics charts without sharing any other data. See [Custom Permissions](https://docs.crowdwork.com/for-theatres/managing-staff-and-users/custom-permissions) for details.
{% endhint %}
***
## Quick Reference
| What You Want to Export | Where to Go |
| ------------------------------------------------------- | -------------------------------------------------------------------------------------------------------------------------------------- |
| Tickets for a specific show |
|
| Sales charts and trends | [Dashboard → Analytics → Charts](https://crowdwork.com/dashboard/analytics) |
| Financial reports (settlements, liabilities, donations) | [Dashboard → Analytics → Reports](https://crowdwork.com/dashboard/reports) |
***
## Related Tasks
| Task | Where to Find It |
| ------------------------------------------------ | --------------------------------------------------------------------------------------------------------- |
| Reconcile orders, payments, and refunds | [Orders Dashboard](https://crowdwork.com/dashboard/orders) |
| View sales charts and revenue reports | [Analytics Dashboard](https://crowdwork.com/dashboard/analytics) |
| Run, save, and export financial reports | [Getting Started with Reports](https://docs.crowdwork.com/for-theatres/reports-and-analytics) |
| Understand the `notes` column | [Staff Notes](https://docs.crowdwork.com/for-theatres/staff-notes) |
| Collect additional info from patrons at checkout | [Custom Checkout Fields](https://docs.crowdwork.com/for-theatres/custom-checkout-fields) |
| Manage who can access exports and analytics | [Managing Staff & Users](https://docs.crowdwork.com/for-theatres/managing-staff-and-users) |
| Give a stakeholder analytics-only access | [Custom Permissions](https://docs.crowdwork.com/for-theatres/managing-staff-and-users/custom-permissions) |
| View and manage individual admissions | [Managing Admissions](https://docs.crowdwork.com/for-theatres/managing-admissions) |
# Managing Staff & Users
This page describes how to manage multiple users within your CrowdWork account.
This guide will help you set up and manage your team within CrowdWork. Our user management features enable you to grant access to your theatre's ticketing system without needing to share your personal account—think of it as a more secure alternative to password sharing. By inviting users, you can customize the permissions of each team member, ensuring they have precisely the access required to keep your theatre running smoothly.
Users in the Dashboard menu
### Inviting New Users
To start, you'll need to invite the members of your team to your account. Here's how:
1. **Navigating to Users**: Locate the Users menu in the left sidebar of your Dashboard.
2. **Sending an Invite**: At the top of the Users screen, use the email field to enter the email address of the team member you wish to invite, then click "Invite User."
User Management Screen in the CrowdWork Dashboard
3. **Invitation Email**: The user will receive an email invitation from **** with the subject **"CrowdWork Invitation Instructions"** that will guide them through the process.
Sample of email invitation sent to a newly added staff user.
#### Important Notes About Invitations
* **Admin Control**: User permissions are exclusively controlled by Admins through the [Users dashboard](https://crowdwork.com/dashboard/users). Once you save the correct email address and role, the user gains access immediately to their assigned permissions.
* **Existing CrowdWork Users**: If the invited person already has a CrowdWork account, they'll have access even without clicking the invite link. However, clicking the link confirms their acceptance of the role and notifies you as the admin.
* **New Users**: Those without existing accounts will need to click the invitation link to create their account and gain access.
### Managing Invited Users
After inviting users, you can view and manage their access through the Users screen:
* **Email**: Displays the email addresses of invited users
* **Date Invited**: Shows when each user was invited
* **Invite Status**: Indicates if the invite is still pending ("Invited") or if the user has accepted ("Accepted")
* **User Role**: Shows each user's current role - you can change it by selecting a new role from the dropdown and clicking "Update Role"
* **Remove User**: Click here to remove a user's access to your theater account
### Understanding User Roles
User roles determine what each user can and cannot do within your account. It's important to assign roles that fit each team member's responsibilities.
#### Quick Role Overview
Role
✅ Can
❌ Can't
Box Office
(Default role for new users)
Check in tickets, use the POS app
Access most management and analytics features
Producer
Manage shows, view customer data, use the POS app
Access extended analytics, class information, or financial management features
Instructor
View and manage class-related data, use the POS app
Access show/ticket data or extensive customer management
Manager
Manage tickets, shows, customers, classes, and view orders
View analytics, charts, or manage financial tools like discounts and gift cards
Admin
Do absolutely everything! Full access to all features and data
A fully configurable permission set — choose exactly which events, features, and data types this user can access. Ideal for producers scoped to one show, outside auditors, or stakeholders who only need analytics.
Requires manual configuration via the permissions editor
### Detailed Permission Matrix
Permissions
Admin
Manager
Producer
Instructor
Box Office
Use POS
✅
✅
✅
✅
✅
View Tickets
✅
✅
✅
❌
✅
View Customers
✅
✅
✅
❌
❌
Manage Shows
✅
✅
✅
❌
❌
Manage Waitlist
✅
✅
✅
✅
❌
View Students
✅
✅
❌
✅
❌
View Registrations
✅
✅
❌
✅
❌
Manage Classes
✅
✅
❌
✅
❌
View Orders
✅
✅
❌
❌
❌
Manage Notifications
✅
✅
❌
❌
❌
Manage Payment Plans
✅
❌
❌
❌
❌
View Charts
✅
❌
❌
❌
❌
View Reports
✅
❌
❌
❌
❌
Invite Users
✅
❌
❌
❌
❌
Manage Discounts
✅
❌
❌
❌
❌
Issue Refunds
✅
❌
❌
❌
❌
Manage Gift Cards
✅
❌
❌
❌
❌
Manage Memberships
✅
❌
❌
❌
❌
*The table above shows exactly what each role can access. Use this to determine the appropriate role for each team member based on their job responsibilities.*
{% hint style="info" %}
**Need more control than the standard roles offer?** The **Custom** role lets you build a tailored permission set — scope a user to specific events, pick exactly which features they can access, and nothing more. [Learn how to set up Custom Permissions →](https://docs.crowdwork.com/for-theatres/managing-staff-and-users/custom-permissions)
{% endhint %}
#### Permission Categories Explained
* **Use POS**: Access to the point-of-sale mobile app for in-person sales
* **View/Manage Shows**: Access to show listings, creation, and editing
* **View/Manage Classes**: Access to class listings, creation, and editing
* **View Tickets/Customers**: Access to ticket sales data and customer information
* **View Students/Registrations**: Access to class enrollment data
* **View Orders**: Access to all transaction history
* **Financial Tools**: Discounts, gift cards, refunds, payment plans
* **Analytics**: Sales charts and financial reports — the **Charts** and **Reports** toggles, grantable separately
* **Admin Functions**: User management, notifications, advanced settings
User permissions grid as visible in the Dashboard
### Troubleshooting Access Issues
If a user's permissions aren't showing up correctly, try these solutions:
#### Common Fixes
1. **Logout and log back in** - This refreshes the user's session and permissions
2. **Try a different browser** or use an incognito/private window to test
3. **Check theatre selection** - If the user has access to multiple theatres, they may need to switch between them
#### Multiple Theatre Access
Users with access to multiple theatre accounts will see a theatre selector dropdown. If permissions seem incorrect:
* Try switching between different theatres in the selector
* Switch back to the intended theatre
* This process can refresh the permission settings
### Best Practices
#### Safety First
We recommend giving each user the **minimum level of access required** to do their job effectively. You can always upgrade permissions later if needed.
#### Role Assignment Tips
* Start new team members with **Box Office** access and upgrade as they prove competent
* **Instructors** only need class-related permissions unless they also perform administrative duties
* Reserve **Admin** access for owners and senior management only
* **Manager** role works well for experienced staff who handle day-to-day operations
#### Regular Review
* Periodically review user access, especially when:
* Staff members change roles
* Someone leaves your organization
* You add new features or expand operations
* You notice unusual account activity
{% hint style="warning" %}
*User management is a powerful tool for keeping your theatre operations secure and efficient.*
*When in doubt, start with lower permissions and increase access as needed.*
{% endhint %}
### Need Help?
Have more questions? Need help managing your users? [Our support team is always ready to help](/contacting-support)!
***
# Custom Permissions
Custom permissions let you build a tailored access level for any user — scoped to specific events and only the features they actually need.
Not every team member fits neatly into a standard role. Custom permissions let you go beyond the built-in roles and build exactly the right access level for a specific person — whether that's a producer who should only see their own show, an outside accountant reviewing your order history, or a board member who just needs to see the sales numbers.
{% hint style="info" %}
**New to user roles?** Custom permissions build on top of the standard role system. If you haven't set up users yet, start with the [Managing Staff & Users guide](https://docs.crowdwork.com/for-theatres/managing-staff-and-users) first.
{% endhint %}
***
## Start Here: Common Scenarios
Most people only need custom permissions for a handful of situations. Find yours below and follow the checklist — you don't need to read the whole page.
***
### 🎭 A Producer Who Should Only See Their Own Show
**The situation:** You have multiple producers running separate shows, and you don't want them seeing each other's ticket sales, customers, or data.
**How to set it up:**
1. Go to [Dashboard → Users](https://crowdwork.com/dashboard/users) and find the user
2. Change their role to **Custom**, then click the gear icon (⚙️) that appears
3. In the **Events** field, search for and select their specific show
4. If they only need to see the show, leave the extra checkboxes unchecked — view access is on by default. Check **Edit Only** if they also need to make changes to the show itself.
5. Under **Other Permissions**, enable **View Only** for:
* Customers
* Orders
6. Leave everything else unchecked
7. Click **Save Permissions**
**What this does:** The producer can see their show, their ticket buyers, and their orders — nothing else. Their analytics will automatically show only data for that show. The "Create Show" option won't even appear in their interface.
***
### 📊 An Outside Accountant or Financial Auditor
**The situation:** Someone external needs to review your order history and transaction records — but they should have no ability to touch anything else.
**How to set it up:**
1. Go to [Dashboard → Users](https://crowdwork.com/dashboard/users) and find the user (or invite them first)
2. Change their role to **Custom**, then click the gear icon (⚙️)
3. Leave the **Events** field blank — they don't need event access
4. Under **Other Permissions**, enable **View** only for:
* Orders
5. Leave all Platform Features unchecked
6. Click **Save Permissions**
**What this does:** The auditor can log in and see order history. That's it. No customer data, no shows, no financial tools — just the transaction records they need to do their job.
***
### 📈 A Stakeholder Who Just Needs to See Analytics
**The situation:** A board member, investor, or director wants to check in on sales performance without having any ability to edit events or access patron data.
**How to set it up:**
1. Go to [Dashboard → Users](https://crowdwork.com/dashboard/users) and find the user
2. Change their role to **Custom**, then click the gear icon (⚙️)
3. Leave the **Events** field blank
4. Leave all **Other Permissions** unchecked
5. Under **Platform Features**, enable **Charts**
6. Click **Save Permissions**
**What this does:** The stakeholder can view your Analytics charts dashboard. They can't see individual orders, customer records, or anything else. If they should also run financial reports, enable **Reports** as well — keep in mind that report exports include patron names and email addresses. If you want to scope their view to specific shows, add those events in the Events field — analytics and reports will automatically filter to match.
***
### 🎟️ A Box Office Volunteer for One Specific Show
**The situation:** A volunteer is working the door for one specific show and needs to check in tickets via POS, but shouldn't have access to anything else.
**How to set it up:**
1. Go to [Dashboard → Users](https://crowdwork.com/dashboard/users) and find the user
2. Change their role to **Custom**, then click the gear icon (⚙️)
3. In the **Events** field, search for and select their specific show
4. Leave the extra checkboxes unchecked — view access is on by default, which is all they need
5. Leave all **Other Permissions** and **Platform Features** unchecked
6. Click **Save Permissions**
{% hint style="info" %}
All roles — including Custom — have access to the POS app for in-person sales and check-ins by default.
{% endhint %}
***
## How to Assign Custom Permissions
{% hint style="info" %}
**You must be an Admin** to assign or edit user permissions. Go to [Dashboard → Users](https://crowdwork.com/dashboard/users) to get started.
{% endhint %}
1. Locate the user in your [Users list](https://crowdwork.com/dashboard/users)
2. Open the role dropdown for that user and select **Custom**
3. Click **Update** to save the role change
4. A gear icon (⚙️) will appear next to the role dropdown — click it to open the permissions editor
5. Configure access using the sections below, then click **Save Permissions**
***
## Understanding the Permissions Editor
The permissions editor has three sections. Work through them top to bottom.
### Step 1: Select Events
This is where you control which shows or classes this user can access.
* **Type to search** for a specific show or class and select it — you can add multiple
* **Leave blank** if this user doesn't need access to any events
Every user with event access can view those events by default — that's the baseline. Use the checkboxes below the event selector to grant additional capabilities if needed:
* **Edit Only** — the user can modify event details (name, dates, pricing, etc.) but cannot create new events or delete existing ones
* **Full Access (create, delete, etc.)** — the user has complete control, including creating new events and permanently deleting them
{% hint style="warning" %}
These access levels apply **only to the events you've selected above** — they do not affect any other part of the account. The Other Permissions grid below is a separate and independent set of controls.
{% endhint %}
{% hint style="danger" %}
Grant **Full Access** only to users you fully trust. Creating and deleting events are irreversible actions that affect ticket sales and patron data.
{% endhint %}
**What gets automatically scoped:** When you assign specific events, CrowdWork automatically limits that user's view of tickets, registrations, and analytics to only those events. You don't need to configure this separately — it happens on its own.
### Step 2: Set Other Permissions
This grid controls access to specific data types and features across the platform. Each row is independent — you can mix and match freely.
| Feature | View | Edit Only | Full Access |
| ---------------------------- | ----------------------------------------------------------------------------- | ------------------------------------------------ | ----------------------------------- |
| **Discount Codes** | See existing codes | Modify existing codes | Create new + delete codes |
| **Orders** | See transaction history | Add tickets to an existing order | Create new orders |
| **Customers** | See customer records | Edit customer record details | Create customer record + delete |
| **Students** | See student records | Edit student record details | Create student record + delete |
| **Tags** | See tags | Modify existing tags | Create new + delete tags |
| **Notifications** | See notifications | Edit existing notification content | Create new alerts + delete existing |
| **Custom Fields** | See custom fields | Modify existing fields | Create new fields + delete fields |
| **Gift Cards** | See gift card records | Modify gift card details | Create new gift cards + delete |
| **Membership Tiers** | See membership tiers | Modify tier details | Create new tiers + delete tiers |
| **Memberships** | See membership records | Manage patrons' memberships (retry/pause/cancel) | — |
| **Payment Plans** | See payment plan settings | Modify payment plan settings | Create new plans + delete plans |
| **Payment Plans (Enrolled)** | See enrolled payment plans | Modify an enrolled patron's plan | — |
| **Waitlist** | View all waitlist entries and send email notifications to patrons on the list | — | — |
{% hint style="info" %}
Not all features support all three access levels. Where a cell shows "—", checking that box has no additional effect beyond the level below it.
{% endhint %}
***
### Step 3: Enable Platform Features
These are account-wide capabilities that aren't tied to specific data. Each is a simple on/off toggle.
| Feature | What it enables |
| ----------------- | --------------------------------------------------------------------------------------------------------------------------------------------------------------------------------------------------------- |
| **Charts** | Access to the Analytics charts dashboard (**Analytics → Charts** in the sidebar); when specific Events are selected, charts are scoped to those events only |
| **Reports** | Access to the Reports page — run, save, and export financial reports. Report exports include patron names and email addresses. When specific Events are selected, reports are scoped to those events only |
| **Issue Refunds** | Ability to process refunds on orders |
| **Manage Users** | Ability to invite and manage other users (use with caution) |
***
## How the Interface Adapts
One of the most useful things about Custom permissions: **CrowdWork's interface adjusts automatically** based on what the user can access. Menu items, buttons, and actions that aren't available to that user simply won't appear. A user who can't create shows won't see the "Create Show" button. A user scoped to one event won't see data from other events.
This means you don't need to worry about users accidentally stumbling into things they shouldn't see — the system handles that for you.
***
## Tips
* **Start minimal.** Give the user only what they've asked for. It's easy to add more later, and much harder to explain why someone saw something they shouldn't have.
* **Scoping events also scopes analytics.** If you add specific events, that user's analytics view automatically reflects only those events — a useful side effect for producers or show-specific staff.
* **Custom doesn't replace standard roles.** For most team members, a standard role (Box Office, Producer, Manager, etc.) is the right choice and easier to maintain. Reach for Custom only when a standard role doesn't fit the situation.
* **Notes have no permission checkbox — and don't need one.** Access to [staff notes](https://docs.crowdwork.com/for-theatres/staff-notes) is exactly access to the record they're on. Anyone who can open a customer, student, order, show, or class can read and add its notes; a user scoped away from your Students can't see student notes either. Everyone can edit and delete their own notes, and admins can edit and delete anyone's.
* **Review permissions periodically.** If a contractor or guest auditor finishes their work, remove their access promptly via [Dashboard → Users](https://crowdwork.com/dashboard/users).
***
## Related Topics
| Task | Guide |
| ---------------------------------- | ---------------------------------------------------------------------------------------------------------------------------------------------- |
| Invite a new user | [Managing Staff & Users](https://docs.crowdwork.com/for-theatres/managing-staff-and-users) |
| Understand the standard roles | [Managing Staff & Users → Understanding User Roles](https://docs.crowdwork.com/for-theatres/managing-staff-and-users#understanding-user-roles) |
| Understand who can see staff notes | [Staff Notes](https://docs.crowdwork.com/for-theatres/staff-notes) |
| Troubleshoot access issues | [Managing Staff & Users → Troubleshooting](https://docs.crowdwork.com/for-theatres/managing-staff-and-users#troubleshooting-access-issues) |
# Setting Up Discount Codes
This page describes how to create and use discount codes.
Some call them rewards, coupons, or promo codes. Here at [CrowdWork](https://crowdwork.com), we call them "discount codes." And you have the flexibility to create as many as you need to provide exclusive promotions and incentives to your patrons. This article will guide you through the process of creating, managing and editing discount codes to make your theatre even more enticing! Click [**Discount Codes**](https://crowdwork.com/dashboard/discounts) in the Dashboard menu to get started.
> **Direct link:** [Discount Codes Dashboard](https://crowdwork.com/dashboard/discounts)
Discount Codes in the Dashboard menu
## Creating Your First Discount Code
After selecting the [**Discount Codes**](https://crowdwork.com/dashboard/discounts) menu, find and click the blue [**+ Create New Discount**](https://crowdwork.com/dashboard/discounts/new) button to begin building your first campaign.
Create New Discount button in the CrowdWork Dashboard
***
## **Creating a New Discount Code**
On the **Create New Discount Code** screen you'll set the specifics of your promotion or incentive. Let's explore the fields you'll encounter while crafting a new discount code. *Click the reference image below to enlarge it.*
Create New Discount Code form in the CrowdWork Dashboard
### Apply Discount
The **Apply Discount** field controls exactly which events, pricing tiers, or ticket types this code is valid for. You can assign a discount code to a specific bundle by selecting it here by name, alongside shows, classes, and tags. Type in the field to search by name, then select one or more of the following:
* **All Shows** — applies to every show in your account
* **All Classes** — applies to every class in your account
* **All** [**Bundles**](/for-theatres/setting-up-bundles) — applies to every bundle in your account
* **An entire event (All Tiers)** — applies to all pricing tiers within a specific show or class, displayed as *Event Name - All Tiers*
* **A specific pricing tier** — targets one price point within a show or class, displayed as *Event Name - Tier Name ($Price)*
* **A specific** [**Bundle**](/for-theatres/setting-up-bundles) — targets one bundle, displayed as *Bundle Name*
* **A** [**Tag**](https://docs.crowdwork.com/for-theatres/tags) — applies to all events with that tag
* **A** [**Membership Tier**](https://docs.crowdwork.com/for-theatres/setting-up-memberships) — applies when patrons purchase or renew a membership
* **Any ticket tier with a given name** — under **Dynamic Tier Names**, displayed as *Any tier named "General Admission" (12 tiers)*. Covers that tier on every event that has one, including events you create later (see the section just below)
* Any combination of the above
{% hint style="info" %}
**All Tiers vs. individual tiers:** Selecting *Event Name - All Tiers* includes all current pricing tiers for that event. Selecting individual tiers gives you precise control — for example, applying a discount only to a premium-priced tier while leaving general admission unaffected.
{% endhint %}
### "Any tier named…" — codes that cover events you haven't created yet
Most theatres reuse the same ticket-tier names on every event: every show sells a *General Admission*, a *Student*, a *VIP*. Picking those tiers one event at a time means hundreds of clicks, and the list goes stale the moment you add next month's shows.
The **Dynamic Tier Names** group in the **Apply Discount** field solves that. An *Any tier named "…"* option saves the *name* rather than the list. Each time a patron redeems the code, CrowdWork checks that event's ticket tiers and applies the discount to any tier carrying that name — so a show you create six months from now is covered the day you make it.
{% hint style="warning" %}
**It matches the whole name, not a keyword inside it.**
*Any tier named "General Admission"* matches a tier called *General Admission*, *general admission*, or *General Admission* with stray spaces around it — capitalization and surrounding whitespace are ignored. It does **not** match *General Admission + Featured Cocktail* or any other longer name. Those are separate names with their own options in the list.
{% endhint %}
The number in each option — *(12 tiers)* — is how many ticket tiers carry that name in your account **today**. An option reading *(no tiers currently)* is a rule you saved earlier whose name no longer matches anything; it stays in the list so a saved selection never silently disappears.
### Select all by keyword — a shortcut, not a rule
Beneath the **Apply Discount** field is a **Select all by keyword** box with a **Select All Matches** button. It looks like the tier-name rule above and does something different.
Type a word and it filters the options in front of you, matching that text *anywhere* in an option's label; click **Select All Matches** and everything currently matching is added to the field at once. A line underneath reports how many options match and how many aren't selected yet.
{% hint style="warning" %}
**The keyword box matches loosely — check what it grabbed.**
Typing `General Admission` selects the *Any tier named "General Admission"* rule **and** the *Any tier named "General Admission + Featured Cocktail"* rule, plus every individual *Event Name - General Admission* tier, plus any event whose own name contains those words. Read back the chips in the field afterwards and remove anything you didn't intend to discount.
{% endhint %}
### The coverage line — check this before you save
As you build a selection, a line under the field reports what it actually resolves to: *"Currently covers 34 ticket tiers across 12 events."* When a tier-name rule is part of the selection it adds *"Tier-name rules keep applying to events you add later."* If nothing matches, it says so: *"This selection doesn't match any ticket tiers right now."*
The count reflects your exclusions as well as your inclusions, and it counts your **current** events — a tier-name rule goes on covering events beyond that count as you create them. A rule that quietly matches nothing is the failure worth catching here: if the name is spelled differently on your events, the code will simply never apply and nothing will look broken.
### Exclude Specific Events or Tiers
The **Exclude Specific Events or Tiers** field *(optional)* works in combination with your **Apply Discount** selections. CrowdWork first assembles everything included by your Apply Discount selections, then removes anything you specify in the Exclude field.
This is useful when you want a broad discount with specific exceptions — for example:
* Apply to **All Shows**, then exclude one show that should not be discounted
* Apply to *Show Name - All Tiers*, then exclude a single premium-priced tier from receiving the discount
You can exclude individual shows and classes, whole ticket tiers of a specific event, [tags](https://docs.crowdwork.com/for-theatres/tags), and *Any tier named "…"* rules. Exclusions are about narrowing where a code works, so *All Shows*, *All Classes*, bundles and membership tiers aren't offered here — leave those out of the Apply Discount field instead.
What an exclusion *does* depends on which kind you pick:
* **Exclude an event or a tag** → the code stops working on those events entirely.
* **Exclude a ticket tier or a tier name** → the code still works on the event; it just won't discount that tier. Patrons buying the excluded tier pay full price, and the code still applies to everything else in their cart.
{% hint style="info" %}
**To exclude a tier everywhere, exclude the tier \_name**\_\*\* — not the individual tier.\*\*
Excluding *Event Name - VIP ($40)* excludes the VIP tier **on that one event only**. Excluding *Any tier named "VIP"* excludes it across every event that has one, including events you create later. When you want a standing rule, pick the **Any tier named…** option.
{% endhint %}
{% hint style="success" %}
**Example:** You want a 20% discount on all shows except your VIP seats — permanently, on every show you'll ever add. Set **Apply Discount** to *All Shows*, then add *Any tier named "VIP"* to the Exclude field. Every other tier is discounted automatically, on this season's shows and next season's.
{% endhint %}
### Required Fields
In addition to the Apply Discount field above, the following fields are also required:
* **Discount Code**: Enter a custom code that patrons will input to redeem the discount. Discount codes are case-insensitive and may include any combination of letters, numbers or symbols... even emojis! 😲 🤯 🤭
* **Discount Amount**: Enter a number to specify the value of the discount. Discounts are calculated before service fees are added, if applicable.
* **Discount Type**: Choose the type of discount:
* **Percent**: Offers a percentage off the order subtotal.
* **Dollars**: Provides a fixed dollar amount off. By default, this applies once to the order subtotal. Use the **Apply to Number of Items** field (below) to apply the discount per-item instead.
* **Tickets**: Grants a set number of free tickets.
{% hint style="warning" %}
**Yea, 🐢 emojis are 💯 🆒 but some⏰ they can 🗑️ cause a little 👼 trouble 😈...**
Emojis in discount codes can sometimes cause issues when copy-pasting the code, as some platforms or input fields may not support certain emojis. Additionally, emojis can have varying interpretations and meanings across different devices and operating systems, potentially leading to confusion for patrons trying to redeem the discount.\
☢️ Use emojis at your own risk! ☢️
{% endhint %}
### Optional Fields
The remaining fields are not required, but give you more granular control and flexibility:
* **Enable the Code During a Specific Time**: Define a date and time range when the discount code will be usable. This allows you to schedule codes in advance and have them automatically expire.
* **Date Start**: Set the beginning date and time for the discount code to become effective. Leaving the start date blank means the discount code will work instantly.
* **Date End**: Set the expiration date and time for the discount code to become invalid. Leaving the end date blank means the discount code will work indefinitely.
* **Max Number of Uses**: Limit the total number of uses. Leaving this blank means the discount code will work for an unlimited number of uses.
* **Max Number of Uses per Customer**: Limit the number of uses per customer. Each customer is identified by their unique email address. Leaving this field empty allows unlimited uses per customer.
* **Minimum Purchase Quantity**: Set the minimum number of tickets or registrations that must be in the order before this code can be applied. Leave at `0` (or blank) for no minimum requirement.
* **Apply to Number of Items** *(dollar-type discounts only)*: Controls how a dollar-amount discount is applied at checkout. Leave blank to apply the discount once to the order subtotal (this is the default behavior, and setting it to `0` or `1` has the same effect). Enter a number to apply the discount individually to that many items — for example, setting this to `5` on a $5-off code means each of the first 5 tickets in the cart receives $5 off.
{% hint style="info" %}
**Per-item vs. subtotal — a quick comparison (dollar-type discounts):**
* **$5 off the subtotal** — Set Discount Amount to `5`, Discount Type to **Dollars**, and leave Apply to Number of Items blank. The $5 is deducted once from the order subtotal.
* **$5 off per ticket, up to 10 tickets** — Same setup, but enter `10` in Apply to Number of Items. Each of the first 10 tickets in the cart receives $5 off individually.
* **$5 off per ticket, unlimited** — Same setup, but enter a high number like `9999` in Apply to Number of Items.
{% endhint %}
### Saving Your Code
Finally, click "Save" to add the new discount code to your account. After saving your new code, you will be returned to the main [**Discount Codes** screen](#discount-codes-overview). By default, new discount codes are set to *Active* status. This indicates that the code will be effective either immediately or on its Start Date, if specified. [Read more about statuses.](#understanding-and-managing-discount-code-status)
{% hint style="info" %}
**What if two discounts have the same code?**
In the event that you need two identical codes, the code that was most recently created (the one closest to the top of the list) will take precedence.
{% endhint %}
***
## Discount Codes Overview
The main **Discount Codes** screen serves as your central hub for managing and monitoring all the codes in your CrowdWork account. Additionally, you can add a new discount code by clicking the blue **+ Create New Discount** button .
Main Discount Codes admin screen on CrowdWork
### Create New Discount
From this screen you can also begin creating a new discount code by clicking the blue **+ Create New Discount** button . This will allow you to set up a fresh discount code to attract and reward your patrons. [Read above for info on creating a new discount code.](#creating-a-new-discount-code)
### Existing Codes
The table on this screen displays all the discount codes you have created, with the most recently created codes appearing at the top. It includes the following details for each:
* **SHOW OR CLASS**: Displays where the discount can be applied — which events, tiers, tags, or memberships are eligible. A tier-name rule appears here as *Any tier named "General Admission"*. Names of individual **Tags**, **Shows**, or **Classes** in bold can be clicked to visit their respective admin page for further information and customization.
* **CODE**: This is the custom code that patrons will enter to receive the discount.
* **TYPE**: Indicates whether the code provides a discount in *Dollars*, *Percentage*, or *Tickets*.
* **AMOUNT**: Displays the value of the discount, either in *dollars off*, as a *percentage*, or the *number of tickets* offered.
* **TIMES USED**: Shows how many times the code has been utilized by patrons.
* **STATUS**: Indicates whether the code is currently *Active* or *Paused*. [Read more about statuses.](#understanding-and-managing-discount-code-status)
* **Edit Link**: Provides a shortcut to edit the code details, activate, pause, or delete the code. [Read more about Editing a Discount Code.](#editing-a-discount-code)
#### Scrolling on Mobile
{% hint style="info" %}
**On mobile devices and smaller screens**, you may need to horizontally scroll on your list of discount codes to see the entire row.
{% endhint %}
***
## Editing a Discount Code
The **Edit Discount Code** screen provides everything you need to modify and manage a discount code.
### Accessing Edit Screen
To modify a discount code, start from the main [**Discount Codes**](https://crowdwork.com/dashboard/discounts) screen in your account Dashboard. Then locate the code you wish to edit within the list of all discounts. Then, click on the **Edit** link in the table row of that specific code.
{% hint style="info" %}
**On mobile devices and smaller screens**, you may need to scroll horizontally on your list of discount codes to see the entire row. The **Edit** link is located in the far right column of the table. [*See example image above*](#scroll-left-to-right).
{% endhint %}
### Editing Process
When editing a discount code, the process is similar to creating a new code ([see here](#creating-a-new-discount-code)). However, these additional features available:
* **Current Status**: The current status of the discount code is displayed at the top of the screen as either
* **Discount Active**
* **Discount Paused**
* **Status Toggle**: You can easily switch the status of the discount code between Active and Paused using the toggle button. The change will take effect immediately.\ \
* **Delete Button**: A red button is provided to delete the discount code from your account. Please note that this action is irreversible, and the code will be immediately and permanently removed from our system.\
[Read more about Understanding and Managing Discount Code Status.](#understanding-and-managing-discount-code-status)
Edit Discount Codes and Manage Status from the Edit Screen on CrowdWork
***
## Understanding and Managing Discount Code Status
Discount codes are powerful tools for theaters to attract and engage patrons through exclusive promotions and incentives. However, effectively managing discount codes requires a clear understanding of their status and how to control them. This section will delve into the meaning of discount code statuses, their practical use, and the best practices for managing them within your account.
### Meaning of Discount Code Status
Discount code status refers to whether a particular code is currently active and available for use, or paused/disabled and not valid for redemptions. Discount codes can have two primary statuses:
1. **Discount Active** \
*Active* status indicates that the discount is enabled and the code can be utilized by patrons for the selected events. However, even if a code is marked as Active, patrons can only redeem it within the specified Start and End Dates, if applicable.
2. **Discount Paused** \
When a discount is *Paused*, the code is temporarily disabled and cannot be used by patrons for discounts. This status is useful when you need to temporarily stop a promotion without deleting the code entirely.
Understanding these statuses helps theaters control the availability and usage of their discount codes effectively.
### Managing Discount Code Status
Managing discount code status on CrowdWork is straightforward and user-friendly. Here's a step-by-step guide to handling discount code statuses:
1. **View or Change Status**: The current status of each discount code is prominently displayed in two locations:
* on the main **Discount Codes** overview screen as **Active** or **Paused**; and
* at the top of the **Edit** screen for a specific code as or
2. **Activating and Pausing**: On the **Edit** screen of a discount code, you can toggle the status of a discount code between active and paused by clicking the button next to the status indicator. The change will take effect immediately.\ \
3. **Deleting**: If a discount code needs to be removed entirely, use the red **Delete** button on the **Edit** screen. Be mindful that deleting a code is irreversible, and the code will be immediately and permanently removed from our system.\
Manage Discount Code Status from the Edit Screen on CrowdWork
{% hint style="info" %}
**Giving out free tickets?** A 100% discount code is one way to issue complimentary tickets (comps) for staff, performers, or advance guests. For all the ways to issue comps — including free memberships for recurring access — see [Issuing Complimentary & Free Tickets](/for-theatres/issuing-comps).
{% endhint %}
***
## Looking for Something Beyond a Discount Code?
Discount codes are flexible, but CrowdWork also has dedicated features that might be a better fit depending on what you're trying to accomplish:
{% hint style="success" %}
**Offering ongoing free or discounted access to shows?** A [Membership](https://docs.crowdwork.com/for-theatres/setting-up-memberships) tier — even a free one at $0 — lets patrons reserve their own seats through the normal checkout flow without needing a code each time. Great for staff, performers, season subscribers, or community access programs. See [Setting Up Memberships](https://docs.crowdwork.com/for-theatres/setting-up-memberships) to get started, or try our [Memberships Quick Start Guide](https://docs.crowdwork.com/the-academy/crowdwork-academy/memberships-quick-start-guide).
{% endhint %}
{% hint style="success" %}
**Packaging multiple events together at a special price?** [Bundles](https://docs.crowdwork.com/for-theatres/setting-up-bundles) let you group tiers from different shows and classes into a single discounted purchase — like a "dinner and a show" deal or a multi-class workshop pack. Patrons buy the bundle as one transaction and receive admissions to each included event. See [Setting Up Bundles](https://docs.crowdwork.com/for-theatres/setting-up-bundles).
{% endhint %}
***
We know the world of theatre marketing can be overwhelming. By effectively managing discount codes, CrowdWork can help you optimize promotional efforts, engage patrons, and boost ticket sales. And if you ever need assistance or have further questions, [our team is always ready!](/contacting-support)
# Setting Up Donations
Accept donations from your patrons at checkout, on a dedicated public Donations page, or both. Configure where donations appear, customize your campaign message, and track contributions over time.
Donations let your patrons rally behind a season, a building project, an outreach program — or just keep the lights on. CrowdWork lets patrons donate **at checkout** when they're already buying a ticket, **on a dedicated public Donations page** they can visit anytime, or both.
{% hint style="success" %}
**Quick start:** Your dedicated Donations page lives at `https://crowdwork.com/v/[your-subdomain]/donations`. Visit your [Theatre Details](https://crowdwork.com/dashboard/theatres/0/edit#section-donations) to enable donations, choose where they appear, and customize your campaign message.
{% endhint %}
***
## Where Donations Can Appear
You control where donations show up using the **Collect Donations** dropdown in your Theatre Details.
| Option | Where donations appear |
| -------------------- | ---------------------------------------------------------------------------------- |
| **Disabled** | Donations are turned off entirely. |
| **Everywhere** | At checkout **and** on your dedicated public Donations page. |
| **Only Events** | At ticket and registration checkout only — the dedicated Donations page is hidden. |
| **Only Public Page** | On your dedicated Donations page only — not at checkout. |
The Collect Donations dropdown in Theatre Details
***
## Turning On Donations and Setting Your Preferences
> **Direct link:** [Theatre Details — Donation Options](https://crowdwork.com/dashboard/theatres/0/edit#section-donations)
1. Navigate to **Theatre → Theatre Details** in your Dashboard sidebar.
2. Scroll to the **Donation Options** section.
3. Use the **Collect Donations** dropdown to choose where donations appear *(see the table above for what each option does)*.
4. *(Optional)* Add a **Donation Campaign Text** message — see [Customizing Your Donation Message](https://docs.crowdwork.com/for-theatres/setting-up-donations#customizing-your-donation-message) below.
5. Click **Save**.
The Donation Options panel in Theatre Details
***
## Customizing Your Donation Message
The **Donation Campaign Text** field lets you tell patrons what their donation supports. This message displays on your dedicated public Donations page — so a clear, specific call to action will go further than a generic thank-you.
> **Direct link:** [Theatre Details — Donation Options](https://crowdwork.com/dashboard/theatres/0/edit#section-donations)
**Some ideas to inspire your message:**
* Funding an upcoming season of performances or productions
* Supporting outreach, education, or scholarship programs
* Raising money for space improvements, renovations, or equipment
* Disaster relief or humanitarian causes your community cares about
* General operating support to keep the doors open
{% hint style="info" %}
**Running a time-bound campaign?** Update this text whenever your focus changes — like a year-end appeal or a renovation drive. The page URL stays the same; only your message rotates.
{% endhint %}
***
## Your Dedicated Donations Page
Every theatre with donations enabled gets a public Donations page at:
```
https://crowdwork.com/v/[your-subdomain]/donations
```
Replace `[your-subdomain]` with the subdomain that appears in your other CrowdWork URLs (your Shows page, Classes page, etc.).
### How to Find Your Donations Page
From your CrowdWork Dashboard menu, find **Public Links > Donations**. Click this link to open your dedicated Donations page in a new window.
Donations page link in Dashboard menu
### What Patrons See on the Donations Page
* **Three suggested amounts** — $25, $50, $100 — plus a **Custom Amount** field for any other amount
* **Their name and email** *(both required, so a receipt can be sent)*
* **An optional message** — patrons can include a short note with their donation
* **A "Cover the transaction fees" checkbox** — when checked, the patron pays a little extra so 100% of their intended donation reaches your theatre
* **Your campaign message** — the [Donation Campaign Text](https://docs.crowdwork.com/for-theatres/setting-up-donations#customizing-your-donation-message) you customized in Theatre Details
Your dedicated public Donations page
### The Donate Tab on Your Public Page
When donations are enabled on your public page (**Everywhere** or **Only Public Page**), a **Donate** tab automatically appears in your public site navigation alongside Shows, Classes, and Memberships. Patrons can find their way to your Donations page from anywhere on your CrowdWork pages with one click.
The Donate tab on your public page
***
## Promoting Your Donations Page
Your Donations page does its best work when supporters can find it easily. A few ways to point people there:
* **Add a Donate button to your website.** Link the button directly to `https://crowdwork.com/v/[your-subdomain]/donations`. Most website builders (WordPress, Squarespace, Wix, etc.) let you add a styled button with a custom link in a couple of clicks.
* **Include the link in your email signature and newsletter.** Especially effective for year-end campaigns and post-show thank-yous.
* **Share it on social media.** The page is a regular URL, so posts, link-in-bio tools, and stories all work normally.
* **Post QR codes around your venue.** Print a QR code that points to `https://crowdwork.com/v/[your-subdomain]/donations` on lobby signs, table cards, or programs, paired with a short prompt like *"Support our work"* or *"Like what you see? Donate."* Patrons can scan it with their phone camera and give before they've even left the building. See [Tips, Tools & Resources for Your Theatre](https://docs.crowdwork.com/the-academy/crowdwork-academy/tech-tips-and-tricks#creating-a-qr-code) for free ways to generate one.
* **Mention it in show programs and confirmation emails.** Patrons who just enjoyed a performance are often the most likely to donate — a small note in your global confirmation email text can go a long way. See [Customizing Your Theatre Settings](https://docs.crowdwork.com/for-theatres/customizing-your-theatre-settings#global-show-and-class-descriptions) for how to edit that.
***
## Tracking Donations
### Donation Reports in Analytics
> **Direct link:** [Analytics Dashboard](https://crowdwork.com/dashboard/analytics)
To see how much you've raised over a given time range:
1. Go to **Dashboard → Analytics → Charts**.
2. Set the **Starts At** and **Ends At** dates *(or pick a Preset Range)*.
3. In the **Report** dropdown, choose **Donations**.
4. Click **Search**.
You'll see a total dollar amount and a daily chart of donation activity over the selected period. For an accounting-ready donations total with line items and CSV export, see the [Donations report](https://docs.crowdwork.com/for-theatres/reports-and-analytics/donations-report).
The Analytics filter bar with Donations selected
### Finding Your Donors in the Customer List
> **Direct link:** [Customers Dashboard](https://crowdwork.com/dashboard/customers)
Anyone who donates — including supporters who give on your standalone Donations page — is added to your **Customers** list. Exporting that list is currently the most complete way to get a full roster of your donors alongside their contact details.
1. Go to **Dashboard → Customers**.
2. *(Optional)* Use the **Filters** to narrow the list before exporting.
3. Click the **Export CSV** button.
4. Open the spreadsheet and find the **`total donations`** column — it shows the total amount each patron has given.
For a breakdown of every column in the export, see [Exporting Your Data](https://docs.crowdwork.com/for-theatres/exporting-your-data#exporting-your-customer-or-student-list).
### Get an Email Every Time Someone Donates
> **Direct link:** [Notifications Dashboard](https://crowdwork.com/dashboard/notifications) | [+ Create New Notification](https://crowdwork.com/dashboard/notifications/new)
Set up a notification so that you (or anyone you choose) gets an email whenever a donation comes in — perfect for promptly sending a note of thanks to your generous supporters.
1. Go to **Dashboard → Notifications**.
2. Click **+ Create New Notification**.
3. In the **Notification Trigger** dropdown, select **Donation Received**.
4. Add the email address(es) that should be notified.
5. Click **Save Notification**.
For more on notification setup and other available triggers, see [Setting Up Notifications](https://docs.crowdwork.com/for-theatres/setting-up-notifications).
Creating a "Donation Received" notification
***
## Related Tasks
| Task | Guide |
| ---------------------------------------- | ---------------------------------------------------------------------------------------------------------------------------------- |
| **Configure your Theatre Settings** | [Customizing Your Theatre Settings](https://docs.crowdwork.com/for-theatres/customizing-your-theatre-settings) |
| **Get notified when donations come in** | [Setting Up Notifications](https://docs.crowdwork.com/for-theatres/setting-up-notifications) |
| **View your sales and donation reports** | [Exporting Your Data → Analytics](https://docs.crowdwork.com/for-theatres/exporting-your-data#viewing-sales-reports-and-analytics) |
| **Understand fees on transactions** | [Understanding CrowdWork Fees](https://docs.crowdwork.com/for-theatres/setup-your-theatre-account/understanding-crowdwork-fees) |
***
## FAQ
Are there fees on donations?
Donations go through the same payment processor as your tickets, so the standard processing fee applies to each donation. Patrons can opt to **cover the transaction fees** at checkout using the checkbox on the donation form — when they do, 100% of their intended donation reaches your theatre.
Do donors automatically get a receipt?
Yes. When a patron completes a donation, an email receipt is sent to the email address they entered on the donation form.
Can patrons donate without buying a ticket?
Yes — that's exactly what the dedicated Donations page is for. As long as your **Collect Donations** setting is **Everywhere** or **Only Public Page**, patrons can visit your Donations page anytime and contribute without going through a ticket purchase.
How do I turn off the public Donations page but still accept donations at checkout?
Set **Collect Donations** to **Only Events** in [Theatre Details](https://crowdwork.com/dashboard/theatres/0/edit#section-donations). Donations will appear during ticket and registration checkout, and the public Donate tab and dedicated Donations page will be hidden.
How do I see who donated?
A few options, depending on what you need:
* **Get an email each time** by setting up a **Donation Received** [notification](https://docs.crowdwork.com/for-theatres/setting-up-notifications) — the email includes the donor's details.
* **See totals over time** in the **Donations** report in your [Analytics dashboard](https://crowdwork.com/dashboard/analytics).
* **Get a full donor roster** by exporting your [Customers list](https://crowdwork.com/dashboard/customers) — the CSV includes a `total donations` column. See [Finding Your Donors in the Customer List](https://docs.crowdwork.com/for-theatres/setting-up-donations#finding-your-donors-in-the-customer-list) above.
***
## Need Help?
If you have questions about setting up donations or running a fundraising campaign, [contact our support team](https://docs.crowdwork.com/contacting-support) — we're here to help!
# Setting Up Gift Cards
This help article walks through how theatre managers and patrons can create and use gift cards within the CrowdWork system.
Our Gift Cards feature allows your patrons to effortlessly purchase, redeem, and check gift card balances on your theatre's CrowdWork page. You can activate and deactivate the Gift Cards feature at any time from your Dashboard.
{% hint style="success" %}
**✨ Special Feature**
**Gift Cards** is one of our **Special Features** — powerful tools to grow your revenue and deepen patron loyalty. These features are completely optional. When enabled, each one adds a 1% fee to all transactions. If your theatre passes fees on to customers (the default setting), they cost you nothing to use.
[Read more about Special Feature pricing >](https://docs.crowdwork.com/for-theatres/setup-your-theatre-account/understanding-crowdwork-fees#special-features)
{% endhint %}
{% hint style="success" %}
**Gift cards never expire**, but they can only be redeemed when the Gift Cards feature is activated on the theatre's account. When the feature is not enabled, the gift card will retain its value and will be eligible for redemption anytime the Gift Cards feature is re-activated.
{% endhint %}
Gift Cards in the CrowdWork Dashboard menu
## Activating Gift Cards
To get started, you'll need to activate the gift cards functionality from your Dashboard.
1. **Navigate** to the [**Gift Cards**](https://crowdwork.com/dashboard/gift-cards) section in the left menu.
2. **Click** the teal "Activate Gift Cards" button.
3. **Review** the information in the popup box (*see image below*).
4. **Confirm** by clicking "Activate Gift Cards" in the popup to enable the Gift Cards feature.
Activate Gift Cards modal in the CrowdWork Dashboard
> **Direct link:** [Gift Cards Dashboard](https://crowdwork.com/dashboard/gift-cards)
**Once activated**, there will be a few key changes to your account:
* An additional **1% fee** will be added to all online credit card purchases (if your theatre passes fees on to customers, this is covered by your patrons automatically)
* A new **"Gift Card" field** will appear on the checkout page, allowing patrons to enter a gift card code as payment
* A **"Gift Cards" tab** will be added to your public CrowdWork page where patrons can purchase new gift cards and check their balances
{% hint style="success" %}
**Deactivating**
You can deactivate the Gift Cards feature at any time from your Dashboard navigating to Gift Cards and clicking the yellow PAUSE button. Deactivating will remove the 1% fee and prevent patrons from buying or redeeming gift cards. However, the balances of any gift cards already issued will remain intact if you re-activate the feature later.
{% endhint %}
Gift Cards tab on a theatre's public page
***
## Creating New Gift Cards
There are two ways gift cards get created in the system:
1. **Theatres can manually generate gift card codes** of any value and assign them to any customers within the theatre's CrowdWork Dashboard. Read more here
2. **Patrons can purchase new gift cards** directly through the Gift Cards tab on the theatre's public page, which automatically creates and adds them to the theatre's Dashboard. [Read more here](#purchasing-gift-cards)
Create New Gift Card form with note about adding new customers first
### Manually Creating New Gift Cards
As a theatre admin, you can easily create a new gift card code in your theatre's CrowdWork account Dashboard. We always recommend adding new customers first, then proceed with generating the gift card code:
1. **Navigate:** On your Dashboard, go to [**Gift Cards**](https://crowdwork.com/dashboard/gift-cards) then click [**Create New Gift Card**](https://crowdwork.com/dashboard/gift-cards/new)
2. **Customers:** Select the purchaser and recipient patrons from the dropdown menus
* **If your purchaser/recipient are not found**, click the "Create a New Customer" link, add the new customers, then return to the gift card form
3. **Amount:** Enter the desired gift card amount in dollars
4. **Save:** Click Save to create the new gift card code
{% hint style="warning" %}
**Adding new customers before creating gift cards**
Gift cards can be redeemed for tickets to any shows or classes from the issuing theatre. However, only Customers (not Students nor User accounts) can be issued a valid gift card code. *Therefore, both the purchaser and recipient must already exist as customers in a theatre's account in order for a gift cards to be issued.*
If manually creating a gift card to/from a new patron, first add them as customers by either:
* clicking the "Create a New Customer" link under the Purchaser or Recipient selection fields on the New Gift Card form; or
* navigating to [**Customers**](https://crowdwork.com/dashboard/customers) in Dashboard menu, then clicking [**+ Add New Customer**](https://crowdwork.com/dashboard/customers/new)
{% endhint %}
***
## 🛒 Purchasing Gift Cards
For theatres that have the Gift Cards feature activated, patrons can purchase gift cards from the theatre's CrowdWork page. Gift cards are available in preset $25, $50 and $100 denominations, or a custom dollar amount can be entered. Patrons can optionally enter a personal message to be included in the gift card email sent to the recipient.
**When a new gift card is purchased online:**
* The full gift card value is immediately credited to the theatre's account.
* If applicable, new customers are automatically created in the theatre's account.
* The recipient will receive an email containing the new gift card code (and optional personal message). A receipt is emailed to the purchaser.
* CrowdWork will then automatically track the balance and deduct amounts whenever that gift card code is redeemed for purchases.
Gift Card purchasing form on CrowdWork
## 🎟️ Redeeming Gift Cards
When a theatre has activated the Gift Cards feature, patrons will be able to redeem gift card codes when making purchases. During the checkout process, there will be a "Gift Card code" field above the usual Credit Card fields. Entering a valid code will reduce the order total by that gift card's available balance.
**Only one gift card can be used per transaction**. The full amount of a gift card will be applied toward the total first. No fees are assessed on gift card payments.
**If the gift card balance covers the entire order total**, then no other payment is required.
**If there is still an amount due after the gift card is applied**, payment for the remaining total can be made via credit or debit card.
**If a gift card has credit remaining**, the same gift card code can be used multiple times until the card's balance is depleted.
{% hint style="info" %}
**Gift Cards are currently for online use only**
Gift cards can be used during checkout to pay for tickets to any show or class. However, at the moment, gift cards can only be redeemed online and cannot be used inside our [POS app for mobile devices](/for-theatres/setting-up-point-of-sale-pos).
{% endhint %}
Gift Card code entry during checkout on CrowdWork
## 💰 Checking Balances
While theatre admins can see all gift card balances in their account Dashboard, patrons can also easily check the balance of their personal gift cards. To view the current balance on a gift card code:
* Visit the Gift Cards section on the theatre's CrowdWork public page
* Under the large Gift Cards heading, select the "Check Balance" tab.
* Enter the gift card code and press the CHECK BALANCE button to view the amount of credit remaining for that code.
{% hint style="success" %}
**Gift cards never expire**, but they can only be redeemed when the Gift Cards feature is activated on the theatre's account. When the feature is not enabled, the gift card will retain its value and will be eligible for redemption anytime the Gift Cards feature is re-activated.
{% endhint %}
Check Gift Card Balance on CrowdWork
***
As always, if you have any other questions, don't hesitate to [reach out to our support team](https://github.com/bp-crowdwork/cw-gitbook/blob/gitbook/contacting-support/README.md) for assistance!
\\
# Setting Up Bundles
Learn how to create and manage bundles — grouping shows and/or classes together so patrons can purchase multiple event tiers in a single transaction at a set price.
Bundles let you group any combination of show tiers and class tiers together for purchase at a single set price. Patrons add the bundle in one click during checkout, and the system automatically assigns the next available date for each included event.
> **Direct link:** [Bundles Dashboard](https://crowdwork.com/dashboard/bundles)
***
## What Bundles Can Do
A Bundle pairs a **fixed set of tickets and/or items** together at one price. You decide exactly what's included when you build it, and every patron who buys it gets that same combination — with each included event automatically assigned to its next upcoming date. Bundles are built for **attaching something extra to a purchase**, not for letting patrons choose between options.
**Bundles are great for:**
* **Same-night upsells** — buy the 7pm show, add the 10pm show at a package price
* **Cross-promotion across dates** — buy this week's Friday show, get a ticket to a different show next Wednesday
* **Show + class combos** — pair a ticket with a related workshop
* **Non-ticket add-ons** — attach merch or concessions to a ticket purchase, like "Add a T-shirt" or "Add a drink"
**Bundles aren't built for:**
* **Letting a patron pick a date or show** — every bundle item assigns itself to that event's next upcoming date; patrons don't choose
* **Season passes or ongoing access** — for repeat attendance across a whole run, use [Memberships](https://docs.crowdwork.com/for-theatres/setting-up-memberships)
* **A menu of choices** — a bundle is one fixed package, not a pick-your-own selection
Here are two ways theatres use them:
**Show + Class Combo** — Pair a show ticket with a related workshop or class registration at a combined price. For example, bundle your Friday night show with your Saturday beginner improv class as an intro-to-your-theatre offer.
**Full Night Out** — If you run an early show and a late show on the same evenings, bundle a ticket to each as a full-night offer. Patrons get both shows in one purchase at a package price.
When a patron purchases a bundle, each included item is automatically assigned to the next available occurrence — so checkout is fast and seamless. You control which events display the bundle offer at checkout, so the same bundle can appear on multiple event pages even if those events have nothing to do with what's in the bundle.
{% hint style="info" %}
**Looking for season passes, unlimited access, or recurring attendance programs?** Those are best handled by [Memberships](https://docs.crowdwork.com/for-theatres/setting-up-memberships), which give patrons ongoing access to tagged events with flexible billing options. Bundles are designed for one-time package purchases at checkout.
{% endhint %}
***
## Creating a Bundle
Go to [**Dashboard → Bundles**](https://crowdwork.com/dashboard/bundles) and click **+ Create New Bundle**.
### Step 1 — Assign the Bundle to Events
The first field controls which events display this bundle as a purchase option during checkout.
* Type to search for a specific show, class, or tag
* Select **All Shows** or **All Classes** to show the bundle sitewide across that event type
* You can combine multiple selections (for example: "All Classes" plus one specific show)
**Exclude Specific Events** — Use this field to remove specific shows, classes, or tags from displaying the bundle, even if they'd be included by your broad assignment. For example: assign to "All Shows" but exclude one show that doesn't make sense with this bundle.
{% hint style="warning" %}
**Pay What You Want (PWYW) events:** If a bundle appears on a PWYW event, the bundle itself also becomes pay what you want. Check **Exclude PWYW Events** to prevent this and keep your bundle at its set price on all events.
{% endhint %}
### Step 2 — Name, Price, and Description
* **Bundle Name** — The name patrons see at checkout
* **Bundle Cost** — The flat price for the entire bundle. This is **not** automatically calculated from the included tiers — you set this price directly, which is how you create a discount or special value offer
* **Bundle Description (optional)** — A short description shown to patrons during checkout. Use this to explain the value, for example: *"Come to First Show and take our beginner workshop — bundled at a discount."*
### Step 3 — Bundle Items
This is where you define what's included. Each item is a specific pricing tier from a show or class — not an event as a whole.
1. Click **+ Add Item**
2. Type to search and select a tier (e.g. "The Friday Show • VIP Circle ($20.00)")
3. Repeat for each tier you want to include
4. To include the same tier more than once, simply add it multiple times — each entry counts as a separate admission
{% hint style="info" %}
**Items are selected by pricing tier.** If a show has multiple tiers (General, VIP, Student), you pick the specific tier(s) you want in the bundle — not the show as a whole. For example, you might bundle only the "General" tier of one show with the "Beginner" tier of a class.
{% endhint %}
{% hint style="warning" %}
**Each bundle item uses the next upcoming date.** When a patron purchases a bundle, each included event is automatically assigned to its next upcoming occurrence. If any included event has no upcoming dates, the entire bundle will not appear at checkout. Before creating or troubleshooting a bundle, confirm that every included event has at least one future date scheduled.
{% endhint %}
Click **Save Bundle** when finished.
***
## How Bundles Appear to Patrons
Bundles appear in the checkout modal alongside regular ticket tiers. Each bundle is displayed as a card with a **Bundle** badge, the bundle name, total price (including fees), and optional description. Patrons can toggle **Show Details** to see exactly which events and tiers are included, along with the next available date for each.
{% hint style="info" %}
**Automatic date assignment:** Bundles always use the next available occurrence for each included event at the time of purchase. Patrons don't choose dates — the system picks them automatically.
{% endhint %}
{% hint style="warning" %}
**A patron checking out for one event can purchase a bundle for different events entirely.** A bundle assigned to Event A may include tiers from Event B and Event C. A patron on Event A's checkout page can complete the bundle purchase and receive admissions to those other events — without purchasing anything for Event A. This is intentional. Use the bundle name and description to clearly communicate what patrons are getting.
{% endhint %}
***
## Managing Bundles
From the [Bundles dashboard](https://crowdwork.com/dashboard/bundles), you can see all your bundles with their included items, where they're assigned, cost, purchase count, and status. Click **Edit** on any bundle to modify it.
**Bundle status options:**
* **Active** — The bundle is live and visible at checkout
* **Paused** — The bundle is temporarily hidden from checkout but not deleted
* **Archived** — The bundle is retired and no longer shown to patrons
**Editing a bundle:** You can update a bundle's name, price, description, items, or assignment at any time by clicking **Edit** from the Bundles dashboard. Changes apply to future purchases only — existing orders are not affected.
***
## Bundles and Discount Codes
Discount codes can be applied to a specific bundle. When creating or editing a discount code, type the bundle name in the **Apply Discount** field — bundles appear alongside shows, classes, and tags as valid assignment targets.
{% hint style="success" %}
🥕 See [Setting Up Discount Codes](https://docs.crowdwork.com/for-theatres/setting-up-discount-codes) for full details on creating and managing discount codes.
{% endhint %}
***
## Bundle Orders and Reporting
When a patron purchases a bundle, the order appears in your [Orders dashboard](https://crowdwork.com/dashboard/orders) and in the relevant Tickets or Registrations screens for each included event.
**How costs are displayed:** Each tier in the bundle appears as a separate line item sharing the same Order ID. The cost shown per item is a proportional allocation of the total bundle price — the system distributes the bundle cost across included items based on their relative list prices.
**Custom checkout fields:** If any included events have custom checkout fields, those fields all appear during the bundle checkout. Patrons fill them out as part of the same transaction.
**Confirmation emails:** Bundle confirmation emails list all included items grouped together, rather than being tied to a single event name.
***
## Common Questions
Can I include the same tier in a bundle more than once?
Yes. Click **+ Add Item** multiple times and select the same tier each time. Each entry is a separate admission to that tier's next upcoming occurrence — so adding the same class tier twice gives the patron two admissions to the *same* session (handy for a bring-a-friend offer), not admissions to two different dates.
Can I bundle a multi-session or grouped-package class?
Yes — and the patron gets the full run, not just one session. A [grouped-package class](https://docs.crowdwork.com/for-theatres/creating-a-show-or-class#grouped-package-classes) included in a bundle enrolls the patron in the entire series, exactly as if they'd registered for the class directly.
One timing note: a grouped class stops selling once its first session has passed. Because a bundle can only be purchased while every included item is still available, a grouped class whose run has already started makes the whole bundle unavailable to purchase. Keep any grouped class in a bundle pointed at a run whose first session is still upcoming.
Can I bundle tiers from completely different, unrelated events?
Yes — bundles can include any combination of tiers from any shows and classes in your account, regardless of how unrelated they are.
What happens if a bundle is assigned to a Pay What You Want event?
If the bundle is displayed on a PWYW event, the bundle itself also becomes pay what you want. To prevent this, check **Exclude PWYW Events** when creating or editing the bundle.
Does purchasing a bundle let patrons choose their dates?
No. The bundle automatically assigns the next available occurrence for each included event at the time of purchase. Patrons cannot select specific dates when purchasing a bundle.
What if my event has multiple showtimes on the same day (e.g., 5pm and 8pm)?
The bundle assigns the **next available occurrence** — which is determined by date and time. If your Friday show has both a 5pm and an 8pm performance, the bundle will assign whichever is the next upcoming occurrence at the moment of purchase. The patron cannot choose between the two. If you need patrons to get a specific showtime, consider creating each time slot as its own separate show listing so you can include the exact tier you want in the bundle.
Can I see which orders came from a bundle purchase?
Yes. Bundle orders are visible in the [Orders dashboard](https://crowdwork.com/dashboard/orders). Within the order detail view, the bundle purchase is identified and the cost breakdown shows the proportional allocation across each included item.
Can a patron purchase both a bundle and individual tickets in the same checkout?
Yes. Bundles appear alongside regular ticket tiers in the checkout modal, so patrons can select a bundle and individual tickets in the same transaction.
Why isn't my bundle appearing at checkout?
A bundle only appears when all of its included items have availability for the next upcoming occurrence. If any included event is sold out for its next date, the bundle is hidden from checkout until availability opens up — for example, if a new occurrence becomes the next date, or if a cancellation frees up a spot. Check the capacity and availability of each event included in the bundle to identify the issue.
Can I use a bundle as a season pass?
Bundles are designed for one-time package purchases, not ongoing access programs. For season passes, festival badges, or any program where patrons get recurring or extended access to your events, [Memberships](https://docs.crowdwork.com/for-theatres/setting-up-memberships) is the right feature — it supports flexible billing (monthly, yearly, or one-time), usage limits, and automatic renewal. See the [Memberships Quick Start Guide](https://docs.crowdwork.com/the-academy/crowdwork-academy/memberships-quick-start-guide) to get started.
Can I apply a discount code to a bundle?
Yes. When creating a discount code, select the bundle by name in the Apply Discount field. See [Setting Up Discount Codes](https://docs.crowdwork.com/for-theatres/setting-up-discount-codes) for details.
***
## Related Tasks
| Task | Where to Find It |
| ---------------------------------------------- | ---------------------------------------------------------------------------------------------- |
| Create a bundle | [Dashboard → Bundles → + Create New Bundle](https://crowdwork.com/dashboard/bundles/new) |
| Apply a discount code to a bundle | [Setting Up Discount Codes](https://docs.crowdwork.com/for-theatres/setting-up-discount-codes) |
| View and manage bundle orders | [Dashboard → Orders](https://crowdwork.com/dashboard/orders) |
| Export order data | [Exporting Your Data](https://docs.crowdwork.com/for-theatres/exporting-your-data) |
| Create shows and classes to include in bundles | [Creating a Show or Class](https://docs.crowdwork.com/for-theatres/creating-a-show-or-class) |
| Set up pricing tiers for your events | [Creating a Show or Class](https://docs.crowdwork.com/for-theatres/creating-a-show-or-class) |
| Offer season passes or ongoing event access | [Setting Up Memberships](https://docs.crowdwork.com/for-theatres/setting-up-memberships) |
# Setting Up Memberships
Explore setting up and managing membership plans – a fantastic way to give your patrons easy access to shows and classes while creating steady, predictable revenue for your theatre.
{% hint style="warning" %}
**Are you a student or ticketholder? Check out our** [**Member's Guide to Memberships**](/for-ticket-holders/members-guide-to-memberships)**.**
**The following guide is for venue administrators and managers** who need to create and configure memberships for their events.
{% endhint %}
## What Are Memberships?
Think of memberships as your theatre's version of Netflix or Spotify - subscription plans that give your patrons awesome benefits, mainly free or discounted access to tagged shows and classes. This feature doesn't just help your bottom line - it transforms your whole business model:
* Create predictable, recurring revenue (goodbye, feast-or-famine ticket sales!)
* Build serious patron loyalty and community connection
* Boost attendance at your events (even those typically harder-to-fill slots)
* Make life easier for your regular attendees (no more "Do I want to pay for this show?" decisions)
* Offer season passes, festival badges, or VIP access programs
{% hint style="success" %}
**✨ Special Feature**
**Memberships** is one of our **Special Features** — powerful tools to grow your revenue and deepen patron loyalty. These features are completely optional. When enabled, each one adds a 1% fee to all transactions. If your theatre passes fees on to customers (the default setting), they cost you nothing to use.
[Read more about Special Feature pricing >](https://docs.crowdwork.com/for-theatres/setup-your-theatre-account/understanding-crowdwork-fees#special-features)
{% endhint %}
{% hint style="info" %}
**First time running a membership or subscription program?** Check out our [Quick Start Guide](/the-academy/crowdwork-academy/memberships-quick-start-guide) for simple setup steps, common questions and popular membership models to get you started quickly.
{% endhint %}
## Memberships Feature Details
When you activate the Memberships feature:
* A 1% fee is added to all transactions (not just membership-related ones). If your theatre passes fees on to customers (the default setting), this costs you nothing.
* You can turn it off anytime, but deactivation will terminate all active membership plans
* Members would need to sign up again if you later reactivate the feature
## Activating Memberships
To start offering memberships:
1. Navigate to the **Memberships** section in your Dashboard menu
2. Click the teal **Activate Memberships** button
3. Review the information in the popup
4. Confirm by clicking **Activate Memberships**
## Creating Membership Tiers
After activating memberships, you'll need to create at least one membership tier:
1. Go to **Memberships** → [**Manage Tiers**](https://crowdwork.com/dashboard/memberships/tiers) in your Dashboard
2. Click the [**+ Create New Membership Tier**](https://crowdwork.com/dashboard/memberships/tiers/new) button
3. Complete the membership tier form:
### Membership Tier Form Fields
* **Name**: What you want to call this membership level (e.g., "Monthly Access Pass," "Comedy Club Membership," "Season Pass")
* **Description**: Details about what's included in the membership (supports rich text formatting)
{% hint style="info" %}
**Need help with the description field?** See [Using the Rich Text Editor](https://docs.crowdwork.com/for-theatres/using-the-rich-text-editor) for formatting tips. Note that images and file attachments are not available in the Membership Tier Description field.
{% endhint %}
* **Cadence**: The billing frequency. Choose from:
* **Daily**: Renews every day (great for festivals or short-term events)
* **Weekly**: Renews every week
* **Monthly**: Renews every month (most common)
* **Yearly**: Renews every year (ideal for season passes)
* **Once**: One-time charge with no recurring billing (perfect for season tickets, festival badges, or single-purchase access passes)
* **Price**: The amount charged per billing period (can be set to $0.00 for free memberships)
{% hint style="warning" %}
***Factor any fee costs into your membership pricing when setting your price.***
**Fees are always absorbed on membership purchases.** Regardless of your theatre's fee settings, transaction fees on all membership transactions are never passed on to the patron. This ensures members are always charged a predictable, consistent amount each billing cycle.
{% endhint %}
* **Select Show or Class**: What the membership covers. Pick whole events, tags, individual ticket tiers, *All Shows*/*All Classes*, or an **"Any tier named…"** rule that keeps covering events you create later. [See Choosing What a Membership Covers >](#choosing-what-a-membership-covers)
* **Exclude Specific Events or Tiers** *(optional)*: Carve something back out of what you just included — a show, a class, a tag, one ticket tier, or a tier name. [See Choosing What a Membership Covers >](#choosing-what-a-membership-covers)
* **Member Benefit**: What members receive on the admissions your tier covers. Choose from:
* **Free Admission**: members claim covered admissions at $0 — the classic membership behavior, and the default
* **Percent Off**: members pay a reduced price — a set percentage off each covered admission
* **Dollars Off**: members pay a reduced price — a set dollar amount off each covered admission
* **Benefit Amount**: Appears once you choose Percent Off or Dollars Off. Enter the percent (like 20%) or the dollar amount (like $5) that comes off each covered admission.
* **Max Uses per Renewal** *(optional)*: How many *different showtimes* a member can claim per billing period. Leave blank for unlimited. [See how the two limits differ >](#how-often-a-member-can-claim-the-benefit)
* **Password** *(optional)*: Set a password requirement to enroll in this membership tier (useful for VIP or exclusive memberships)
* **Admissions per Use** *(optional)*: How many admissions receive the member benefit *at a single showtime*. Defaults to 1 — raise it when a membership should cover a member plus a guest, or a whole household. [See how the two limits differ >](#how-often-a-member-can-claim-the-benefit)
4. Click **Save Group** to create the membership tier
***
## Choosing What a Membership Covers
Coverage is the part of a membership tier worth slowing down for. It is built in two steps, and the second step is what makes precise offers possible:
1. **Include** — in the **Select Show or Class** field, add everything the membership should cover.
2. **Exclude** *(optional)* — in the **Exclude Specific Events or Tiers** field, carve pieces back out.
CrowdWork assembles everything in the first field, then removes everything in the second. You can leave the second field empty; most simple memberships do.
### The five ways to include coverage
Click the **Select Show or Class** field and type to search. Options are grouped, and you can mix as many as you like:
* **By Type** — *All Shows* or *All Classes*. Covers everything of that type, including events you create later.
* **A whole event** — shown as *Event Name - All Tiers*. Covers every ticket tier on that one event.
* **One ticket tier of one event** — shown as *Event Name - Tier Name ($Price)*. Covers only that price point on that one event.
* **A** [**tag**](/for-theatres/tags) — covers every event carrying that tag, including events you tag later.
* **Dynamic Tier Names** — shown as *Any tier named "General Admission" (12 tiers)*. Covers every ticket tier with that name across your whole account, on events that exist now *and* events you create later. This is the one that does the most work for the least maintenance.
An event with a single ticket tier appears as one plain entry rather than an *All Tiers* row plus a tier row — there is nothing to choose between.
### "Any tier named…" — the rule that covers events you haven't created yet
Most theatres reuse the same tier names on every event: every show sells a *General Admission*, a *Student*, a *VIP*. Picking those tiers one event at a time means hundreds of clicks, and the list goes stale the moment you add next month's shows.
An **Any tier named "…"** option saves the *name* instead of the list. Every time a member checks out, CrowdWork looks at that event's ticket tiers and applies the membership to any tier carrying that name. Add a show six months from now with a *General Admission* tier and it is covered the day you create it — no edit to the membership.
{% hint style="warning" %}
**It matches the whole name, not a keyword inside it.**
*Any tier named "General Admission"* matches a tier called *General Admission*, *general admission*, or *General Admission* with stray spaces around it — capitalization and surrounding whitespace are ignored. It does **not** match *General Admission + Featured Cocktail*, *General Admission (Late Show)*, or any other longer name. Those are separate names, and each has its own *Any tier named…* option in the list.
That is usually exactly what you want — it is how a membership covers the plain seat and leaves the upgrade to be paid for. But if you expected a partial match, this is where the surprise lives.
{% endhint %}
The number in each option — *(12 tiers)* — is how many ticket tiers carry that name in your account **today**. An option reading *(no tiers currently)* is a rule you saved earlier whose name no longer matches anything; it stays in the list so a saved selection never silently disappears, and it will start matching again if you create a tier with that name.
### Select all by keyword — a shortcut, not a rule
Under both pickers is a **Select all by keyword** box with a **Select All Matches** button. It is easy to mistake for the tier-name rule above; it is a different tool.
Type a word and it filters the list you are looking at, matching that text *anywhere* in an option's label. Click **Select All Matches** and every currently matching option is added to your selection at once. The line underneath reports how many options match and how many aren't selected yet.
{% hint style="warning" %}
**The keyword box matches loosely — check what it grabbed.**
Because it matches any part of an option's label, typing `General Admission` selects the *Any tier named "General Admission"* rule **and** the *Any tier named "General Admission + Featured Cocktail"* rule, plus every individual *Event Name - General Admission* tier, plus any event whose own name happens to contain those words.
That is the fast way to build broad coverage, and the easy way to cover something you meant to leave out. After clicking **Select All Matches**, read back the chips in the field and remove anything you didn't intend.
{% endhint %}
### The coverage line — check this before you save
As you build a selection, a line under the field reports what it actually resolves to: *"Currently covers 34 ticket tiers across 12 events."* When a tier-name rule is part of the selection it adds *"Tier-name rules keep applying to events you add later."* If nothing matches, it says so plainly: *"This selection doesn't match any ticket tiers right now."*
The count updates as you add and remove items in both fields, so it reflects your exclusions too. It counts your **current** events — a tier-name rule will go on covering events beyond that count as you create them, which is what the extra sentence is telling you.
{% hint style="success" %}
**✨ A rule that quietly matches nothing is the failure worth catching.** If you name a tier slightly differently from how it is spelled on your events, the membership will simply never apply and nothing will look broken. A glance at this line before saving catches it.
{% endhint %}
### Excluding events and tiers — two different effects
The **Exclude Specific Events or Tiers** field takes shows, classes, tags, individual ticket tiers, and *Any tier named…* rules. What an exclusion *does* depends on which kind you pick:
* **Exclude an event or a tag** → the membership stops applying to those events entirely. Use this for "all our shows except this one benefit night."
* **Exclude a ticket tier or a tier name** → the membership still applies to the event; it just won't cover that tier. Members claim their benefit on the other tiers and pay full price for the excluded one.
{% hint style="info" %}
**To exclude a tier everywhere, exclude the tier \_name**\_\*\* — not the individual tier.\*\*
Excluding *Event Name - VIP ($40)* excludes the VIP tier **on that one event only**. Excluding *Any tier named "VIP"* excludes it across every event that has one, including events you create later. When you want a standing rule, pick the **Any tier named…** option in the exclude field.
{% endhint %}
### Common coverage setups
**Members get into everything.** Include *All Shows* (and *All Classes* if you want both). Leave the exclude field empty.
**Members get the standard seat, but pay for the upgrade.** Say every show sells a *General Admission* tier and a *General Admission + Featured Cocktail* tier, and the cocktail should never be free. Two ways to set it up, both durable:
* **Include only what you want covered** — put *Any tier named "General Admission"* in the include field and nothing in the exclude field. The membership covers general admission on every event that sells it, now and in future, and touches nothing else.
* **Include broadly, then carve out** — put *All Shows* in the include field and *Any tier named "General Admission + Featured Cocktail"* in the exclude field. Members get every other tier and pay for the cocktail. Better when new tier names appear often and you'd rather cover them by default.
**A membership for one series or festival.** [Tag](/for-theatres/tags) the events, then include the tag. Anything you tag later joins automatically.
**A members-only night at a member price.** Include the single event, set **Member Benefit** to *Percent Off* or *Dollars Off*, and members see the reduced price at checkout instead of $0.
### Editing coverage later
Coverage is re-evaluated at checkout, not frozen at signup. Editing a tier's included or excluded selections changes what **current** members can claim from that moment on. Price changes behave differently — they only apply to members who enroll after the edit.
***
## How Often a Member Can Claim the Benefit
Two fields sound similar and do different jobs. Setting the wrong one is one of the easier mistakes to make here.
* **Admissions per Use** — how many admissions get the benefit **at a single showtime**. Defaults to 1. Set it to 2 for a member-plus-guest membership, or 4 for a household pass.
* **Max Uses per Renewal** — how many **different showtimes** a member can claim in a billing period. Blank means unlimited. A flex pass good for five shows a month is `5`.
They stack: *Admissions per Use* = 2 with *Max Uses per Renewal* = 5 gives a member five outings a month with a guest on each — up to ten admissions, but never more than two at any one showtime.
{% hint style="info" %}
**"Showtime" means one specific date \_and**\_\*\* time.\*\*
If a show runs at 7:00 PM and 9:00 PM on the same day, those are two separate showtimes. A member with the default settings can claim one admission at the 7:00 PM and one at the 9:00 PM — and each one counts separately against **Max Uses per Renewal**. If you want a run capped by day rather than by performance, program it as a single showtime.
{% endhint %}
Two more behaviors worth knowing, both automatic:
* **The benefit goes to the most expensive eligible seats first.** If a member's cart holds more covered admissions than their allotment, CrowdWork applies the benefit to the highest-priced ones and charges normally for the rest — the member always gets the best outcome available to them.
* **Only one membership applies per checkout.** A patron can hold as many memberships at your theatre as they like. At checkout CrowdWork uses the single one that saves them the most on that order rather than combining them.
{% hint style="info" %}
**A use is only spent when the benefit is actually worth something.** If a covered admission is already free, or a *Dollars Off* benefit has nothing to come off, no use is consumed. Members don't burn a flex-pass slot on a $0 seat. Membership benefits do not apply to [bundle](/for-theatres/setting-up-bundles) purchases.
{% endhint %}
***
## Membership Types & Use Cases
### Recurring Memberships
Perfect for ongoing access to your regular programming:
* **Monthly Comedy Pass**: $25/month for unlimited access to all comedy shows
* **Class Membership**: $50/month for unlimited access to all classes
* **VIP Membership**: $75/month for priority seating and member-only events
### One-Time Memberships
Great for special situations where recurring billing doesn't make sense:
* **Season Pass**: One-time $150 payment for access to entire 6-month season
* **Festival Badge**: One-time $40 payment for weekend festival access
* **Workshop Series**: One-time $200 payment for 8-week intensive course
### Free Memberships
Useful for building community or offering special access:
* **Student Membership**: Free tier for students (password protected)
* **Volunteer Access**: Free membership for your volunteers
* **Patreon Supporter Access**: Free tier for existing Patreon supporters
* **Performer & Cast Comp Access**: Free membership for cast, crew, and performers to reserve their own complimentary seats each run
{% hint style="info" %}
**Using memberships to manage comps?** Free memberships are one of the most efficient ways to handle recurring complimentary tickets — patrons self-serve without any admin effort on your end. [See the full guide to issuing complimentary tickets.](/for-theatres/issuing-comps)
{% endhint %}
### Limited-Use Memberships
When creating your Membership Tier, use the **Max Uses per Renewal** setting to control access frequency while maintaining value. Common campaigns include:
* **Flex Pass**: $30/month for up to 5 shows
* **Date Night Pass**: $40/month for up to 2 shows
* **Premium Access**: $60/month for up to 10 events plus merch or concessions
***
## Understanding Membership Fees & Pricing
### How Membership Fees Work
Unlike regular ticket sales, membership transactions do not follow your theatre's fee settings. Even if your fee settings are configured to pass fees on to customers, membership fees are always absorbed by the theatre rather than passed to the member.
This design choice exists for several important reasons:
* **Subscription model psychology**: Hidden fees on memberships feel deceptive to customers who expect one clear price
* **Competitive positioning**: Most subscription services (Netflix, Spotify, gym memberships) show one all-inclusive price
* **Processing complexity**: Recurring billing with variable fees creates reconciliation and accounting complications
* **Customer experience**: It's much cleaner to say "membership is $30/month" rather than "$30/month + processing fees"
### Pricing Strategy
When setting your membership prices, we recommend building processing fees into your tier pricing. For example, if you want to net $30 after fees, price your membership at $35 to account for the absorbed processing costs.
## How Memberships Work
### Key Features
* **One Admission Per Showtime**: By default, a member's benefit applies to one admission at each covered showtime. A show playing at 7:00 PM and 9:00 PM on the same day is two showtimes, and a member can claim at each. Raise **Admissions per Use** to cover more than one seat at a showtime
* **Free or Discounted**: A tier can give free admission, a percentage off, or a dollar amount off — set with **Member Benefit**
* **Tier-Level Coverage**: Include or exclude individual ticket tiers — or every tier sharing a name, across events you haven't created yet — so a membership can cover a standard seat while leaving a premium or add-on tier for members to pay for. [See Choosing What a Membership Covers >](#choosing-what-a-membership-covers)
* **Usage Limits**: Cap how many different showtimes a member can claim per renewal period with **Max Uses per Renewal**
* **Password Protection**: Restrict membership enrollment with passwords
* **Public Events**: Memberships work with public events through tagging
* **Unlisted Events Option**: For "members-only" events, create unlisted events and share links only with members
### Member Login Requirement
Members must be logged in to their CrowdWork account when purchasing tickets for their membership benefits to apply automatically. When logged in, covered events show their member price during checkout — $0 on a Free Admission tier, or the reduced price on a Percent Off or Dollars Off tier.
### Billing & Renewal
* Initial charge occurs immediately when a patron signs up
* **Recurring memberships**: Renewals happen on the same calendar date each period (e.g., signup on the 5th = bill on the 5th of each month)
* **One-time memberships**: No renewal charges - access continues based on event eligibility
* Renewals are processed around 11am Central Time daily
* Payment failures for recurring memberships trigger an automatic retry sequence:
* First retry after 24 hours
* Second retry after another 24 hours
* Final retry after an additional 24 hours
* If those attempts don't succeed and the member has another card on file, we'll try that card too
* The membership may be deactivated if all cards fail
{% hint style="warning" %}
***Factor any fee costs into your membership pricing when setting your price.***
**Fees are always absorbed on membership purchases.** Regardless of your theatre's fee settings, transaction fees on all membership transactions are never passed on to the patron. This ensures members are always charged a predictable, consistent amount each billing cycle.
{% endhint %}
### Password-Protected Memberships
When you set a password for a membership tier:
* A password field automatically appears on your public membership page
* Only people with the password can enroll in that tier
* Useful for exclusive access programs, student discounts, or VIP memberships
* The password field only shows if you have at least one active password-protected tier
### Discount Codes for Memberships
You can offer discount codes for membership tiers:
1. Create discount codes in your **Discount Codes** section
2. When selecting events to apply the discount to, your membership tiers will appear as options
3. Discount code fields automatically appear on your membership page when active codes exist
4. Great for promotional campaigns, existing supporters, or special offers
{% hint style="info" %}
**Important:** Discount codes applied to a membership tier discount the **membership purchase itself** (the signup or renewal price) — they do not give members an ongoing discount on individual ticket purchases. Members receive their benefit on the events the tier covers simply by logging in and checking out — $0 on a Free Admission tier, or the reduced price on a Percent Off or Dollars Off tier. To give members a break on events the tier *doesn't* cover, create a separate discount code and share it with your members directly.
{% endhint %}
### Season Ticket Considerations
For traditional season ticket programs where patrons expect one ticket per production (not per occurrence), the current system works best when combined with the Max Uses feature. For example, if you have a 5-show season, set Max Uses to 5. While this doesn't prevent a member from using all 5 tickets on one show that runs multiple weeks, it approximates traditional season ticket behavior for most use cases.
## Managing Individual Memberships
To view and manage individual member subscriptions:
1. Navigate to **Memberships** → [**Members**](https://crowdwork.com/dashboard/memberships) in your Dashboard
2. Search for specific members using the search field
3. Click on a member to view their details
4. From the member details page, you can:
* **Pause Membership**: Temporarily suspends benefits and shifts renewal date forward (recurring memberships only)
* **Cancel Membership**: Terminates membership at end of paid period
* **View Membership History**: See past renewals and changes
### Tracking Member Activity
Since members "purchase" tickets even when using their membership benefits, their activity appears in your regular dashboard sections:
* [**Orders**](https://crowdwork.com/dashboard/orders): All membership-based ticket purchases show here as $0 transactions
* [**Tickets**](https://crowdwork.com/dashboard/tickets): Individual ticket records for shows
* [**Registrations**](https://crowdwork.com/dashboard/registrations): Individual registration records for classes
This allows you to track member attendance and engagement using the same tools you use for regular ticket holders.
## Pausing vs. Cancelling
### **Pause Functionality** *(Recurring memberships only)*:
* Temporarily suspends access to benefits
* Shifts renewal date forward by the same number of days paused
* Member can still reactivate their membership
* No immediate charges upon reactivation, follows normal billing cycle
### **Cancel Functionality**:
* Terminates membership at the end of the paid period
* Access remains until end of current paid period (for recurring) or based on event dates (for one-time)
* Cannot be reactivated (new signup required)
* When members cancel themselves, they see this message: "If you cancel, your membership will remain active until the end of your current billing period. After that, you'll lose access to all member features. *This action cannot be undone.*"
### **Refunds**
* By default, there are no prorated refunds when memberships are cancelled
* If you want to issue a refund as a theatre admin, find the transaction and click the refund button
* For detailed refund procedures, see the Issuing Refunds guide
## Tracking Membership Revenue
Membership revenue appears in your Square Dashboard alongside other sales. You can identify membership transactions by:
1. Logging into your Square Dashboard
2. Navigating to the Sales section
3. Looking for transactions labeled as "Membership"
## Best Practices for Memberships
### Pricing Strategy
* **Recurring Value Calculation**: Price recurring memberships so they feel like a steal! If tickets are $15 and members might attend 2 shows per month, price around $25-30. They save money, you get reliable income - win-win!
* **One-Time Value**: For season passes or festival badges, price below what individual tickets would cost for the full season — if you're not sure where to start, try 20–30% off the full-season total
* **Free Tier Benefits**: Use free memberships to build community and convert casual attendees into regular supporters
* **Psychological Pricing**: Set price points where members feel they "break even" after 2-3 events. Once they've hit that point, every additional show feels completely free, which encourages more attendance
* **Account for Fees**: Remember to build processing fees into your membership pricing since they're absorbed by the theatre
### Membership Program Design
* **Limited Use Strategy**: Offer tiers with usage limits (like "5 shows per month") to create urgency and encourage regular attendance
* **Password Protection**: Use passwords for exclusive tiers, student discounts, or special promotions
* **Mixed Offerings**: Consider offering both unlimited and limited memberships to appeal to different patron types
### Tag Management
* Create specific tags for membership-eligible events
* Consider creating different tags for different membership tiers
* Use descriptive tag names to help you identify membership content
### Communication
* Clearly explain membership benefits on your Public page
* Send welcome emails to new members explaining how to use their membership
* Remind members of upcoming events that are included in their membership
* For limited-use memberships, let members know how many uses they have remaining
* Remind members to log in when purchasing tickets to receive their benefits
## FAQs for Theatre Administrators
**Q: Can members book multiple tickets for the same show?**\
A: By default a member's benefit applies to one admission at each covered showtime. A showtime is a specific date *and* time, so a show playing twice in one evening gives a member a claim at each performance. Raise **Admissions per Use** on the tier when you want the benefit to cover more than one seat at a single showtime — that's how you build a member-plus-guest or household membership.
**Q: How do members redeem their benefit?**\
A: Members must be logged in to their CrowdWork account and still "purchase" tickets through the normal checkout process. On covered events the price shows as $0 on a Free Admission tier, or already reduced on a Percent Off or Dollars Off tier.
**Q: Can we limit how many shows a member can attend per month?**\
A: Yes! Use the **Max Uses per Renewal** field when creating a membership tier. Leave it blank for unlimited access, or set a number like `5`. It counts *different showtimes* — a member who brings a guest to one performance has used one of their five, not two. [More on the two limits >](#how-often-a-member-can-claim-the-benefit)
**Q: Can a membership cover one ticket tier but not another?**\
A: Yes, and there are two ways to do it. Either include only the tier you want covered — pick *Any tier named "General Admission"* in **Select Show or Class** — or include the show broadly and put the tier you want left out in **Exclude Specific Events or Tiers**. Choosing the *Any tier named…* option in either field makes the rule stand for events you create later too; choosing one event's individual tier applies only to that event. [Full walkthrough >](#choosing-what-a-membership-covers)
**Q: Can members get a discount instead of free admission?**\
A: Yes. Set **Member Benefit** to *Percent Off* or *Dollars Off* and enter a **Benefit Amount**. Members then pay a reduced price on covered events rather than $0 — useful when free entry is more than you want to give on a premium tier but you still want members to feel the value.
**Q: Can a membership cover more than one seat at a showtime?**\
A: Yes — raise **Admissions per Use** above its default of 1. That is how you build a membership covering a member plus a guest, or a whole household.
**Q: Will a membership cover shows we haven't created yet?**\
A: Yes, if you set it up that way. *All Shows*, *All Classes*, a [tag](/for-theatres/tags), and any *Any tier named "…"* rule all keep applying to events you add later. Picking individual events or individual ticket tiers covers only what existed when you saved. [More on tier-name rules >](#choosing-what-a-membership-covers)
**Q: A member holds two of our memberships. Do they stack?**\
A: No — at checkout CrowdWork applies the single membership that saves them the most on that order. Patrons can hold as many of your memberships as they like; they just won't combine on one purchase.
**Q: Can we offer free memberships?**\
A: Absolutely! Set the price to $0.00 when creating a membership tier. This is great for student memberships, volunteer access, or building community engagement.
**Q: How do one-time memberships work?**\
A: Select "Once" as the cadence when creating the tier. Members pay once and get access based on your event selection until their access expires or you modify the tier.
**Q: Do we need to set up special shows for members?**\
A: No special setup is needed beyond tagging events correctly. For members-only events, you can use unlisted events and share links only with members.
**Q: What happens if we deactivate the Memberships feature?**\
A: All existing memberships will be immediately terminated (not paused), and members will need to sign up again if you reactivate the feature.
**Q: Can members switch between different membership tiers?**\
A: There's no switching needed! Your patrons can subscribe to as many different membership types as they want. If they want to move from one tier to another, they can simply cancel the current one and sign up for a different tier. Or they might want multiple memberships simultaneously - our system is designed for flexibility, allowing you to create exactly the program that works for your community.
**Q: How do password-protected memberships work?**\
A: Set a password when creating the tier. The password field automatically appears on your public membership page only when you have active password-protected tiers. Anyone with the password can enroll in that specific tier.
**Q: Can we offer discounts on memberships?**\
A: Yes! Create discount codes in your Discount Codes section and select your membership tiers when choosing what the discount applies to. The discount code field appears on your membership page when active codes exist.
**Q: Why don't membership fees follow our theatre's fee settings?**\
A: Membership transactions always absorb fees rather than passing them to customers. This creates a cleaner subscription experience and matches how most subscription services work. Build any necessary fee costs into your membership pricing.
**Need help setting up your membership program?** [Contact our support team](/contacting-support#for-theatre-owners-and-administrators) for assistance customizing your membership offerings.
{% hint style="info" %}
**Just getting started?** Our [Quick Start Guide](/the-academy/crowdwork-academy/memberships-quick-start-guide) walks you through simple setup steps and popular membership models.
{% endhint %}
# Setting Up Notifications
This guide provides detailed instructions on how to create and manage notifications within the CrowdWork admin dashboard to monitor important events related to shows, classes, and tags.
Notifications in the admin Dashboard menu
Want to get an email when a special show sells out? Need to email a guest teacher every time someone registers for a particular class? Our Notifications feature is a powerful tool that allows you stay on top of your shows and classes. Let's learn how it works!
### Accessing Notifications
To begin managing notifications...
1. **Click** [**Notifications**](https://crowdwork.com/dashboard/notifications) in the dashboard admin menu.
2. You will be presented with your list of notifications. If you haven't created any notifications yet, don't worry! You can easily set one up by clicking the blue [**+ Create New Notification**](https://crowdwork.com/dashboard/notifications/new) button.
> **Direct link:** [Notifications Dashboard](https://crowdwork.com/dashboard/notifications)
### Understanding Notifications
Notifications in CrowdWork are automated alerts triggered by specific actions. They consist of the following components:
* **Trigger:** An action that activates the notification.
* **Event(s):** The specific show, class, or tag to monitor.
* **Email(s):** The designated email addresses to receive notifications.
### Creating or Editing a Notification
When you create a new notification or edit an existing one, you will use the Notification Form. Here's how to fill in its key components:
1. **Notification Trigger**
* Select a trigger from the dropdown menu that will activate your notification.
* Currently available triggers include:
* **Purchase:** Sends a notification when a purchase is made.
* **Sold Out:** Sends a notification when an event is sold out.
* **Donation Received:** Sends a notification when a patron makes a donation. Donations aren't tied to a specific event, so just set the trigger and recipient emails. See [Setting Up Donations](/for-theatres/setting-up-donations) for the full donations guide.
* **Gift Card Purchased:** Sends a notification when someone buys a gift card. See [Setting Up Gift Cards](/for-theatres/setting-up-gift-cards).
* **Membership Purchased:** Sends a notification when a patron enrolls in a membership. See [Setting Up Memberships](/for-theatres/setting-up-memberships).
* **Waitlist Enrolled:** Sends a notification when a patron joins the waitlist for a sold-out show or class. The email names the event and date they signed up for, includes the patron's email address, and links to your Waitlist page. See [Setting Up Waitlists](/for-theatres/setting-up-waitlists).
* If you need other triggers for your workflow, [please let us know](/request-a-feature).
2. **Event Selection**
* Begin typing to search for and select specific shows, classes, or tags.
* You can also choose:
* **All Classes** or **All Shows** to monitor all events of a specific type.
* Specific shows or classes by entering their names.
* Tags, which monitors all events associated with selected tags.
* Feel free to select any combination of events to monitor.
3. **Email Notification To**
* Type email addresses and press enter to add them to your notification list.
### Notifications Overview List
Once you've saved your new notification, you'll return to your list of notifications. This list provides the following details:
* **Show or Class:** The name of the show or class.
* **Trigger:** The action that activates the notification.
* **Recipients:** The email addresses the notification will be sent to.
* **Type:** The method of notification (currently email).
* **Status:** Indicates if the notification is active.
* **Edit:** A link to modify the notification.
To edit a notification, click the "Edit" link in the far-right column. Clicking on a show, class, or tag name in **bold** will take you to the details for that related item.
Options when editing an Active Notification
Options when editing a Paused Notification
### Editing a Notification
When you edit a notification, the form resembles the creation form, but with additional options at the top:
* **Status Label:** This indicates whether the notification is "Paused" or "Active."
* **Toggle Buttons:** You have the option to toggle between Paused/Active.
* **Delete Button:** Optionally, delete the notification if it's no longer needed.
So, go ahead and give it a try. If you have any questions or feedback, please feel free to [contact our support team](/contacting-support) anytime.
# Setting Up Payment Plans
Learn how to setup and use Payment Plans to lower the barrier of cost to your classes, workshops, and even shows!
{% hint style="warning" %}
**Are you a student or ticketholder? Check out our** [**Patron's Guide to Payment Plans**](/for-ticket-holders/patrons-guide-to-payment-plans)**.**
**The following guide is for venue administrators and managers** who need to configure payment plan options for their events
{% endhint %}
### What are Payment Plans
Payment Plans are an optional method for customers to break up payments into smaller installments over time. For example, instead of a $100 payment, they can decide to split into four $25 payments over time. This can help with purchasing specific shows or classes that might otherwise not be able to be afforded in one payment. The amount and number of installments can be decided by you, along with which specific shows and classes you want to allow to be purchased via a plan.
### Setting Up Payment Plans
Setting up Payment Plans is very straight-forward. Simply expand the "Payment Plans" option on the left-hand sidebar and select [**Manage Plans**](https://crowdwork.com/dashboard/payment-plans).
> **Direct link:** [Payment Plans Dashboard](https://crowdwork.com/dashboard/payment-plans)
{% hint style="warning" %}
**Heads up for Square users!**
Depending on when you created your account and connected Square, you may need to reconnect to grant additional permissions. If you see a "Reconnect Square Account" button present on this page, simply click and follow the steps. You will only need to do this once.
{% endhint %}
From this page, you'll be able to create a new Payment Plan by clicking the [**Create New Payment Plan**](https://crowdwork.com/dashboard/payment-plans/new) option in the upper-right.
#### Payment Plan Configuration Options
On the creation page, you have a few options:
* **Plan Name**: This is a custom name you can include that is displayed both internally and to the patrons.
* **Plan Description**: This is an optional description you can use to include more details about the plan. This is included along-side the Template description (more on that below).
* **Select Show, Class, or Tag**: This is to assign the specific events you'd like to this payment plan.
* **Template**: This is the payment plan template you'd like. More on templates below.
### Payment Plan Templates
We've created helpful templates for you to use with this feature. Choose the template that best fits your payment collection needs:
Plan Template
Plan Schedule
Plan Notes
50% now, 50% at start
1st payment: 50% of the total due at checkout
2nd payment: 50% charged just before the event start date
Ideal for pre-event collection: This template ensures you have everything paid in full prior to the start of the show or class.
⚠️ Special handling: If the patron purchases a plan less than 24 hours from the start of the event, then they are charged both halves at checkout.
50% now, 50% in a month
1st payment: 50% of the total due at checkout
2nd payment: 50% charged one month after checkout
Time-based schedule: Unlike the "50% at start" template, this plan charges the second payment on a fixed schedule relative to checkout — not tied to the event date. This makes it a good fit for events that are far out or when you want a predictable billing timeline.
3 Payments
1st payment: ~1/3 of the total due at checkout
2nd payment: ~1/3 charged just before the event start date
3rd payment: ~1/3 charged 30 days after the event start date
⚠️ Post-event payment included: This template includes a payment that intentionally occurs after the event. Ensure your terms and conditions clearly communicate this to patrons.
3 Payments (monthly)
1st payment: ~1/3 of the total due at checkout
2nd payment: ~1/3 charged one month after checkout
3rd payment: ~1/3 charged two months after checkout
Time-based schedule: All three payments follow a fixed monthly cadence from checkout — not tied to the event date. This is a good option for classes or events where you want straightforward monthly billing.
4 Payments
1st payment: 25% due at checkout
2nd payment: 25% charged 2 weeks after checkout
3rd payment: 25% charged 4 weeks after checkout
4th payment: 25% charged 6 weeks after checkout
Four payments evenly split over six weeks. This familiar template is modeled after what many third-party payment plan platforms provide.
### Understanding Payment Plan Fees
Payment plan transactions always pass fees on to the patron, regardless of your theatre's fee settings. Even if your theatre absorbs fees for standard ticket sales, payment plan installments will include fees in each payment the patron sees at checkout.
This is because each installment is processed as a separate credit card transaction through Square, and each one incurs its own processing fees. The system is designed this way to keep pricing transparent — patrons see the exact amount of each installment (including fees) before they commit to a plan, so there are no surprises on future charges.
{% hint style="info" %}
**How it works in practice:** When a patron selects a payment plan at checkout, they see a full breakdown of every installment amount — including fees — before confirming their purchase. Each installment is charged as a separate transaction on the scheduled date.
{% endhint %}
{% hint style="warning" %}
**If your theatre absorbs fees for standard sales**, be aware that payment plans are the one exception — fees are always included in the patron's installment amounts. You may want to mention this in your plan description so patrons understand the pricing they see at checkout.
{% endhint %}
For a full overview of how CrowdWork fees work, see [Understanding CrowdWork Fees](https://docs.crowdwork.com/for-theatres/setup-your-theatre-account/understanding-crowdwork-fees).
***
### Payment Processing & Management
#### How Payments Work
When a patron purchases a plan, we store their credit card information on your Square account. This allows us to automatically retrieve and charge the patron on each plan date.
{% hint style="danger" %}
**Important Square Account Management**
It is highly advised to not edit or modify the payments or customers within your Square account dashboard while they are enrolled in a plan.
**Do not switch or reconnect your Square account while patrons have active payment plans.** Changing your connected Square account breaks the link to stored payment methods and will cause all remaining scheduled installments to fail. If you need to reconnect Square for any reason, wait until all active plans have completed their final payments.
{% endhint %}
#### Payment Retry Logic
{% hint style="info" %}
**Automatic retry system:** We'll try to charge a patron's payment three times, each time with 24 hours between attempts. If those attempts don't succeed and the patron has another card on file, we'll try that card too. If we still can't collect the payment, the plan may be canceled.
{% endhint %}
### Viewing Enrolled Plans
You can view enrolled plans one of two ways:
1. **From Payment Plans menu**: Navigate to [**Enrolled Plans**](https://crowdwork.com/dashboard/payment-plans/enrolled) option in the Payment Plans dropdown
2. **From individual Orders**: View payment plan details directly on the specific Order page
> **Direct link:** [Enrolled Payment Plans](https://crowdwork.com/dashboard/payment-plans/enrolled)
#### What You'll See
The enrolled plans view shows:
* Patron information
* Payment schedule and amounts
* Payment status for each installment
* Card on file details
* Next payment date
### Managing Enrolled Payment Plans
From the [Enrolled Plans](https://crowdwork.com/dashboard/payment-plans/enrolled) page, you can manage individual payment installments for your patrons. This gives you full control over the payment plan lifecycle.
#### Searching and Sorting
The enrolled plans table allows you to:
* **Search by Name**: Find specific patrons by their name
* **Search by Email**: Locate plans by patron email address
* **Sort columns**: Click on column headers to sort by Patron Name, Email, Date Enrolled, Payment Amount, Payment Due, Payment Status, or Retries
#### Changing Payment Status
Each payment installment has a dropdown menu (accessible via the three dots **•••** icon) that allows you to change its status:
| Status | Description | When to Use |
| ----------------- | ----------------------------------------------- | ----------------------------------------------------------------------------------------------------- |
| **Mark Upcoming** | Resets the payment to upcoming/scheduled status | Use when you need to reschedule a paused or problematic payment to be processed again |
| **Mark Paused** | Temporarily pauses the scheduled payment | Use when a patron needs extra time before their next payment, or when resolving payment issues |
| **Mark Paid** | Manually marks the installment as paid | Use when payment was received outside of the system (e.g., cash, check, or external payment) |
| **Mark Canceled** | Cancels the payment installment | Use when the patron can no longer complete the plan or by mutual agreement to stop remaining payments |
{% hint style="info" %}
**Pausing vs. Canceling:** Use **Pause** when the payment is temporarily on hold and may resume later. Use **Cancel** when the payment will not be collected at all. Paused payments can be marked as Upcoming to resume processing.
{% endhint %}
{% hint style="warning" %}
**Important:** Changing a payment status does not automatically issue refunds or charge the patron. If you mark a payment as Paid manually, ensure you've actually received payment through another method. For refunds, you'll need to process those separately through Square.
{% endhint %}
#### Common Scenarios
**Patron needs more time to pay:**
1. Navigate to their enrolled payment plan
2. Find the upcoming payment installment
3. Click the dropdown menu and select "Mark Paused"
4. When ready to resume, select "Mark Upcoming" to reschedule
**Patron paid via cash or check:**
1. Find the relevant payment installment
2. Select "Mark Paid" from the dropdown
3. Record the external payment in your records
**Patron wants to stop their payment plan:**
1. Review remaining installments with the patron
2. Mark remaining unpaid installments as "Canceled"
3. Discuss any outstanding balance or refunds needed
***
### Patron Experience
#### For Patrons
Patrons can view and manage their payment plans through their account page. They can:
* See upcoming payment dates
* Update their payment method
* View payment history
{% hint style="info" %}
**Email notifications:** Patrons receive email notifications about upcoming payments and any payment issues
{% endhint %}
#### Payment Method Updates
If patrons need to add or update their payment method, they can do so through their account page under "Payment Methods." If a patron has no card on file, they can add one; if they already have a card, they can replace it. Cards are grouped by theatre and by purpose (Payment Plans and Enrolled Memberships).
{% hint style="success" %}
**Need to help your patrons with their payment plan features?**
We've got a guide! See our [Patron's Guide to Payment Plans](/for-ticket-holders/patrons-guide-to-payment-plans) for the customer experience documentation.
{% endhint %}
***
Have questions about implementing payment plans? Just [reach out to our Support Team for help](/contacting-support).
# Setting Up Waitlists
Learn how to use CrowdWork's native waitlist feature to capture demand for sold-out events and easily notify patrons when spots become available.
{% hint style="warning" %}
**Are you a patron looking to join a waitlist?** When an event is sold out, you'll see a "Join Waitlist" button on the event page. Click it, and you'll be notified if spots open up!
**The following guide is for venue administrators and managers** who want to configure and manage waitlists for their events.
{% endhint %}
## What Are Waitlists?
Waitlists turn "sold out" from a dead end into an opportunity. When your events reach capacity, interested patrons can add themselves to a waitlist, and you can notify them when spots become available.
CrowdWork's native waitlist feature:
* **Captures demand** automatically when events sell out
* **Tracks by occurrence** — each waitlist submission is tied to a specific date/time
* **Stores submissions** in one central dashboard for all your events
* **Enables direct outreach** with built-in email functionality
* **Displays waitlist counts** on your event overview pages
* **Works for both shows and classes** with flexible settings
{% hint style="info" %}
**Important:** Waitlists are occurrence-specific. When a patron joins a waitlist, they're signing up for a particular date and time, not just the event in general. This allows you to manage demand for each performance or class session individually.
{% endhint %}
{% hint style="success" %}
**Good news!** Waitlist collection is enabled by default for all new accounts. If you're already up and running, your sold-out events are likely already capturing waitlist submissions.
{% endhint %}
***
## Configuring Waitlist Settings
Waitlist collection is controlled at the theatre level in your Checkout Options settings.
### Accessing Waitlist Settings
1. Navigate to **Theatre Details** in your Dashboard sidebar
2. Scroll down to the **Checkout Options** section
3. Find the **Collect Waitlist Submissions** dropdown
> **Direct link:** [Theatre Checkout Options](https://crowdwork.com/dashboard/theatres/0/edit#section-checkout)
### Waitlist Collection Options
| Option | Description |
| ------------------------ | --------------------------------------------------------------- |
| **Everywhere** (default) | Collect waitlist submissions for all sold-out shows and classes |
| **Only Shows** | Collect waitlist submissions only for sold-out shows |
| **Only Classes** | Collect waitlist submissions only for sold-out classes |
| **Do Not Collect** | Disable waitlist collection entirely |
***
## What Your Patrons See
When an event reaches its max capacity, the experience changes automatically for your patrons.
### The Waitlist Button
When a show or class is sold out for a specific date/time:
* The "Get Tickets" or "Register" button transforms into a **"Join Waitlist"** button
* Clicking the button opens a simple modal explaining that they'll receive an email if space becomes available
* Patrons confirm by clicking **"Join Waitlist"** in the modal
The patron is added to the waitlist for that specific occurrence (date and time), not the event as a whole.
### Logged-In vs. New Patrons
* **Logged-in patrons**: Automatically added to the waitlist with one click
* **New visitors**: Prompted to sign in or create an account first, then redirected back to join the waitlist
### Already on the Waitlist
If a patron returns to the event page after joining the waitlist, they'll see a message indicating they're already on the waitlist for that event.
***
## Managing Your Waitlist
### Viewing All Waitlist Submissions
Access your complete waitlist from the Dashboard sidebar:
1. Click **Waitlist** in the left-hand menu
2. View all waitlist submissions across all your events
> **Direct link:** [Waitlist Dashboard](https://crowdwork.com/dashboard/waitlist)
### Filtering Your Waitlist
Use the filters at the top of the waitlist page to narrow down submissions:
| Filter | Description |
| ------------------- | ---------------------------------------------------- |
| **Filter by Event** | Show only submissions for a specific event |
| **Filter by Date** | Show only submissions for a specific occurrence/date |
| **Filter by Email** | Search for a specific patron by email address |
### Waitlist Count on Event Pages
For a quick view of waitlist demand, check your event's overview page:
1. Navigate to any event in your Dashboard
2. Scroll down to the **Admissions** section
3. The **Waitlist Count** displays how many people are waiting for that event
Click the **"View More"** link below the count to jump directly to the waitlist filtered for that specific event and date.
### Get Notified When Someone Joins
Instead of checking the Waitlist page for new activity, you can have CrowdWork email you — or anyone else on your team — as soon as a patron joins a waitlist. This is set up on the Notifications page, and it's separate from waitlist collection itself.
1. Click **Notifications** in your Dashboard sidebar, then **+ Create New Notification**
2. Set the **Notification Trigger** to **Waitlist Enrolled**
3. Under **Select Show or Class**, choose which events to watch — specific shows or classes, a tag, or **All Shows** / **All Classes**
4. Under **Select Recipients**, type each email address that should receive the alert and press enter
5. Save the notification
Each alert names the show or class and the date the patron signed up for, includes the patron's email address, and links straight to your Waitlist page.
> **Direct link:** [Notifications Dashboard](https://crowdwork.com/dashboard/notifications)
{% hint style="info" %}
**These alerts are off until you create one.** Collecting waitlist submissions and being notified about them are two different settings — waitlist collection is on by default, but no one is emailed about new signups until you add a notification for it. For the full walkthrough of triggers, recipients, and pausing alerts, see [Setting Up Notifications](/for-theatres/setting-up-notifications).
{% endhint %}
### Removing Patrons from the Waitlist
Need to take someone off a waitlist? You can remove one or more patrons right from the Waitlist page using the checkboxes and the **Actions** menu.
1. Go to the **Waitlist** page in your Dashboard
2. Check the box to the left of each patron you want to remove
3. Click the **Actions** button at the top right of the table
4. Select **Remove**, then you'll be asked to confirm.
> **Direct link:** [Waitlist Dashboard](https://crowdwork.com/dashboard/waitlist)
{% hint style="info" %}
**When is this useful?** Tidy up your waitlist by removing patrons who've already purchased a ticket, who've let you know they're no longer interested, or who signed up for an event that has already passed.
{% endhint %}
Selecting a patron on the Waitlist page and choosing Actions → Remove
***
## Inviting Patrons from the Waitlist
When spots open up, here's how to notify your waitlisted patrons.
Step 1: Make Spots Available
Before inviting anyone from the waitlist, you need to have tickets available for them to purchase. Here are the most common ways spots become available:
#### Refunding an Existing Ticket
The most common scenario is when a ticket holder can no longer attend and requests a refund. After you [issue a refund](/for-theatres/issuing-refunds), their ticket is released and becomes available for purchase.
#### Marking an Admission as Standby
If a patron can't attend but you're not ready to issue a full refund (or they want to potentially attend a different date), you can mark their admission as **Standby**. This releases their spot without fully canceling their ticket.
To mark an admission as Standby:
1. Go to the event's overview page in your Dashboard
2. Scroll down to the **Admissions** section
3. Check the box next to the admission you want to modify
4. Click the **Actions** button at the top right of the table
5. Select **Edit**
6. Change the **Status** dropdown from "Paid/Active" to "Standby"
7. Click **Confirm Changes**
{% hint style="info" %}
**What is Standby?** Standby keeps the admission on file but it won't count toward tier quantities or capacity caps. This is useful when you want to hold a patron's information without blocking their seat from being sold. For more details, see [Managing Admissions](/for-theatres/managing-admissions#what-is-standby).
{% endhint %}
Steps to Edit an Admission from any Event Overview
#### Other Ways to Add Availability
You can also make spots available by:
* **Increasing max capacity** on the event
* **Adding capacity to an existing tier**
* **Creating a new tier** (consider making it [password-protected](/for-theatres/creating-a-show-or-class#pricing-and-tiers) for waitlist patrons)
* **Adding a new date/occurrence** — see our Academy guide on [using waitlists to promote new dates](/the-academy/crowdwork-academy/waitlists-never-turn-away-a-patron#using-waitlists-to-promote-new-dates-or-events)
{% hint style="warning" %}
**Important:** If your max capacity is still met, patrons will still see "Join Waitlist" instead of the purchase button. Spots must be available for them to complete a purchase.
{% endhint %}
Step 2: Select Waitlist Recipients
1. Go to the **Waitlist** page in your Dashboard
2. Use the checkboxes on the left side of each row to select who you want to invite
3. You can select individual patrons or multiple at once
Steps to select waitlist recipients to email.
Step 3: Send the Invitation Email
1. Click the **Actions** button at the top right of the table
2. Select **Send Email**
3. The email form opens with pre-filled defaults:
* **Subject:** "A waitlist spot has opened up!"
* **Body:** A message explaining that a spot is available with a link to purchase
4. Customize the message if needed (especially if using a password-protected tier—include the password!)
5. Check the Terms of Service agreement box
6. Click **Send Email**
{% hint style="success" %}
The email automatically includes event details and a button linking patrons directly to the event page where they can complete their purchase.
{% endhint %}
{% hint style="info" %}
**Want a copy of the invitations you send?** Add your box office address to **CC Email Addresses** in [Theatre Settings — Email Communication](https://docs.crowdwork.com/for-theatres/customizing-your-theatre-settings#email-communication) and it's copied on every waitlist invitation. It's a CC, so patrons can see the address, and you get one copy per recipient.
{% endhint %}
Form to customize email sent to selected waitlist recipients.
Step 4: Patrons Receive Email & Respond
Invited patrons receive an email with:
* The subject line you specified (prefixed with your theatre name)
* Your custom message
* Event details (name, date, time)
* A button to view the event and purchase tickets
The button links directly to the **same occurrence** (date/time) they originally joined the waitlist for. Patrons then follow the normal checkout process to claim their spot for that occurrence of the event.
Sample email sent to selected waitlist recipients.
***
## The Complete Workflow
Here's the typical waitlist process from start to finish:
1. **Event sells out** — Your show or class reaches max capacity
2. **Waitlist activates** — The "Join Waitlist" button automatically appears
3. **Patrons sign up** — Interested people add themselves to the waitlist
4. **You monitor demand** — Check the Waitlist page or event overview to see interest
5. **Spots open up** — A ticket holder requests a refund, you mark an admission as Standby, or you add capacity
6. **You invite patrons** — Select waitlisted individuals and send them an email
7. **Patrons purchase** — They click the link in the email and complete checkout
{% hint style="info" %}
**Pro Tip:** If you're adding new capacity (rather than filling a refunded spot), **consider creating a password-protected tier** specifically for waitlist patrons. This prevents general visitors from claiming the newly added spots before your waitlisted patrons have a chance.
{% endhint %}
***
## Best Practices
### How Many People Should You Email?
When spots open, you might wonder how many waitlisted patrons to invite. Consider:
* **Invite more than you have spots for** — Not everyone will respond immediately (or at all), so cast a wider net to make sure opened spots get filled.
* **Send in waves** — Start with a portion of your waitlist, give them time to respond, then invite more if spots remain.
* **Set a deadline** — In your email, mention a timeframe (e.g., "Spots are first-come, first-served and may fill quickly").
### How Long Should You Wait Before Emailing More?
There's no one-size-fits-all answer, but here are some guidelines:
| Time Until Event | Recommended Wait |
| ----------------- | -------------------------------------------------- |
| 1+ weeks away | Give 24-48 hours before emailing additional people |
| A few days away | Give 12-24 hours before the next wave |
| Tomorrow/same day | Email everyone immediately—it's now or never! |
### Using Password-Protected Tiers
For fairness and to reward your waitlisted patrons:
1. Create a new tier with a limited quantity
2. Set a password (e.g., "WAITLIST2024")
3. Include the password in your email to waitlisted patrons
4. They use the password at checkout to access the reserved tier
This prevents random visitors from snagging the newly added spots.
### Using Waitlists to Promote New Dates
Want to direct waitlisted patrons to a completely new date or event? Since the default email link goes back to the original occurrence, you'll need to customize your message. Check out our Academy guide for detailed steps on [using waitlists to promote new dates or events](/the-academy/crowdwork-academy/waitlists-never-turn-away-a-patron#using-waitlists-to-promote-new-dates-or-events).
***
## Tracking Waitlist Activity
### Emails Sent Column
On the Waitlist page, you'll see columns showing:
* **Emails Sent** — How many invitation emails each person has received
* **Last Email Sent** — The date and time of the most recent email
This helps you track who you've already contacted and avoid sending duplicate invitations.
### Waitlist Count on Event Overview
The Admissions section on each event's overview page shows:
* Total tickets sold
* Waitlist count for that date
* Quick link to view the waitlist
***
## FAQs
How do I remove someone from the waitlist?
Go to the [**Waitlist**](https://crowdwork.com/dashboard/waitlist) page in your Dashboard, check the box to the left of the patron (or patrons) you want to remove, click the **Actions** button at the top right of the table, and select **Remove**. For the full walkthrough, see [Removing Patrons from the Waitlist](https://docs.crowdwork.com/for-theatres/setting-up-waitlists#removing-patrons-from-the-waitlist).
Can patrons remove themselves from the waitlist?
Patrons can't remove themselves, but you can remove them in seconds: on the [**Waitlist**](https://crowdwork.com/dashboard/waitlist) page, check the box next to their name, click **Actions**, and select **Remove**. See [Removing Patrons from the Waitlist](https://docs.crowdwork.com/for-theatres/setting-up-waitlists#removing-patrons-from-the-waitlist).
Are waitlisted patrons automatically added to the event when I email them?
No. Sending an email simply notifies them that spots are available. They must click the link in the email and complete the normal checkout process to claim a ticket.
Do they get a free ticket when I email them?
No. The email invites them to purchase a ticket. They'll pay whatever price is set for the available tier(s).
How do I prevent anyone from claiming spots I've added for waitlist patrons?
Create a password-protected tier with limited capacity. Only share the password with your waitlisted patrons in the email you send them. This ensures only invited patrons can access those specific tickets.
After someone purchases a ticket, are they removed from the waitlist?
No — purchasing a ticket doesn't automatically remove a patron from the waitlist. You can remove them yourself if you'd like (on the [Waitlist](https://crowdwork.com/dashboard/waitlist) page, check the box next to their name, then **Actions → Remove**), or leave them on the list and use the "Emails Sent" column to keep track of who you've already contacted.
How can I tell who I've already invited?
Check the "Emails Sent" and "Last Email Sent" columns on the [Waitlist](https://crowdwork.com/dashboard/waitlist) page. These show how many invitation emails each person has received and when.
Are waitlisted patrons visible in the POS/mobile app?
Not yet. Waitlist management is currently only available through the [web dashboard](https://crowdwork.com/dashboard/waitlist).
Why does the waitlist button still show after I freed up a spot?
The waitlist button appears whenever your max capacity is met. If you refunded a ticket or marked an admission as Standby, the spot should be available. If you manually increased capacity, make sure you've saved the event. If the total available tickets still equals the total sold, the waitlist will remain active.
What is Standby status?
Standby is a status you can assign to an admission (ticket or class registration) that keeps the record on file but doesn't count toward tier quantities or capacity caps. It's useful when a patron can't attend but you're not ready to issue a full refund, or when they might want to be moved to a different date. To mark an admission as Standby, select it from the Admissions table on the event overview page, click Actions → Edit, and change the Status to "Standby."
Can I customize the email template?
Yes! When you click "Send Email" from the Actions menu, you can edit both the subject line and the email body before sending. The event details are automatically appended.
Can I direct waitlisted patrons to a different date or new event?
Yes! The default email link takes patrons back to the same occurrence they signed up for, but **you can customize the email message to include a link to a new date or event**. This is a great way to use your waitlist as a marketing tool. See our Academy guide on [using waitlists to promote new dates or events](/the-academy/crowdwork-academy/waitlists-never-turn-away-a-patron#using-waitlists-to-promote-new-dates-or-events) for detailed steps.
***
## We Want Your Feedback!
This is version one of our native waitlist feature, and we're actively developing improvements based on your input. If you have suggestions, feature requests, or run into any issues, please [reach out to our support team](/contacting-support) or [submit a feature request](/request-a-feature).
***
## Need Help?
If you have questions about configuring waitlists or need assistance with your waitlist workflow, [contact our support team](/contacting-support).
# CrowdWork Academy
Become a CW All-Star in the Academy.
Welcome to the CrowdWork Academy! Here you'll find tips, tricks, and best practices gathered from hundreds of theaters to help you get the most out of CrowdWork.
***
## 🚀 New to CrowdWork?
Start here to get up and running quickly:
* [**Getting Started with CrowdWork**](/the-academy/crowdwork-academy/getting-started-with-crowdwork) – A comprehensive guide to setting up your theater and selling your first tickets
***
## 🎟️ Memberships
Everything you need to launch and grow a successful membership program:
* [**Memberships: Quick Start Guide**](/the-academy/crowdwork-academy/memberships-quick-start-guide) – Get your membership program running in minutes
***
## ⏳ Waitlists
Never lose a potential patron when shows sell out:
* [**Waitlists: Never Turn Away a Patron**](/the-academy/crowdwork-academy/waitlists-never-turn-away-a-patron) – Set up and manage waitlists effectively
***
### 📺 Livestreaming & Virtual Events
Reach audiences beyond your venue with virtual and hybrid ticketing:
* [**Selling Tickets to Livestream Events**](#livestreaming-and-virtual-events) – Set up streaming-only and hybrid events with CrowdWork
***
## 🛠️ Embedding Widgets
Embed CrowdWork directly on your website:
* [**Embedding Widgets on Specific Platforms**](/the-academy/crowdwork-academy/embedding-widgets-on-specific-platforms) – Step-by-step guides for WordPress, Squarespace, Wix, Shopify, Webflow, and more
***
## 💡 Have a Topic in Mind?
Is there something you'd love to see covered in the Academy? [Let us know!](/contacting-support) We're always looking to add content that helps you succeed.
# Getting Started with CrowdWork
A Quick Start Guide for Theatres
## 🎭 Your CrowdWork Playbill
*A guide to tonight's features. Running Time: \~15 minutes*
{% hint style="info" %}
💡 **Stage Direction**: Click any item to jump to that section!
{% endhint %}
{% stepper %}
{% step %}
**Act I: Setting the Stage**
* [ ] 🎟️ [Create Your Account](#create-your-account-and-enable-payments)
* [ ] 🎨 [Customize Your Theatre](#customize-your-theatre)
* [ ] [📱 Set Up Our POS Mobile App](#set-up-our-pos-mobile-app)
{% endstep %}
{% step %}
**Act II: The Main Performance**
* [ ] [🎭 **Create Shows**](#create-shows)
* *One-Time Shows*
* *Weekly Shows*
* *Monthly Shows*
* [ ] [📚 **Create Classes**](#create-classes)
* *Multi-Session Programs*
* *One-Off Workshops*
* *Recurring Drop-in Classes*
{% endstep %}
{% step %}
**Act III: Special Effects**
* [ ] [💰 Pricing Strategies](#pricing-strategies)
* [ ] [🏷️ Discount Codes](#discount-codes)
* [ ] [🎁 Gift Cards](#gift-cards)
* [ ] [📦 Bundles](/for-theatres/setting-up-bundles)
* [ ] [⏳ Waitlists](#waitlists)
* [ ] [🧑🎨 Giving Your Staff Access](#giving-your-staff-access)
{% endstep %}
{% step %}
**Encore**
* [ ] [📖 Helpful Links](https://docs.crowdwork.com/the-academy/crowdwork-academy/getting-started-with-crowdwork#helpful-links)
* [ ] [🗺️ Navigation Quick Reference](#navigation-quick-reference)
{% endstep %}
{% endstepper %}
***
## Welcome to CrowdWork!
Let's get your theatre up and running with our platform. This guide breaks down the essentials into bite-sized pieces - tackle them one at a time at your own pace. Go from zero to ticket sales in 15 minutes!
***
### Initial Setup
🎟️ Create Your Account & Enable Payments
***Navigation**: Dashboard → Theatre → Theatre Details*
> **Direct link:** [Create Your Free Account](https://www.crowdwork.com/users/sign_up)
1. Create your free account at [crowdwork.com/users/sign\_up](https://www.crowdwork.com/users/sign_up)
2. Enter your theatre details and timezone
3. Connect your Square account for payment processing
* Don't have Square? Create a free account
* Instant deposits to your account
* Simple pricing: $1 per ticket + standard card processing
* Free tickets and cash sales have no fees
💡 **Pro Tip**: Want step-by-step instructions? Check out our [complete setup guide](https://docs.crowdwork.com/for-theatres/setup-your-theatre-account).
🎨 Customize Your Theatre
***Navigation**: Dashboard → Theatre → Theatre Details*
> **Direct link:** [Theatre Settings](https://crowdwork.com/dashboard/theatres/0/edit)
1. Upload your logo
2. Add your address
3. Set default event descriptions
4. Configure sales windows
5. Set global blackout dates
Need a little more detail? Visit our [complete customization guide](https://docs.crowdwork.com/for-theatres/customizing-your-theatre-settings).
📱 Set Up Our POS Mobile App
***Navigation**: Dashboard → Theatre → Point-of-Sale*
> **Direct link:** [POS Settings](https://crowdwork.com/dashboard/pos-settings)
**Get our free POS app to manage in-person sales and check-ins:**
1. Download the CrowdWork POS app *(if it says "Fourth Wall Tickets" don't worry, that's our old name and it just hasn't updated in the app stores yet!)*
* [ Available on Apple App Store for iOS](https://apps.apple.com/us/app/fourth-wall-tickets/id6444920144)
* [ Available on Google Play for Android](https://play.google.com/store/apps/details?id=com.fourthwalltickets\&gl=US)
2. Quick Setup
* Sign in with your CrowdWork account
* Connect a [compatible Square card reader](https://docs.crowdwork.com/for-theatres/setting-up-point-of-sale-pos/square-hardware-compatibility-guide) (optional)
* You're ready to sell!
3. Key Features
* Sell tickets in person
* Accept credit cards or cash
* Scan and check in ticket holders
* View real-time sales data
* Process refunds
💡 **Pro Tip**: Perfect for front-of-house staff! [Create user accounts](/for-theatres/managing-staff-and-users) with limited box office access.
[Full POS setup guide available here](https://docs.crowdwork.com/for-theatres/setting-up-point-of-sale-pos)
***
### Creating Events
🎭 Create Shows
***Navigation**: Dashboard → Shows → + Add New Show*
> **Direct links:** [View All Shows](https://crowdwork.com/dashboard/shows) | [+ Create New Show](https://crowdwork.com/dashboard/shows/new)
**Example: One-Time Shows**
*Perfect for special events, guest artists, or single performances*
1. Select "Once" from Occurs dropdown
2. Set show date and time
3. Choose pricing:
* Single price for all tickets
* Multiple price tiers
* Pay what you want option
**Example: Weekly Shows**
*Ideal for regular performances or recurring events*
1. Select "Weekly"
2. Set first show date/time
3. Optionally set end date
4. Add any blackout dates
**Example: Monthly Shows**
*Great for regular showcases or monthly specials*
1. Select "Monthly"
2. Choose week position (First/Second/Third/Fourth/Last)
3. Pick day of week
4. Set time
Want more scheduling options? See our [complete scheduling guide](https://docs.crowdwork.com/for-theatres/creating-a-show-or-class).
📚 Create Classes
***Navigation**: Dashboard → Classes → + Add New Class*
> **Direct links:** [View All Classes](https://crowdwork.com/dashboard/classes) | [+ Create New Class](https://crowdwork.com/dashboard/classes/new)
**Example: Multi-Session Classes**
*Perfect for workshops, training programs, or series*
1. Check "Dates are purchased as a grouped package"
2. Add all session dates
3. Set program pricing
4. Optionally add capacity limits
**Example: Drop-in Classes**
*Ideal for ongoing classes with flexible attendance*
1. Set up as recurring events
2. Keep individual date purchase enabled
3. Configure pricing per session
4. Optional: Set capacity limits
**One-Off Workshops**
*Perfect for guest teachers, special topics, or introductory sessions*
1. Select "Once" from Occurs dropdown
2. Set single date and time
3. Choose pricing structure:
* Single price for all students
* Multiple tiers (e.g., Early Bird, Regular)
4. Optional: Set capacity limit and sales window
Need class management inspiration? Visit our [class creation guide](https://docs.crowdwork.com/for-theatres/creating-a-show-or-class).
***
### Advanced Features
💰 Pricing Strategies
**Navigation**: Dashboard → Shows/Classes → Edit Show/Class
**Multiple Price Tiers**
1. Select "Multiple Prices" when creating event
2. Add tiers (e.g., General, Student, VIP)
3. Set price and capacity for each
4. Optional: Add passwords for restricted tiers
**Pay What You Want**
1. Enable "Pay What You Want" pricing
2. Set suggested price (optional)
3. Define minimum amount (optional)
**Sales Windows**
*Control when tickets become available:*
1. Set "Sales start at" date/time
2. Set "Sales end at" date/time
3. Leave blank to use theatre defaults
🏷️ Discount Codes
***Navigation**: Dashboard → Discount Codes → + Create New Discount*
> **Direct links:** [View Discount Codes](https://crowdwork.com/dashboard/discounts) | [+ Create New Discount](https://crowdwork.com/dashboard/discounts/new)
1. Navigate to [Discount Codes](https://crowdwork.com/dashboard/discounts) section
2. Click "Create New Discount"
3. Choose what the discount applies to:
* A specific show or class (entire event or individual pricing tiers)
* All Shows or All Classes
* A tag, membership tier, or any combination
4. Choose discount type:
* Percentage off
* Fixed amount off
* Free tickets
5. Set usage limits:
* Total uses
* Uses per customer
* Valid dates
💡 **Pro Tip**: Start simple and add complexity as needed. You can always update settings later! When you need more guidance, [see our full Discount Codes page](/for-theatres/setting-up-discount-codes).
🎁 Gift Cards
***Navigation**: Dashboard → Gift Cards*
> **Direct links:** [Gift Cards Dashboard](https://crowdwork.com/dashboard/gift-cards) | [+ Create New Gift Card](https://crowdwork.com/dashboard/gift-cards/new)
Offer gift cards that customers can purchase and redeem for any show or class:
1. Enable Gift Cards
* Navigate to [Gift Cards](https://crowdwork.com/dashboard/gift-cards) section
* Toggle gift cards on for your theatre
2. Set Options
* Choose preset amounts or allow custom values
* Customize email delivery message
3. How They Work
* Customers purchase online or at POS
* Recipients get an email with their gift card code
* Codes are entered at checkout to apply balance
💡 **Pro Tip**: Gift cards make great holiday promotions! [See our full Gift Cards guide](/for-theatres/setting-up-gift-cards).
⏳ Waitlists
***Navigation**: Dashboard → Shows/Classes → \[Event Name] → Waitlist Settings*
> **Direct link:** [View Waitlist](https://crowdwork.com/dashboard/waitlist)
Never turn away a potential customer when events sell out:
1. Enable Waitlists
* Open any show or class
* Toggle waitlist collection on
* Waitlist automatically activates when sold out
2. Managing Waitlisted Patrons
* View waitlist from event overview page
* Send invitation emails when spots open
* Track conversion and demand
3. Why Use Waitlists
* Capture demand data for future planning
* Convert waitlisted patrons when cancellations occur
* Gauge interest for adding more dates
💡 **Pro Tip**: Waitlists turn sold-out events into new revenue opportunities! [See our full Waitlists guide](/for-theatres/setting-up-waitlists) or explore [creative waitlist strategies](/the-academy/crowdwork-academy/waitlists-never-turn-away-a-patron).
🧑🎨 Giving Your Staff Access
***Navigation**: Dashboard → Users*
> **Direct link:** [Manage Users](https://crowdwork.com/dashboard/users)
*Perfect for setting up your team with appropriate system access:*
1. Invite Staff Members
* Enter staff email address in the [Users Dashboard](https://crowdwork.com/dashboard/users)
* Click "Invite User"
* They'll receive account creation email
2. Assign Role Levels
* Box Office: For front desk, ticket checking
* Producer: Show management and customer data
* Instructor: Class management only
* Manager: Full access except financials
* Admin: Complete system access
💡 **Pro Tip**: Start staff with minimal access - you can always upgrade their role later! For more details on roles and permissions, [see our full Managing Staff guide](/for-theatres/managing-staff-and-users).
***
### **📖 Helpful Links**
*Quick links to a few pages you might find handy...*
**Platform Quick Links:**
* [Dashboard Login](https://crowdwork.com/account)
* [Shows Dashboard](https://crowdwork.com/dashboard/shows)
* [Classes Dashboard](https://crowdwork.com/dashboard/classes)
* [Customers Dashboard](https://crowdwork.com/dashboard/customers)
* [Students Dashboard](https://crowdwork.com/dashboard/students)
* [Analytics (Charts)](https://crowdwork.com/dashboard/analytics) · [Reports](https://crowdwork.com/dashboard/reports)
**Documentation:**
* [Complete Documentation](https://docs.crowdwork.com)
* [Theatre Settings Guide](https://docs.crowdwork.com/for-theatres/customizing-your-theatre-settings)
* [Show Creation Guide](https://docs.crowdwork.com/for-theatres/creating-a-show-or-class)
* [Point of Sale Setup](https://docs.crowdwork.com/for-theatres/setting-up-point-of-sale-pos)
* [Memberships Quick Start Guide](/the-academy/crowdwork-academy/memberships-quick-start-guide)
* [Contacting Support](/contacting-support)
***
### 🗺️ Navigation Quick Reference
*The quickest way to find what you need...*
Class & Show Management
> **Direct links:** [Shows](https://crowdwork.com/dashboard/shows) | [Classes](https://crowdwork.com/dashboard/classes) | [Registrations](https://crowdwork.com/dashboard/registrations) | [Tickets](https://crowdwork.com/dashboard/tickets)
* **Create Show/Class**: *Dashboard → Shows/Classes →* [*+ Add New Show*](https://crowdwork.com/dashboard/shows/new)*/*[*Class*](https://crowdwork.com/dashboard/classes/new)
* **Edit Show/Class**: *Dashboard → Shows/Classes → \[Event Name] → Edit*\
\
🥕 Read More: [Creating a Show or Class](/for-theatres/creating-a-show-or-class)
* **View Class Registrations** (2 options):
* *Dashboard → Classes → \[Class Name] → Registrations are in the table at the bottom*
* *→ Click ••• next to an order for more options (details/refunds)*
* *→ Checkmark that order and select Actions → Edit to modify (exchanges)*
* *Dashboard → Registrations → At the top, Filter by Class/Dates/ID → Click ••• next to an order for more options*
* **Moving Customers/Students to a Different Class/Show:** *Dashboard → Customers/Students → \[Person Name] → Edit → Select the ticket → Actions → Edit*\
\
🥕 Read More: [Managing Exchanges](https://docs.crowdwork.com/for-theatres/managing-exchanges)
* **View Sales Totals**: *Dashboard → Shows/Classes → \[Event Name] → Top of Page has Sales Info*
* **View/Manage Admissions for an Event**: *Dashboard → Shows/Classes → \[Event Name] → View admissions table at bottom of page*\
\
🥕 Read More: [Managing Admissions](/for-theatres/managing-admissions)
* **Get Email Notifications when a Class/Show is Purchased or Sells-Out:** *Dashboard →* [*Notifications*](https://crowdwork.com/dashboard/notifications) *→* [*+ Create New Notification*](https://crowdwork.com/dashboard/notifications/new)\
\
🥕 Read More: [Setting Up Notifications](https://docs.crowdwork.com/for-theatres/setting-up-notifications)
Customer Service Tasks(Exchanges & Refunds)
> **Direct links:** [Customers](https://crowdwork.com/dashboard/customers) | [Students](https://crowdwork.com/dashboard/students)
* **Switch Student to a Different Class**: *Dashboard →* [*Students*](https://crowdwork.com/dashboard/students) *→ \[Student Name] → Edit Student → Select the ticket/registration → Actions → Edit*
* **Exchange a Ticket**: *Dashboard →* [*Customers*](https://crowdwork.com/dashboard/customers) *→ \[Customer Name] → Edit Customer → Select the ticket/registration → Actions → Edit*\
\
🥕 Read More: [Managing Exchanges](https://docs.crowdwork.com/for-theatres/managing-exchanges)
* **Issue a Refund**: *Dashboard → Customers/Students → \[Person Name] → Edit → Click ••• next to order → Issue Refund*\
\
🥕 Read More: [Issuing Refunds](https://docs.crowdwork.com/for-theatres/issuing-refunds)
* **Help a Patron with a Common Issue** *(missing emails, login problems, payment failures, checkout errors)*: Most patron issues can be resolved directly from your Dashboard.\
\
🥕 Read More: [Helping Your Patrons](https://docs.crowdwork.com/for-theatres/helping-your-patrons)
Customer Information(Orders, Profiles & Custom Checkout Fields)
> **Direct links:** [Checkout Fields](https://crowdwork.com/dashboard/custom-fields) | [Theatre Settings](https://crowdwork.com/dashboard/theatres/0/edit)
* **Collect Phone Numbers from Students/Customers:** *Dashboard →* [*Theatre Details*](https://crowdwork.com/dashboard/theatres/0/edit#section-checkout) *→ Checkout Options → Collect Phone Numbers*
* **Collect Email Newsletters Subscriptions During Checkout**: *Dashboard →* [*Theatre Details*](https://crowdwork.com/dashboard/theatres/0/edit#section-checkout) *→ Checkout Options → Collect Newsletter Opt-Ins*
* **Collect Additional Info During Checkout**: *Dashboard →* [*Checkout Fields*](https://crowdwork.com/dashboard/custom-fields) *→ Edit Fields →* [*+ Add New Checkout Field*](https://crowdwork.com/dashboard/custom-fields/new)\
\
🥕 Read More: [Custom Checkout Fields](https://docs.crowdwork.com/for-theatres/custom-checkout-fields)
* **View Data Collected During Checkout** (3 options):
* *Dashboard → Checkout Fields → Submissions*
* *Dashboard → Customers/Students → \[Person Name] → Edit → Click ••• next to order → View Custom Submission*
* *Dashboard → Shows/Classes → \[Event Name] → Click ••• next to an order → View Custom Submission*
* **View Customer/Student Profile Details**: *Dashboard → Customers/Students → \[Person Name] → Profile Details at the top*
* **View Customer/Student Purchase History**: *Dashboard → Customers/Students → \[Person Name] → Orders in the bottom table*
Email Features(Activity Notifications, Custom Email Text, etc.)
> **Direct links:** [Notifications](https://crowdwork.com/dashboard/notifications) | [Theatre Settings](https://crowdwork.com/dashboard/theatres/0/edit)
* **Add an Opt-in for Email Newsletters During Checkout**: *Dashboard →* [*Theatre Details*](https://crowdwork.com/dashboard/theatres/0/edit#section-checkout) *→ Checkout Options → Collect Newsletter Opt-Ins*
* **Add Custom Information to all Emails**: *Dashboard →* [*Theatre Details*](https://crowdwork.com/dashboard/theatres/0/edit#section-descriptions) *→ Global Show/Class Descriptions*
* **Add Event-Specific Email Text**: *Dashboard → Classes/Shows → \[Event Name] → Edit button → scroll down to Confirmation Email section*
* **Format Descriptions and Emails / Add Images or Embed Videos**: See [Using the Rich Text Editor](https://docs.crowdwork.com/for-theatres/using-the-rich-text-editor)
* **Get Email Notifications on New Purchases or Sold-Out Events**: *Dashboard →* [*Notifications*](https://crowdwork.com/dashboard/notifications) *→* [*+ Create New*](https://crowdwork.com/dashboard/notifications/new) */ Edit an Existing Notification*
* **Find a Customer/Student Email Address**: *Dashboard → Customers/Students → \[Person Name] → Profile Details at the top*
* **Get all Customer/Student Email Addresses**: *Dashboard → Customers/Students → (optionally use the Filters) → Export CSV button*
* **Get all Customer/Student Email Addresses for a Specific Show/Class:** *Dashboard → Tickets/Registrations → Filter by Event/Date → Export CSV button*
Financial Tools(Fees, Reports, Square, Discounts, Donations)
> **Direct links:** [Analytics](https://crowdwork.com/dashboard/analytics) | [Discount Codes](https://crowdwork.com/dashboard/discounts) | [Payment Plans](https://crowdwork.com/dashboard/payment-plans)
* **Collect Payment While Adding Tickets for a Patron**: *Dashboard → Customers → \[Patron Name] → Edit Customer → + Add Tickets button*\
🥕 Read More: [Adding Tickets for a Patron](/for-theatres/adding-tickets-for-a-patron)
* **Accepting Donations**: *Dashboard →* [*Theatre Details*](https://crowdwork.com/dashboard/theatres/0/edit#section-donations) *→ Edit Details button → Donation Options*\
\
🥕 Read More: [Setting Up Donations](/for-theatres/setting-up-donations)
* **Change How Fees are Handled**:\` *Dashboard →* [*Theatre Details*](https://crowdwork.com/dashboard/theatres/0/edit#section-fees) *→ Edit Details button → Fees → How would you like service fees handled?*
* **Change Square Account**: *Dashboard →* [*Theatre Details*](https://crowdwork.com/dashboard/theatres/0/edit) *→ Update Connected Square Account button*\
\
🥕 Read More: [Connecting Your Square Account](/for-theatres/setup-your-theatre-account/connecting-your-square-account)
* **View Reports**: *Dashboard → Analytics →* [*Reports*](https://crowdwork.com/dashboard/reports)\
\
🥕 Read More: [Getting Started with Reports](https://docs.crowdwork.com/for-theatres/reports-and-analytics)
* **Export Ticket or Registration Data for a Specific Show or Class**: *Dashboard → Tickets/Registrations → Filter by Name → Export to CSV button*
* **Export Your Full Customer or Student List**: *Dashboard → Customers/Students → (optionally use the Filters) → Export CSV button*\
\
🥕 Read More: [Exporting Your Data](https://docs.crowdwork.com/for-theatres/exporting-your-data)
* **Export Your Full Order History**: *Dashboard →* [*Orders*](https://crowdwork.com/dashboard/orders) *→ Export to CSV button*\
\
🥕 Read More: [Exporting Your Data](https://docs.crowdwork.com/for-theatres/exporting-your-data)
* **Offer Discount Codes**: *Dashboard →* [*Discount Codes*](https://crowdwork.com/dashboard/discounts)\\
* **Create a Bundle of Shows and/or Classes**: *Dashboard →* [*Bundles*](https://crowdwork.com/dashboard/bundles) *→* [*+ Create New Bundle*](https://crowdwork.com/dashboard/bundles/new)\
\
🥕 Read More: [Setting Up Bundles](https://docs.crowdwork.com/for-theatres/setting-up-bundles)\
\
🥕 Read More: [Setting Up Discount Codes](/for-theatres/setting-up-discount-codes)
* **Offer Payment Plans:** *Dashboard →* [*Payment Plans*](https://crowdwork.com/dashboard/payment-plans) *→ Manage Plans →* [*+ Create New Plan*](https://crowdwork.com/dashboard/payment-plans/new) *button*\
\
🥕 Read More: [Payment Plans](/for-theatres/setting-up-payment-plans)
Marketing Tools(Email Lists, Discounts, Gift Cards, Website Embeds)
> **Direct links:** [Embeds](https://crowdwork.com/dashboard/embeds) | [Discount Codes](https://crowdwork.com/dashboard/discounts) | [Gift Cards](https://crowdwork.com/dashboard/gift-cards) | [Tags](https://crowdwork.com/dashboard/tags)
* **Embed Full Calendar of All Shows or Classes on My Website**: *Dashboard → Theatre →* [*Embeds*](https://crowdwork.com/dashboard/embeds) *→ Shows or Classes section → Copy calendar widget code*
* **Embed Calendar of Some Shows/Classes on My Website**: *Dashboard → Theatre →* [*Embeds*](https://crowdwork.com/dashboard/embeds) *→ Shows or Classes section → Filter by Tags → Copy calendar widget code*\
\
🥕 Read More: [Embedding Widgets](https://docs.crowdwork.com/for-theatres/embedding-a-widget)
* **Sales, Promos and Discount Codes**: *Dashboard →* [*Discount Codes*](https://crowdwork.com/dashboard/discounts)\
\
🥕 Read More: [Setting Up Discount Codes](/for-theatres/setting-up-discount-codes)
* **Add an Opt-in for My Email List During Checkout**: *Dashboard →* [*Theatre Details*](https://crowdwork.com/dashboard/theatres/0/edit#section-checkout) *→ Checkout Options → Collect Newsletter Opt-Ins*
* **Send a Newsletter, Promotion, or Announcement to Patrons**: *Dashboard → Emails → Campaigns → New Campaign*\
\
🥕 Read More: [Email Marketing](https://docs.crowdwork.com/for-theatres/email-marketing)
* **Get Email List of all Customers/Students**: *Dashboard → Customers/Students → (optionally use the Filters) → Export CSV button*
* **Get Email List of Customers/Students for a Specific Show/Class:** *Dashboard → Tickets/Registrations → Filter by Event/Date → Export CSV button*
* **What is the Direct Link to My CrowdWork Website**: *Dashboard → Public Links → Shows/Classes*
* **Track Ad Conversions with Google, Meta, TikTok, etc.**: *Dashboard →* [*Theatre Details*](https://crowdwork.com/dashboard/theatres/0/edit#section-tracking) *→ Custom Tracking Pixels section*\
\
🥕 Read More: [Tracking Pixels & Conversion Events](/for-theatres/tracking-pixels-and-conversion-events)
Notifications(Purchase & Sold-Out Alerts)
> **Direct link:** [Notifications Dashboard](https://crowdwork.com/dashboard/notifications)
* **Get Notified When Someone Makes a Purchase**: *Dashboard →* [*Notifications*](https://crowdwork.com/dashboard/notifications) *→* [*+ Create New Notification*](https://crowdwork.com/dashboard/notifications/new) *→ Select "Purchase" trigger*
* **Get Alerts When an Event Sells Out**: *Dashboard →* [*Notifications*](https://crowdwork.com/dashboard/notifications) *→* [*+ Create New Notification*](https://crowdwork.com/dashboard/notifications/new) *→ Select "Sold Out" trigger*\
\
🥕 Read More: [Setting Up Notifications](https://docs.crowdwork.com/for-theatres/setting-up-notifications)
Theatre Settings(Your Account Details, Fees, Your Links)
> **Direct link:** [Theatre Settings](https://crowdwork.com/dashboard/theatres/0/edit)
* **Change My Theatre Name/Email/Logo/other**: *Dashboard →* [*Theatre Details*](https://crowdwork.com/dashboard/theatres/0/edit#section-general) *→ Edit Details button*
* **Change My Theatre Subdomain**: [Contact Support for help on this.](/contacting-support)
* **Change How Fees are Handled**:\` *Dashboard →* [*Theatre Details*](https://crowdwork.com/dashboard/theatres/0/edit#section-fees) *→ Edit Details button → Fees → How would you like service fees handled?*\
\
🥕 Read More: [Customizing Your Theatre Settings](/for-theatres/customizing-your-theatre-settings)
* **What is the Link to My Shows/Classes Website**: *Dashboard →* [*Public Links*](https://crowdwork.com/dashboard/public-links) *→ Shows/Classes*
Website Integration(Embed Calendars or Cards on Your Website)
> **Direct link:** [Embeds Dashboard](https://crowdwork.com/dashboard/embeds)
* **Embed Full Calendar of All Shows or Classes**: *Dashboard → Theatre →* [*Embeds*](https://crowdwork.com/dashboard/embeds) *→ Shows or Classes section → Copy calendar widget code*
* **Embed Calendar of Some Shows/Classes**: *Dashboard → Theatre →* [*Embeds*](https://crowdwork.com/dashboard/embeds) *→ Shows or Classes section → Filter by Tags → Copy calendar widget code*\
\
🥕 Read More: [Embedding Widgets](https://docs.crowdwork.com/for-theatres/embedding-a-widget)
***
### Getting Help
Need help? Our support team is always here for you! [Contact Support](/contacting-support) through your Dashboard or email [support@crowdwork.com](/contacting-support)
**Love CrowdWork?** Know a fellow theatre that could benefit? [Share our referral program](https://crowdwork.com/referral) and help more independent theatres discover us!
# Ⓜ️ Memberships: Quick Start Guide
Here's a simple guide for getting started with our Memberships feature. Follow along to create subscription plans that give your patrons access to the events you select.
## Getting Started with Memberships: A Simple Guide
Since adding our Memberships feature, many theaters have already experienced the benefits of **creating predictable, recurring revenue streams** while **building stronger patron loyalty and community**. This powerful tool not only **boosts attendance at your events** by eliminating the "should I pay for this?" decision barrier.
*And that's just the beginning! Let's dig in a little further...*
## How Memberships Work: The Essentials
* **Set your price and schedule:** Choose how much to charge and when (weekly, monthly, yearly, or one-time), *which means you create predictable recurring revenue or seasonal programs!*
* **Select the events:** Apply consistent tags to shows and classes you want to include (e.g., "MemberAccess" or "Premium"), *which means you control what programming is included!*
* **Members get full access:** Members can attend any occurrence of any included event during their membership period, *which means your events have even better attendance!*
* **Simple redemption:** Members must be logged in and reserve their spot through regular checkout (price shows as $0), *which means you can still manage capacity and track attendance!*
* **Automatic billing:** Recurring members are charged on the same calendar date of each period (join on the 15th, pay on the 15th), *which means you can rely on consistent monthly income!*
{% hint style="success" %}
**✨ Special Feature**
**Memberships** is one of our **Special Features** — powerful tools to grow your revenue and deepen patron loyalty. These features are completely optional. When enabled, each one adds a 1% fee to all transactions. If your theatre passes fees on to customers (the default setting), they cost you nothing to use.
[*Read more about Special Feature pricing >*](https://docs.crowdwork.com/for-theatres/setup-your-theatre-account/understanding-crowdwork-fees#special-features)
{% endhint %}
## It's time to create your first Membership plan!
Memberships works as easily as most of our features, but these steps will get you up to speed in no time.
### Quick Setup Steps
1. **On your Dashboard, go to the *****Memberships***** menu.**
2. **Name Your Membership:** Choose a simple, clear name (e.g., "Monthly Pass," "Season Pass," or "Unlimited Access")
3. **Choose Your Billing:** Select "monthly" for ongoing programs, "yearly" annual passes or "once" for festival badges
4. **Include Your Shows:** Decide which shows will be included (we recommend including most or all of your regular programming)
5. **Set Your Price:** Try the pricing guide below as your starting point (memberships can even be free!)
6. **Write a Simple Description:** Example: "Enjoy unlimited access to all our regular performances for one monthly fee. Attend as many different shows as you like!"
7. **Activate in CrowdWork:** Turn on the Memberships feature and create your first tier
### Start With One Simple Tier
For your first membership program, start with just one clear membership tier that includes most or all of your programming. You can always add premium tiers, password-protected VIP access, or usage-limited options later!
### Try Simple Pricing: The 2.5x Rule
For an easy way to price your membership, multiply your average ticket price by 2.5.
{% hint style="info" %}
**Why 2.5x instead of 2x?** Unlike regular ticket sales, membership processing fees are always absorbed by your theatre rather than passed to customers. This creates a cleaner subscription experience, but means you should build those costs into your pricing.
{% endhint %}
For example:
* If your average ticket is $15, price your membership around $35-40/month
* If your average ticket is $25, price your membership around $60-65/month
This pricing ensures members break even after attending just 2 events per month while covering your processing costs, making it an attractive value for everyone.
{% hint style="info" %}
**Special Cases:**
* **Low-price accessibility venues** ($5-10 tickets): Consider matching your membership price to your ticket price. One theatre with $5 tickets offers a $5 membership and generates $1,500/month!
* **Season passes**: Total up the full retail price of your season and discount by an amount that feels right for your audience. If you're not sure where to start, try 20–30% off the full-season price
* **Free memberships**: Set price to $0.00 for community building, student access, or volunteer programs
{% endhint %}
## Popular Membership Models
Try one the following pass ideas. Adjust the details to fit your audience, organization & events:
Performance Pass
Best for: Theaters with multiple shows each month
Price: 2.5x your average ticket price
Perks: Access to all/most performances
Billing: Monthly or yearly recurring
Workshop Pass
Best for: Training focused organizations
Price: 75% of average workshop price
Perks: Access to tagged workshops
Billing: Monthly recurring or one-time for series
Community Pass
Best for: Venues with both shows & classes
Price: Performance + 50% of workshop pass price
Perks: Access to all shows plus limited class access
Billing: Monthly or yearly recurring
## Important Member Details
**Members Must Log In:** Remind your members that they need to be logged in to their CrowdWork account when purchasing tickets for their membership benefits to apply automatically.
**Advanced Options:** Once you're comfortable with basic memberships, you can explore password-protected tiers for VIP access, usage limits for "flex passes," and discount codes for special promotions.
{% hint style="success" %}
**✨ Worth knowing early: a membership doesn't have to cover a whole show.**
You can set a tier to cover one *ticket type* — the general admission seat but not the premium one, or not the version that comes with a drink. Better still, you can write the rule by tier *name*, so it keeps applying to every show you add from then on without you editing anything.
You can also choose what members get: free admission, a percentage off, or a dollar amount off. Free is the default and the simplest place to start. [See Choosing What a Membership Covers >](/for-theatres/setting-up-memberships#choosing-what-a-membership-covers)
{% endhint %}
## Membership FAQ for New Programs
**Q: Will this cannibalize our ticket sales?**\
A: Some shift from individual ticket sales to membership revenue is normal — that's the model working as intended. Generally, membership revenue more than offsets any change in à la carte ticket sales, especially when members attend more frequently and bring guests.
**Q: How many members should we expect?**\
A: Start with realistic expectations — even a small group of committed members creates meaningful recurring revenue. You can always grow from there.
**Q: Should we offer discounted memberships?**\
A: Keep it simple at first. Add discount tiers (student, senior) or free community memberships after your program is established.
**Q: How do patrons redeem their benefit?**\
A: They must be logged in and still "purchase" tickets through the normal checkout process. On covered events the price shows as $0 if the tier gives free admission, or already reduced if you set it to a percentage or dollar amount off.
**Q: Can we do season tickets instead of monthly memberships?**\
A: Yes! Select "Once" as the billing cadence for one-time season passes or festival badges. You might also consider setting "Max Uses" to the number of productions in your season.
## Next Steps
Tell your audiences about your new program. Once your basic membership program is running smoothly and has 10+ members:
1. Analyze member attendance patterns
2. Gather feedback from early members
3. Consider adding premium tiers or special benefits
4. Refer to our comprehensive [Setting Up Memberships guide](/for-theatres/setting-up-memberships) for advanced strategies
Remember, the key to successful memberships is simplicity and clear value. Start with the basics, then grow your program as you learn what works for your specific audience!
## Need help?
[**Check out our full article about *****Setting up and managing Memberships***](/for-theatres/setting-up-memberships)*.*
And as always, our support team is here anytime you need us! [Contact Support](/contacting-support) through your Dashboard or email [support@crowdwork.com](/contacting-support)
***
# Waitlists: Never Turn Away a Patron
### Why Every Theatre and School Needs a Waitlist Strategy
{% hint style="success" %}
**Native Waitlist Feature Now Available!**
Great news! CrowdWork now has a **built-in waitlist feature** that automatically activates when events sell out. Check out our complete guide: [**Setting Up Waitlists**](/for-theatres/setting-up-waitlists)
The strategies below remain useful for special situations or if you prefer a DIY approach, but most venues will find the native feature handles their waitlist needs perfectly.
{% endhint %}
Waitlists aren't just backup plans—they're powerful tools that transform "sold out" from a dead end into an opportunity. With CrowdWork's platform, you can:
* **Capture additional revenue** when shows or classes sell out
* **Reduce no-shows** by quickly filling last-minute cancellations
* **Gauge interest** in potential new programming
* **Build anticipation** and create FOMO for popular offerings
* **Collect valuable data** on audience/student demand
Let's explore four proven strategies that theaters are using right now to implement effective waitlists on CrowdWork. Here's a quick overview of each:
***
### Option 1: Add a Ticket Tier
> **Best for:** Single-price events that might sell out (performances, one-time workshops)\
> **Difficulty:** ⭐⭐ (Moderate)\
> **Setup time:** 5-10 minutes\
> **Pros**: All-in-one management • Easier discovery by patrons\
> **Cons**: Doesn't work for multi-tier events • Reporting shows confirmed & waitlist in totals
This approach keeps everything under one event, making management streamlined:
1. Edit your event > go to **Pricing** section > select "Multiple Prices"
2. For your regular ticket:
* Set a specific "Tier Quantity" to prevent overselling
* Leave "Global Max Quantity" empty
3. Add a new ticket type:
* Name it "Waitlist"
* Set price to $0
* Leave Tier Quantity blank (for unlimited waitlist spots)
4. Add a note to both your event description and confirmation emails, something like:
> "Waitlist tickets do not guarantee entry. We'll contact you if a spot becomes available."
5. When spots open, you can create a [password protected tier](/for-theatres/creating-a-show-or-class#pricing-and-tiers) on the original event and send waitlisted patrons to a link to purchase the new tier. (Or use [other conversion methods](#q-how-do-i-move-someone-from-waitlist-to-confirmed).)
**Pro Tips:**
* Use the waitlist to gauge interest in additional sessions of popular workshops or classes.
* In the Fine-Tune section, set a custom **Checkout Button Label** (e.g., `Get Tickets / Join Waitlist`) so patrons can tell at a glance that a waitlist option is available. See [Creating a Show or Class](https://docs.crowdwork.com/for-theatres/creating-a-show-or-class#fine-tune) for details.
***
### Option 2: Use a Duplicate Event
> **Best for:** Events with multiple price tiers (several ticket options, complex registrations)\
> **Difficulty:** ⭐⭐⭐ (Intermediate)\
> **Setup time:** 10-15 minutes\
> **Pros**: Keeps waitlist separate from actual tickets • Cleaner reporting • Works with any event type\
> **Cons**: Requires managing two events • Extra step for patrons to find waitlist • More maintenance
This creates a separate waitlist pipeline:
1. Duplicate your existing event
2. Modify the duplicate:
* Add "WAITLIST" to the event name
* Change to "Single Price" (free)
* Set to "Unlisted" in Fine-Tune section (to hide it from your calendar/event list)
* In the Fine-Tune section, set the **Checkout Button Label** to `Join Waitlist` so the action is unmistakable to patrons. See [Creating a Show or Class](https://docs.crowdwork.com/for-theatres/creating-a-show-or-class#fine-tune) for details.
3. In the confirmation email and description, add:
> "This waitlist registration does not guarantee entry. We'll contact you if spots open up."
4. View the public page and copy the URL
5. Add a link to your original event:
> "Sold out? Join our waitlist here"
6. When spots open, you can create a [password protected tier](/for-theatres/creating-a-show-or-class#pricing-and-tiers) on the either event and send waitlisted patrons to a link to purchase the new tier. (Or use [other conversion methods](#q-how-do-i-move-someone-from-waitlist-to-confirmed).)
{% hint style="warning" %}
Reminder: Don't forget to double check descriptions and dates to ensure your actual events and waitlist events are correctly and clearly labeled.
{% endhint %}
**Pro Tips:**
* Date your waitlist event a few minutes after the main event. This helps with chronological sorting in reports and if showing on your calendar/event list.
* For semester-long classes, create a waitlist event that spans the entire semester rather than individual sessions.
***
### Option 3: Link an External Form
> **Best for:** Collecting detailed information or complex needs\
> **Difficulty:** ⭐⭐⭐ (Intermediate)\
> **Setup time:** 15-20 minutes\
> **Pros:** Flexibility for custom integration • Separate data management • Most control over process\
> **Cons:** Patron data lives outside CrowdWork • Manual tracking required • Extra steps for conversion
This gives you maximum control:
1. Create an online form using [Google Forms](https://forms.google.com/) or a similar service.
2. Create fields for:
* Contact information
* Preferred dates/times
* Number of tickets/registrations needed
* Any special requirements
3. Add a link in your event description:
> "Want to be notified if spots open up? Join our waitlist"
4. Set up email notifications directly with your forms service to stay aware of submissions
5. When spots open, you can create a [password protected tier](/for-theatres/creating-a-show-or-class#pricing-and-tiers) on the original event and send waitlisted patrons to a link to purchase the new tier. (Or use [other conversion methods](#q-how-do-i-move-someone-from-waitlist-to-confirmed).)
{% hint style="success" %}
If the collection of additional details is your primary reason for using an external from, remember that you can add [Custom Checkout Fields](/for-theatres/custom-checkout-fields) to any CrowdWork event which will allow you to collect the same data and still keep your patrons connected in your CrowdWork account.
{% endhint %}
**Pro Tips:**
* Use form responses to gauge interest in adding additional performances/classes.
* Ask waitlisted students about alternative time slots they could attend.
{% hint style="danger" %}
Using an external form service can be a great solution, but it does mean your waitlisted patron data will be completely separate from your CrowdWork account. Some venues may prefer this, some may not.
{% endhint %}
***
### Option 4: Placeholder Events
> **Best for:** Save-the-date and future-season events, plus workshops or classes that only run if they reach a minimum number of registrations\
> **Difficulty:** ⭐ (Beginner)\
> **Setup time:** 5 minutes per event\
> **Pros:** Tests market demand before committing • Builds early interest • Great for recurring programs\
> **Cons:** Not for immediate waitlist needs • Requires creating a placeholder event • Needs manual conversion
{% hint style="success" %}
**Perfect for workshops that need a minimum number of students**
If an instructor requires a minimum class size — or you simply don't want to run a workshop unless enough people commit — use this approach to confirm interest *before* you commit. Patrons sign up with a **free** interest ticket, so no money changes hands up front. If you reach your minimum, open sales and invite them to register. If you don't, simply close the event — since nothing was charged, there's nothing to refund and no processing fees lost on a transaction that never happened.
{% endhint %}
This strategy is essentially the same as Option 2 (Duplicate Events) but is intended to specifically collect patron info for potential/expected future events. This can also help you gauge interest before fully committing resources to support a future event:
1. Create placeholder events for your upcoming season (expected or potential shows/classes)
2. Add "Coming Soon" or "Waitlist" or "Class Preview" in the title
* In the Fine-Tune section, set the **Checkout Button Label** to something like `Reserve My Spot`, `I'm Interested!`, `Get Notified`, or `Sign Up for Updates` to match the placeholder framing. See [Creating a Show or Class](https://docs.crowdwork.com/for-theatres/creating-a-show-or-class#fine-tune) for details.
3. Add a **free** ticket tier with a clear, descriptive name — for example "Join the Interest List," "Sign Up to Be Notified," or "Free Interest Sign-Up." Naming it distinctly now makes these early sign-ups easy to tell apart from the named paid tiers you add later when sales open.
4. In the description, add:
> "This event is not yet open for registration. Sign up here to be first in line when sales open!"
5. When sales open, you can offer an [early-bird tier](/for-theatres/creating-a-show-or-class#pricing-and-tiers) or create a [password protected tier](/for-theatres/creating-a-show-or-class#pricing-and-tiers) on the original event and send waitlisted patrons to a link to purchase the new tier. (Or use [other conversion methods](#q-how-do-i-move-someone-from-waitlist-to-confirmed).)
{% hint style="info" %}
**Reuse the same event — don't start over**
Your event isn't locked once it's created. When you're ready to run it, edit this *same* placeholder event rather than building a new one: update the title (remove "Coming Soon," etc.), add your paid ticket tiers, and open sales. Everyone who signed up for the free interest tier stays attached to this event, so your sign-up list is right there when you invite them to register.
{% endhint %}
**Pro Tips:**
* Tag all your waitlist events with "waitlist" to create an easy reference URL (e.g., `crowdwork.com/category/waitlists`) that you can post and share elsewhere.
* Use placeholder events to test demand for new class offerings before committing resources.
***
### Managing Your Waitlist: Best Practices
Once you have waitlist signups, you'll need a process to manage them:
1. **Set clear policies** in your confirmation emails:
* How you'll notify waitlisted patrons (email, phone)
* How long they have to respond (24 hours recommended)
* Whether you follow strict order or prioritize certain situations
2. **Create a notification template** ready to send when spots open for waitlisters:
> "Good news! A spot has opened up for \[EVENT]. Please confirm by \[DEADLINE] by \[PAYMENT METHOD/LINK]."
3. **Choose how you will convert waitlisters** to actual ticketholders, you have options. See the FAQ below on [moving someone from waitlist to confirmed](#q-how-do-i-move-someone-from-waitlist-to-confirmed).
***
### Using Waitlists to Promote New Dates or Events
{% hint style="info" %}
**This section applies to the native waitlist feature.** If you're using the DIY strategies above, you already have full control over how you communicate with waitlisted patrons.
{% endhint %}
With CrowdWork's [native waitlist feature](/for-theatres/setting-up-waitlists), patrons sign up for a specific date/time occurrence. When you email them, the default link takes them back to that same occurrence. But what if you want to use the waitlist to promote a **completely new date** you've added, or even a different event entirely?
This is a great marketing opportunity! Here's how to do it:
1. **Create the new event or occurrence** — Add the new date/time to your event, or create an entirely new event
2. **Copy the link** — View the public page for the new occurrence and copy its URL
3. **Customize the waitlist email** — When sending the invitation email from your [Waitlist dashboard](https://crowdwork.com/dashboard/waitlist), edit the message body to:
* Explain that you've added a new date/time (or a new event)
* Include the link to the new occurrence (paste the URL you copied)
* Optionally mention any password if using a password-protected tier
4. **Update the sold-out event page** *(recommended)* — On the event details page for the original sold-out occurrence, add a prominent note in the description directing visitors to the new event. This helps anyone who visits the page directly.
{% hint style="warning" %}
**Note:** The automatic "View Event" button in the email **will still link to the original occurrence** the patron signed up for. ***Make sure your custom message clearly directs patrons to click your new link instead***.
{% endhint %}
**Example email content:**
> Great news! Due to popular demand, we've added another show on Saturday, March 15th at 8pm. Click here to grab your tickets before they're gone: \[paste your link]
This approach lets you leverage your waitlist as a built-in marketing list for related events and new dates!
***
### Common Questions
Q: Will waitlisted patrons be counted in my event reports?
A: Yes, and...
* if using Option 1 (Ticket Tier): The CSV export of an event will contain a 'tiers' column, allowing you to filter out purchasers from waitlisters and contact them.
* if using Option 2 (Duplicate Event): You now have an easy to use email list to contact interested patrons, just download the CSV export for the duplicated Waitlist event.
* if using Option 3 (External Form): Well, not really. You'll need to manage interested parties separate from your CrowdWork data.
* if using Option 4 (Placeholder Events): This would be the same as Option 2 (Duplicate Event). Each event will be a collection of interested patrons.
Q: How do I move someone from waitlist to confirmed?
* For Option 1 (Ticket Tier): You could...
* manually edit the patron's 'waitlist' ticket and move them to an actual ticket, then manually receive payment from the patron;
* create a password protected ticket tier and send the patron the password to use on the original event link to purchase;
* For Options 2, 3, 4: You'll need to handle the registration manually, likely by contacting those patrons and sending them a link to purchase/register when your actual event is available.
* Optionally, can use other CrowdWork features to control the process:
* Use [Password Protected Tiers](/for-theatres/creating-a-show-or-class#pricing-and-tiers) to control who has access at the event level
* Use [Tier End Dates (Early Bird)](/for-theatres/creating-a-show-or-class#pricing-and-tiers) sales window to time-limit access
* Use [Discount Codes](/for-theatres/setting-up-discount-codes) to more easily offer access to multiple events
* Use [Payment Plans](/for-theatres/setting-up-payment-plans) to get financial commitments & secure sign-ups
Q: How do I handle a class or workshop that needs a minimum number of students to run?
A: Use the Option 4 (Placeholder Events) approach. Collect free interest sign-ups first; once you reach your minimum, open sales and invite those patrons to register. Because nothing is charged up front, you never have to issue refunds — or lose the processing fees that come with them — if the event doesn't reach its threshold.
Q: Can I automate the waitlist process?
A: Yes! CrowdWork's [native waitlist feature](/for-theatres/setting-up-waitlists) automatically captures waitlist signups when events sell out. You can then email waitlisted patrons directly from the dashboard. The DIY methods on this page require more manual work but offer additional flexibility for specific situations.
Q: Is there a limit to how many people can join my waitlist?
A: No — anyone can join when an event is sold out. Not every patron will convert, so a larger waitlist gives you more opportunities to fill spots when they open up.
***
### Get Started: Your Waitlist Implementation Checklist
{% hint style="info" %}
**Using the native waitlist feature?** Most of this is handled automatically! Just verify waitlists are enabled in your [Theatre Checkout Options](https://crowdwork.com/dashboard/theatres/0/edit#section-checkout) and you're good to go. See the full guide: [Setting Up Waitlists](/for-theatres/setting-up-waitlists)
{% endhint %}
**For DIY waitlist strategies:**
* [ ] Identify which events need waitlists
* [ ] Choose the appropriate waitlist strategy [above](#why-every-theatre-and-school-needs-a-waitlist-strategy)
* [ ] Set up your waitlist(s) in CrowdWork
* [ ] Decide in advance how you will register waitlisters and collect payments\
(i.e., create new event, modify their registration on the waitlist event, etc)
* [ ] Add waitlist information to your website/FAQs/[Global descriptions](/for-theatres/customizing-your-theatre-settings#global-show-and-class-descriptions)
* [ ] Train staff on managing waitlist conversions
* [ ] Review waitlist data after events to see what worked
***
Remember, a waitlist isn't just a backup plan—it's a powerful tool for maximizing your venue's potential and creating more opportunities for your patrons to experience your events!
***
### Need Help?
If you need assistance setting up your waitlist or have questions about which strategy would work best for your venue, [reach out to our support team](/contacting-support).
# Selling Tickets to Livestream Events
How to use CrowdWork's ticketing features to sell access to livestreamed performances, including streaming-only and hybrid in-person/virtual events.
### How Theatres Are Using CrowdWork for Virtual and Hybrid Events
While CrowdWork doesn't have a native streaming integration, many theatres have successfully used our ticketing features to sell access to livestreamed performances. Whether you're offering a streaming-only event or a hybrid experience with both in-person and virtual options, this guide covers the approaches that have worked for other venues.
{% hint style="info" %}
**Important:** CrowdWork handles the ticketing—you'll need to use an external streaming platform (Zoom, YouTube Live, Vimeo, etc.) to deliver the actual stream. This guide focuses on how to sell tickets and communicate streaming access to your patrons.
{% endhint %}
***
## Why Consider Livestreaming?
Even if you haven't thought about livestreaming before, it's worth considering as an additional revenue stream. Here's why theatres are adding virtual options:
* **Bonus revenue with minimal overhead:** Once your show is happening anyway, a livestream ticket—even at a low price point—is nearly pure profit
* **Expand your audience globally:** Performers can share the event link with friends, family, and fans who can't make it to your venue in person
* **Convert sold-out disappointment into sales:** When your in-person show sells out, livestream tickets give waitlisted patrons another way to attend
* **Lower the barrier to entry:** Inexpensive virtual tickets let new audiences sample your programming before committing to an in-person visit
* **Weather-proof your revenue:** Bad weather keeping people home? Virtual attendees aren't affected
{% hint style="success" %}
**You don't need fancy equipment to start.** Many theatres have found success with surprisingly simple setups—even a smartphone on a tripod streaming to a private channel. The key is getting started and learning what works for your venue.
{% endhint %}
***
## Simple Streaming Setups
You don't need a professional broadcast studio to offer livestreams. Here are some approaches theatres have used, from simplest to more advanced:
### Basic Setup (Minimal Investment)
* **Equipment:** Smartphone or tablet on a tripod
* **Platform:** Zoom, Facebook Live, or YouTube Live
* **Best for:** Testing the waters, smaller shows, classes
### Intermediate Setup
* **Equipment:** Webcam or camcorder, basic microphone, laptop
* **Platform:** Zoom, YouTube Live, Vimeo
* **Best for:** Regular streaming, better audio quality
### Advanced Setup
* **Equipment:** Multiple cameras, mixing software (OBS), dedicated audio
* **Platform:** YouTube Live, Vimeo, dedicated streaming services
* **Best for:** High-production-value streams, larger audiences
***
## Choosing a Streaming Platform
The key question for paid livestreams is: **How do you keep the stream private so only ticket buyers can access it?**
Here's how popular platforms handle privacy:
| Platform | Privacy Options | Pros | Cons |
| ----------------- | --------------------------------------------------------------- | --------------------------------------------------------------------- | -------------------------------------------------- |
| **Zoom** | Meeting password, waiting room, registration required | Easy access control; familiar to most users; host can admit attendees | Viewer limits on some plans; less "broadcast" feel |
| **YouTube Live** | Unlisted videos (not searchable, but anyone with link can view) | Free; unlimited viewers; good quality | Not truly private—links can be shared |
| **Vimeo** | Password protection, domain restrictions, private links | Strong privacy controls; professional quality | Paid plans required for livestreaming |
| **Facebook Live** | Private groups, events for specific audiences | Easy if audience already uses Facebook | Requires Facebook accounts; less control |
{% hint style="warning" %}
**"Unlisted" ≠ "Private":** YouTube's unlisted videos won't appear in search results, but anyone with the link can watch and share it. For true access control, Zoom or Vimeo's password protection offers more security.
{% endhint %}
### Recommendations by Use Case
**For maximum privacy/control:** Zoom with a meeting password or waiting room. You can admit only verified ticket holders.
**For ease of use with large audiences:** YouTube Live (unlisted) is simple and handles unlimited viewers, though links can technically be shared.
**For professional quality with privacy:** Vimeo with password protection balances quality and access control, though it requires a paid plan.
**For casual/community streams:** Facebook Live to a private group works well if your audience is already on Facebook.
***
## Two Main Approaches
| Approach | Best For | Key Consideration |
| -------------------------------------------------------- | -------------------------------------------------- | ---------------------------------------------------- |
| [**Streaming-Only Event**](#streaming-only-events) | Events with no in-person attendance | Simpler setup, one ticket type |
| [**Hybrid Event**](#hybrid-events-in-person--livestream) | Events offering both in-person AND virtual tickets | Requires careful capacity and communication planning |
***
## Streaming-Only Events
> **Best for:** Virtual performances, online classes, remote workshops\
> **Difficulty:** ⭐ (Beginner)\
> **Setup time:** 10-15 minutes
For events where all attendees will watch via livestream:
### Step 1: Create Your Event
Create your show or class as you normally would:
* Set your event name, date, and time
* Add a description explaining this is a livestream event
* Set your ticket price and quantity (leave quantity blank for unlimited virtual seats)
{% hint style="info" %}
**Make the buy button match the experience.** Use the **Checkout Button Label** in the Fine-Tune section to override the default — try `Watch Livestream`, `Get Stream Access`, or `Register to Watch` so patrons immediately understand what they're buying. See [Creating a Show or Class](https://docs.crowdwork.com/for-theatres/creating-a-show-or-class#fine-tune) for details.
{% endhint %}
### Step 2: Add Streaming Info to the Confirmation Email
Navigate to your event's edit page and scroll to the **Confirmation Email** section. This is where you'll communicate streaming details to ticket buyers.
{% hint style="warning" %}
**Video embeds don't work in confirmation emails.** Email clients don't support embedded video players. If you want to include a video link for patrons, the best practice is to insert a screenshot of the video (with a play button visible) as an image, then link that image to the video URL. Patrons see a familiar thumbnail, click it, and go directly to the video. See [Using the Rich Text Editor](https://docs.crowdwork.com/for-theatres/using-the-rich-text-editor) for help adding images and links.
{% endhint %}
#### **Option A: Include the stream link directly**
If your streaming platform uses a static link (like a Zoom meeting room), you can include it right in the confirmation email:
> **Your Livestream Access** Join the show using this link: \[your Zoom/YouTube link] The stream will go live at \[time]. We recommend joining 5-10 minutes early.
#### **Option B: Promise to send the link before showtime**
If you prefer to send the link closer to the event (recommended for most theatres):
> **Livestream Ticket Confirmed!** Your livestream link will be sent to this email address approximately 1 hour before showtime. If you haven't received it by \[specific time], please contact us at \[your email/phone].
{% hint style="warning" %}
**Pro Tip:** Whatever timing you promise, beat it by 30-60 minutes. If you say "1 hour before," send it 90 minutes or 2 hours before. Excited patrons often check early, and sending ahead of schedule prevents anxious support requests.
{% endhint %}
### Step 3: Send the Streaming Link (If Not Included in Confirmation)
Before your event, use CrowdWork's email feature to send the streaming link to all ticket holders. See [Contacting Attendees](https://docs.crowdwork.com/for-theatres/managing-admissions#contacting-attendees) for detailed instructions.
1. Navigate to your event's overview page
2. Select the ticket holders you want to email
3. Compose your email with the streaming link and any last-minute instructions
**Timing recommendations from theatres:**
* 2-3 days before: Good for complex events requiring patron preparation
* 2-3 hours before: Balances freshness with giving patrons time to prepare
* 30-60 minutes before: Reduces risk of link sharing, but may cause support requests
***
## Hybrid Events: In-Person + Livestream
> **Best for:** Performances offering both venue attendance and virtual viewing\
> **Difficulty:** ⭐⭐ (Moderate)\
> **Setup time:** 15-20 minutes
Hybrid events require more planning since the **Confirmation Email goes to ALL ticket buyers regardless of ticket type**. Here are two approaches:
### Approach A: Single Event with Multiple Tiers
This keeps everything in one place for easier management and lets patrons choose their experience at checkout.
#### **Setup:**
1. Create your event as normal
2. Add multiple pricing tiers:
* "In-Person Ticket" - Set a specific **Tier Quantity** to prevent overselling your venue
* "Livestream Ticket" - Leave **Tier Quantity** blank for unlimited (or set a limit if desired)
3. **Do NOT set a Maximum Global Quantity** - This would limit livestream sales when in-person sells out
#### **Handling the Confirmation Email:**
Since all ticket buyers receive the same confirmation email, you have two options:
**Option 1: Include streaming info for everyone** (Works if livestream is cheaper or same price)
If your livestream ticket is priced lower than or equal to in-person, you can include the stream link for all buyers. In-person attendees get a "bonus" virtual option, and everyone receives clear instructions.
> **Thank you for your purchase!**
>
> **In-Person Attendees:** Doors open at \[time]. Please bring your ticket confirmation.
>
> **Livestream Viewers:** Your streaming link will be sent to this email approximately 1 hour before showtime.
**Option 2: Send streaming link separately** (Recommended for most hybrid events)
Use the confirmation email to set expectations, then manually email only livestream ticket holders before the event:
> **Thank you for your purchase!**
>
> **In-Person Attendees:** Doors open at \[time]. Please bring your ticket confirmation.
>
> **Livestream Ticket Holders:** Your streaming link will be sent separately to this email approximately 1 hour before showtime. If you don't receive it by \[time], contact \[your email/phone].
Then before the event (see [Contacting Attendees](https://docs.crowdwork.com/for-theatres/managing-admissions#contacting-attendees)):
1. Go to your event overview
2. Use the **Tier** column in the Admissions table to identify livestream ticket holders, then check the boxes next to their names
3. Click **Actions** → **Send Email** to send them the streaming link
{% hint style="info" %}
**Analytics Benefit:** Even if you include the stream link for everyone, creating separate ticket tiers helps you track how many patrons specifically chose the virtual option vs. in-person.
{% endhint %}
### Approach B: Separate Events for In-Person and Livestream
If you need completely different communications for each audience, create two separate events:
1. **Main Event:** Your in-person show with venue capacity limits – *Big Saturday Show \[In-Person]*
2. **Livestream Event:** A separate event for virtual attendees – *Big Saturday Show \[LIVESTREAM]*
While this can certainly work, we don't usually recommend it simply because of the potential to create confusion for yourself (managing multiple events/attendees) and for your patrons (less visibility that both events exist, potential to select wrong event). However, if you do use two separate events, name them clearly and cross promote them in the events' descriptions.
| Pros: | Cons: |
| -------------------------------------------------------------------------------------------------------------------------------------------------------------------- | ---------------------------------------------------------------------------------------------------------------------------------------- |
|
Completely separate confirmation emails
Cleaner reporting per audience type
Different descriptions and imagery for each experience
|
Managing two events
Can't see total attendance in one place
Patrons must navigate to the correct event
|
***
## Pricing Strategies
There's no established "best practice" for livestream pricing—theatres have found success with different approaches:
| Strategy | Rationale |
| ------------------------------------- | ---------------------------------------------------------------------------------- |
| **Livestream cheaper than in-person** | Maximizes virtual ticket sales; treats streaming as bonus revenue |
| **In-person cheaper than livestream** | Encourages in-person attendance; positions streaming as premium/convenience option |
| **Same price for both** | Simplifies decision-making; positions both as equal value |
| **Pay What You Want for livestream** | Removes price barrier; lets patrons decide value |
Consider your goals: Are you trying to fill seats? Maximize total revenue? Reach new audiences who can't attend in person? Your pricing should reflect your priorities.
***
## Using the Event Description
{% hint style="warning" %}
**Reminder:** Don't put your streaming link in the event **Description** field. The description is publicly visible to anyone who visits the event page, not just ticket buyers.
{% endhint %}
The event description **is** useful for:
* Explaining that this event offers a livestream option
* Describing what the virtual experience includes
* Setting expectations about how/when the link will be delivered
* Listing technical requirements (browser, internet speed, etc.)
{% hint style="info" %}
**Tip:** The event description supports rich text formatting — you can add bold text, links, and images to make your livestream details stand out. See [Using the Rich Text Editor](https://docs.crowdwork.com/for-theatres/using-the-rich-text-editor) for details.
{% endhint %}
***
## Customer Support Tips
Theatres have learned a few things about supporting livestream ticket holders:
1. **Provide contact info:** Include an email address or phone number for livestream questions. Without it, patrons may contact CrowdWork support, and we may not be staffed at your showtime.
2. **Expect some inquiries:** No matter how clear your instructions, some patrons will reach out. Have someone available to respond in the hour before showtime.
3. **Under-promise, over-deliver:** If you say the link arrives "1 hour before," send it 90 minutes before. This dramatically reduces "where's my link?" messages.
4. **Include troubleshooting basics:** In your streaming link email, include simple troubleshooting tips (refresh the page, try a different browser, check internet connection).
***
## Pairing with Other CrowdWork Features
### 👥 Memberships + 📺 Livestreaming
Use [Memberships](https://docs.crowdwork.com/the-academy/crowdwork-academy/memberships-quick-start-guide) to offer exclusive online content:
* Create an **unlisted** livestream event (won't appear on public calendar)
* Share the event link only with members
* Great for monthly online performances, Q\&As, or behind-the-scenes content
{% hint style="warning" %}
**Members must be logged in.** For membership pricing to apply at checkout, patrons need to be signed in to their account. If a member clicks an unlisted event link while not logged in, they'll see the full ticket price instead of their membership rate. Remind members to log in first, or include a login reminder alongside the event link.
{% endhint %}
### ⏳ Waitlists + 📺 Livestreaming
When an in-person event sells out, use your [Waitlist](https://docs.crowdwork.com/for-theatres/setting-up-waitlists) as a marketing opportunity:
* Email waitlisted patrons about the livestream option
* Optionally offer a discount code as a consolation for missing out on in-person seats
* Turn a "sold out" disappointment into a sale
### 🤑 Discount Codes + 📺 Livestreaming
Create special promotions for virtual attendance:
* Offer waitlisted patrons a discount on livestream tickets
* Create early-bird livestream pricing
* Partner with other organizations to offer their audiences discounted virtual access
***
## Common Questions
Q: Can I include the streaming link in the confirmation email automatically?
Yes! Use the **Confirmation Email** section when editing your event. This content is sent immediately after purchase AND included in automatic reminder emails before the event. Note: The same content is sent to all attendees regardless of their ticket tier.
Q: Can I send different confirmation emails to different ticket tiers?
No, the confirmation email is the same for all ticket tiers on an event. If you need completely separate communications, create separate events for in-person and livestream (see [Approach B](#approach-b-separate-events-for-in-person-and-livestream) above).
Q: How do I email only the people who bought livestream tickets?
From your event overview page, use the **Tier** column in the Admissions table to identify which patrons purchased the livestream tier. Check the boxes next to those patrons, then click **Actions** → **Send Email** to message just that group. See [Contacting Attendees](https://docs.crowdwork.com/for-theatres/managing-admissions#contacting-attendees) for step-by-step instructions.
Q: What streaming platforms do other theatres use?
Common choices include Zoom, YouTube Live, Vimeo, and Facebook Live. Each has different features and pricing. CrowdWork doesn't integrate directly with any platform—you'll share links manually through confirmation emails or the email feature.
Q: Should I limit how many livestream tickets I sell?
Most theatres leave livestream quantity unlimited since there's no physical capacity constraint. However, some limit sales if their streaming platform has viewer caps or if they want to create scarcity/urgency.
Q: When do automatic reminder emails go out?
Automatic reminders are sent early morning on the day of your event. They include the content from your **Confirmation Email** section, so any streaming instructions you add there will be included in reminders too.
***
## Quick Setup Checklist
**For Streaming-Only Events:**
* [ ] Create event with streaming-appropriate title/description
* [ ] Set ticket price (leave quantity blank for unlimited)
* [ ] Add streaming instructions to Confirmation Email section
* [ ] Plan when/how you'll send the actual streaming link
* [ ] Prepare support contact info for day-of questions
**For Hybrid Events:**
* [ ] Create event with multiple tiers (In-Person and Livestream)
* [ ] Set Tier Quantity for in-person (NOT Global Max Quantity)
* [ ] Leave Livestream tier quantity blank (or set limit if needed)
* [ ] Add clear instructions for BOTH audiences in Confirmation Email
* [ ] Plan how you'll send streaming link (all buyers vs. livestream only)
***
### Need Help?
Have questions about setting up livestream ticketing for your venue? [Reach out to our support team](https://docs.crowdwork.com/contacting-support)—we're happy to help you find the right approach for your situation.
# Tips, Tools & Resources for Your Theatre
Practical tips for getting more out of CrowdWork and the everyday tools around it — starting with how to create a QR code for any page you want patrons to find.
A growing collection of small, practical tips for running your theatre with CrowdWork — handy techniques that don't belong to any one feature but make everyday tasks easier.
***
## Creating a QR Code
A QR code turns any web link into something a patron can reach by pointing their phone camera at it. They're perfect for bridging the physical and digital worlds — print one on a lobby sign, a poster, a table card, or a show program, and patrons can jump straight to the page with a single scan.
A few CrowdWork pages worth turning into a QR code:
* Your **Donations page** — `https://crowdwork.com/v/[your-subdomain]/donations` — on signs around your venue with a prompt like *"Support our work."*
* Your **Shows page** — so audiences can grab tickets to your next production on their way out.
* A **specific show or class** — on a poster or flyer for that event.
{% hint style="success" %}
A QR code never expires on its own — it simply encodes a URL. As long as the link still works, the code keeps working, so you can print it once and reuse it for years.
{% endhint %}
### Option 1: Straight From Your Browser
Most Chromium-based browsers — **Chrome**, **Brave**, **Microsoft Edge**, and others — can generate a QR code for whatever page you're viewing, with no extra tools required.
1. Open the page you want to share (for example, your Donations page).
2. Click the **Share** icon in the address bar — or right-click anywhere on the page.
3. Choose **Create QR Code** from the menu.
4. Download or screenshot the QR code that appears, then drop it into your sign, flyer, or program.
Creating a QR code from the browser's Share menu
### Option 2: Free QR Code Generators
If your browser doesn't offer a built-in option — or you want more control over the size, colors, or logo on your code — these free web tools all do the job:
* [**QRCode Monkey**](https://www.qrcode-monkey.com/) — free, no account required, with color and logo customization.
* [**Adobe Express QR Code Generator**](https://www.adobe.com/express/feature/image/qr-code-generator) — free, with styling options if you already use Adobe Express.
* [**QR Tiger**](https://www.qrcode-tiger.com/) — free static QR codes, plus paid options for trackable (dynamic) codes.
Paste in the URL you want to share, generate the code, and download it as an image to use in your print materials.
{% hint style="info" %}
**Always test before you print.** Scan your finished QR code with a phone to confirm it opens the right page — then print it large enough to scan comfortably from a few feet away.
{% endhint %}
***
## Need Help?
Have a tip you'd love to see covered here, or a question about one of these? [Contact our support team](https://docs.crowdwork.com/contacting-support) — we're always happy to help.
# Embedding Widgets on Specific Platforms
This page provides help for easily adding your events to websites on popular platforms.
You have your website. You have your CrowdWork. It's time to get them connected. Ready to showcase your upcoming shows and classes directly on your website? CrowdWork widgets make it super easy to display your events beautifully, keep them automatically updated, and help sell more tickets!
### Why Use CrowdWork Widgets?
Our embeddable widgets are the perfect way to connect your website with your CrowdWork account. Here's why they're awesome:
* **Always up-to-date**: Any changes you make in CrowdWork appear instantly on your website
* **Beautiful displays**: Choose from Calendar or Card views to match your site's style
* **Mobile-friendly**: Look great on any device, from phones to desktops
* **Customizable**: Filter by tags or dates to show exactly what you want
* **Zero maintenance**: No need to manually update your website when events change
> **Pro Tip!** Not sure which widget type to use? Calendar views are perfect for comprehensive schedules, while Card views create visual impact for featured events!
### 🎯 Find Your Website Platform Below
We've created detailed, step-by-step guides for the most popular website platforms. Just click on your platform to get started:
#### WordPress
* [**Standard WordPress**](/the-academy/crowdwork-academy/embedding-widgets-on-specific-platforms/wordpress-embed-guide): Using the block editor (Gutenberg) or classic editor
* [**WordPress Page Builders**](/the-academy/crowdwork-academy/embedding-widgets-on-specific-platforms/wordpress-page-builders-embed-guide): Using Elementor, Divi, Beaver Builder or other page builders
#### Website Builders
* [**Ghost**](/the-academy/crowdwork-academy/embedding-widgets-on-specific-platforms/ghost-embed-guide): Embed spooky widgets in Ghost's clean publishing platform
* [**GoDaddy Website Builder**](/the-academy/crowdwork-academy/embedding-widgets-on-specific-platforms/godaddy-site-builder-embed-guide): Add widgets to your GoDaddy Website Builder site
* [**Google Sites**](/the-academy/crowdwork-academy/embedding-widgets-on-specific-platforms/google-sites-embed-guide): Super simple widget customization for Google Sites
* [**Shopify**](/the-academy/crowdwork-academy/embedding-widgets-on-specific-platforms/shopify-embed-guide): Promote events alongside your Shopify store products
* [**Squarespace**](/the-academy/crowdwork-academy/embedding-widgets-on-specific-platforms/squarespace-embed-guide): Beautiful widget integration for Squarespace websites
* [**Weebly**](/the-academy/crowdwork-academy/embedding-widgets-on-specific-platforms/weebly-embed-guide): Drag-and-drop widget setup for Weebly sites
* [**Wix**](/the-academy/crowdwork-academy/embedding-widgets-on-specific-platforms/wix-embed-guide): Easy widget embedding for Wix websites
* [**Webflow**](/the-academy/crowdwork-academy/embedding-widgets-on-specific-platforms/webflow-embed-guide#advanced-webflow-integration): Professional widget design integration for Webflow
#### Other Platforms
Don't see your platform listed? Most website builders have a way to embed custom HTML. Look for elements named:
* "HTML" or "Custom HTML"
* "Embed" or "Embed Code"
* "Custom Code" or "Code Block"
* "iFrame" or "HTML iFrame"
Once you find this element, you can paste your CrowdWork widget code inside it.
### 🏁 Getting Started: The Basic Steps
No matter which platform you use, the process follows the same general pattern:
1. **Get your widget code** from CrowdWork (Theatre > Embeds in your Dashboard)
2. **Choose the right spot** on your website where you want events to appear
3. **Find the HTML or embed element** in your website builder
4. **Paste your widget code** and save/publish your changes
### 🎨 Widget Types: Choose What Works for You
#### Calendar View
Perfect for displaying your complete schedule in an organized monthly format. Great for:
* Dedicated "Events" or "Schedule" pages
* Comprehensive class listings
* Showing your full season at a glance
#### Card View
Creates a visually appealing gallery of event cards. Ideal for:
* Homepage features and highlights
* Promotional sections
* Showcasing specific event tags
### 💡 Creative Implementation Ideas
No matter which platform you use, here are some smart ways to use your widgets:
* **Homepage Feature**: Highlight upcoming events on your front page
* **Class Categories**: Create separate sections for different class types
* **Season Preview**: Show your entire upcoming season on a dedicated page
* **Team Spotlights**: Add performer-specific widgets to team member bio pages
### ❓ Need Help?
Don't worry, we've got your back! If you run into any issues:
* Check the platform-specific guide for troubleshooting tips
* Make sure you've copied the entire widget code
* Verify your widget is displaying correctly in your site's preview mode
* [Contact our friendly support team](/contacting-support)
### Ready to Start?
Just click on your website platform above to get detailed, step-by-step instructions!
Happy embedding! Your website visitors are going to love seeing your up-to-date event information. on Your Website
# WordPress – Embed Guide
This page gives instructions for embedding CrowdWork widgets on a WordPress website.
Adding your CrowdWork widgets to WordPress is super straightforward - and we've got all the details you need right here. Let's get those show schedules and class listings displaying beautifully on your WordPress site!
{% hint style="warning" %}
**Using a Page Builder?** If you're using Elementor, Divi, Beaver Builder, or another page builder, check out our dedicated [WordPress Page Builders guide](/the-academy/crowdwork-academy/embedding-widgets-on-specific-platforms/wordpress-page-builders-embed-guide) for specific instructions.
{% endhint %}
### ✅ What You'll Need
Before we dive in:
* Your CrowdWork account (with shows or classes created)
* Admin access to your WordPress site
* Your widget embed code from CrowdWork
* About 5 minutes of your time
The Embed Widget code provided in the CrowdWork Dashboard
### 👾 Getting Your Widget Code
First, let's grab your widget code from CrowdWork:
1. Log in to your CrowdWork Dashboard
2. Navigate to [**Theatre > Embeds**](https://www.crowdwork.com/dashboard/embeds) in the left sidebar
3. Choose your widget type (Shows or Classes)
4. Select your preferred view (Calendar or Cards)
5. Customize with any filters if needed (by tag, start date, etc.)
6. Copy the code snippet provided in the box
{% hint style="info" %}
**Quick Access:** Jump directly to your [**widget customization page**](https://www.crowdwork.com/dashboard/embeds) to get started immediately!
{% endhint %}
### 🚀 Adding Your Widget to WordPress
WordPress offers multiple ways to add your widget. So let's figure out which method will work the best for you.
{% hint style="warning" %}
**Using a Page Builder?** If you're using Elementor, Divi, Beaver Builder, or another page builder, check out our dedicated [WordPress Page Builders guide](/the-academy/crowdwork-academy/embedding-widgets-on-specific-platforms/wordpress-page-builders-embed-guide) for specific instructions.
{% endhint %}
#### Method 1: Using a Custom HTML Block (Block Editor)
If you're using the modern WordPress Block Editor (Gutenberg):
{% hint style="info" %}
**Quick Tip:** Make sure you have your widget code from the [**Theatre > Embeds Dashboard**](https://www.crowdwork.com/dashboard/embeds) ready to paste.
{% endhint %}
1. Log in to your WordPress admin dashboard
2. Navigate to the page where you want to add your widget
3. Click the **+** icon to add a new block
4. Search for and select **Custom HTML**
5. Paste your CrowdWork widget code into the HTML block
6. Click **Preview** to see how it looks
7. Update or Publish your page
#### Method 2: Using the Classic Editor
{% hint style="info" %}
**WordPress Tip:** Make sure you have your widget code from the [**Theatre > Embeds Dashboard**](https://www.crowdwork.com/dashboard/embeds) ready to paste before starting.
{% endhint %}
If you're still using the Classic Editor:
1. Switch to the "Text" tab (instead of "Visual")
2. Paste your CrowdWork widget code where you want it to appear
3. Update or Publish your page
#### Method 3: Using a Page Builder
If you're using a page builder like Elementor, Divi, or Beaver Builder:
1. Edit your page with your page builder
2. Find the HTML or Custom Code element
3. Drag it to your desired location
4. Paste your CrowdWork widget code
5. Save your changes
### ⭐️ Making Your Widget Look Amazing
Your widget will inherit some styling from your WordPress theme, but here are some tips to make it shine:
* **Give it space**: Add some padding around your widget for better visual flow
* **Consider width**: Calendar widgets typically look best in full-width sections
* **Check mobile**: Preview your site on different devices to ensure good responsive behavior
* **Widget placement**: Think strategically about where to place your widgets for maximum impact
### 🔄 Updates Happen Automatically!
Once your widget is embedded, it will automatically stay in sync with your CrowdWork account. Any changes you make to your shows or classes in CrowdWork will instantly appear on your WordPress site without any additional work!
### 💡 Creative Uses for WordPress + CrowdWork
Take your WordPress site to the next level with these ideas:
* **Homepage Feature**: Add a card widget to your homepage to showcase upcoming events
* **Dedicated Events Page**: Create a full page with a calendar widget for all your shows
* **Class Directory**: Build a comprehensive class listing page
* **Performer Spotlights**: Add performer-specific widgets to cast bio pages
* **Category-Specific Pages**: Create separate pages for different types of shows or classes
### ❓ Troubleshooting
{% hint style="info" %}
**Quick Fix:** Most display issues can be resolved by getting fresh widget code from your [**Theatre > Embeds Dashboard**](https://www.crowdwork.com/dashboard/embeds) and re-embedding it.
{% endhint %}
**Widget not displaying correctly?**
* Check if your WordPress theme has any CSS conflicts
* Try placing the widget in a different section
* Ensure you've copied the entire code snippet
**Widget appears too small?**
* Some WordPress themes may constrain width - try placing in a full-width section
* Calendar views need more vertical space than card views
**Getting an error message?**
* Make sure your WordPress site allows embedded content
* Check if you have a security plugin blocking scripts
* Verify that your CrowdWork account is active
### 🎯 Advanced Customization
For users comfortable with CSS, you can further customize your widgets by:
* Adding custom styling through your theme's CSS editor
* Using WordPress's built-in Customizer for style adjustments
* Implementing responsive design tweaks for mobile optimization
Need further assistance? [Reach out to our Support Team](/contacting-support) - we're always happy to help!
# WordPress Page Builders – Embed Guide
This page gives instructions for embedding CrowdWork widgets on WordPress sites using popular page builders like Elementor, Divi, Beaver Builder, and others.
Using a WordPress page builder like Elementor, Divi, or Beaver Builder? Perfect! This guide will show you exactly how to embed your CrowdWork widgets using the most popular page builders. The process is surprisingly similar across all builders once you know what to look for.
### ✅ What You'll Need
Before you begin, make sure you have:
* Your CrowdWork account with shows or classes created
* A WordPress site with a page builder installed
* Your widget embed code from CrowdWork
* About 5 minutes of your time
The Embed Widget code provided in the CrowdWork Dashboard
### 👾 Getting Your Widget Code
First, let's grab your widget code from CrowdWork:
1. Log in to your CrowdWork Dashboard
2. Navigate to [**Theatre > Embeds**](https://www.crowdwork.com/dashboard/embeds) in the left sidebar
3. Choose your widget type (Shows or Classes)
4. Select your preferred view (Calendar or Cards)
5. Customize with any filters if needed (by tag, start date, etc.)
6. Copy the code snippet provided in the box
{% hint style="info" %}
**Quick Access:** Jump directly to your [**widget customization page**](https://www.crowdwork.com/dashboard/embeds) to get started immediately!
{% endhint %}
{% hint style="info" %}
**Pro Tip!** Calendar views give a comprehensive monthly overview, while Cards create a more visual, gallery-style presentation perfect for highlighting featured events!
{% endhint %}
***
## 🏗️ Page Builder Specific Instructions
### Elementor
{% hint style="info" %}
**Elementor Tip:** Need fresh widget code? Get it from your [**Theatre > Embeds Dashboard**](https://www.crowdwork.com/dashboard/embeds) anytime.
{% endhint %}
Elementor is the most popular WordPress page builder, making it super easy to add custom code:
#### Method 1: Using the HTML Widget (Recommended)
1. **Open Elementor Editor**
* Edit your page with Elementor
* Make sure you're in the visual editor
2. **Add HTML Widget**
* From the left sidebar, drag the **"HTML"** widget to your desired location
* OR search for "HTML" in the widget search bar
3. **Paste Your Code**
* Click on the HTML widget you just added
* In the **Content** tab on the left, paste your CrowdWork widget code in the **HTML Code** field
* The widget should preview immediately in the editor
4. **Adjust Settings**
* Use the **Style** tab to add any custom spacing or styling if needed
* The **Advanced** tab lets you set custom CSS classes or IDs
#### Method 2: Using the Shortcode Widget
1. **Add Shortcode Widget**
* Drag the **"Shortcode"** widget from the sidebar
2. **Paste Full Code**
* In the **Content** tab, paste your complete CrowdWork embed code
* Make sure to include the entire `

 3. **Review** the information in the popup box (*see image below*).
4. **Confirm** by clicking "Activate Gift Cards" in the popup to enable the Gift Cards feature.
3. **Review** the information in the popup box (*see image below*).
4. **Confirm** by clicking "Activate Gift Cards" in the popup to enable the Gift Cards feature.
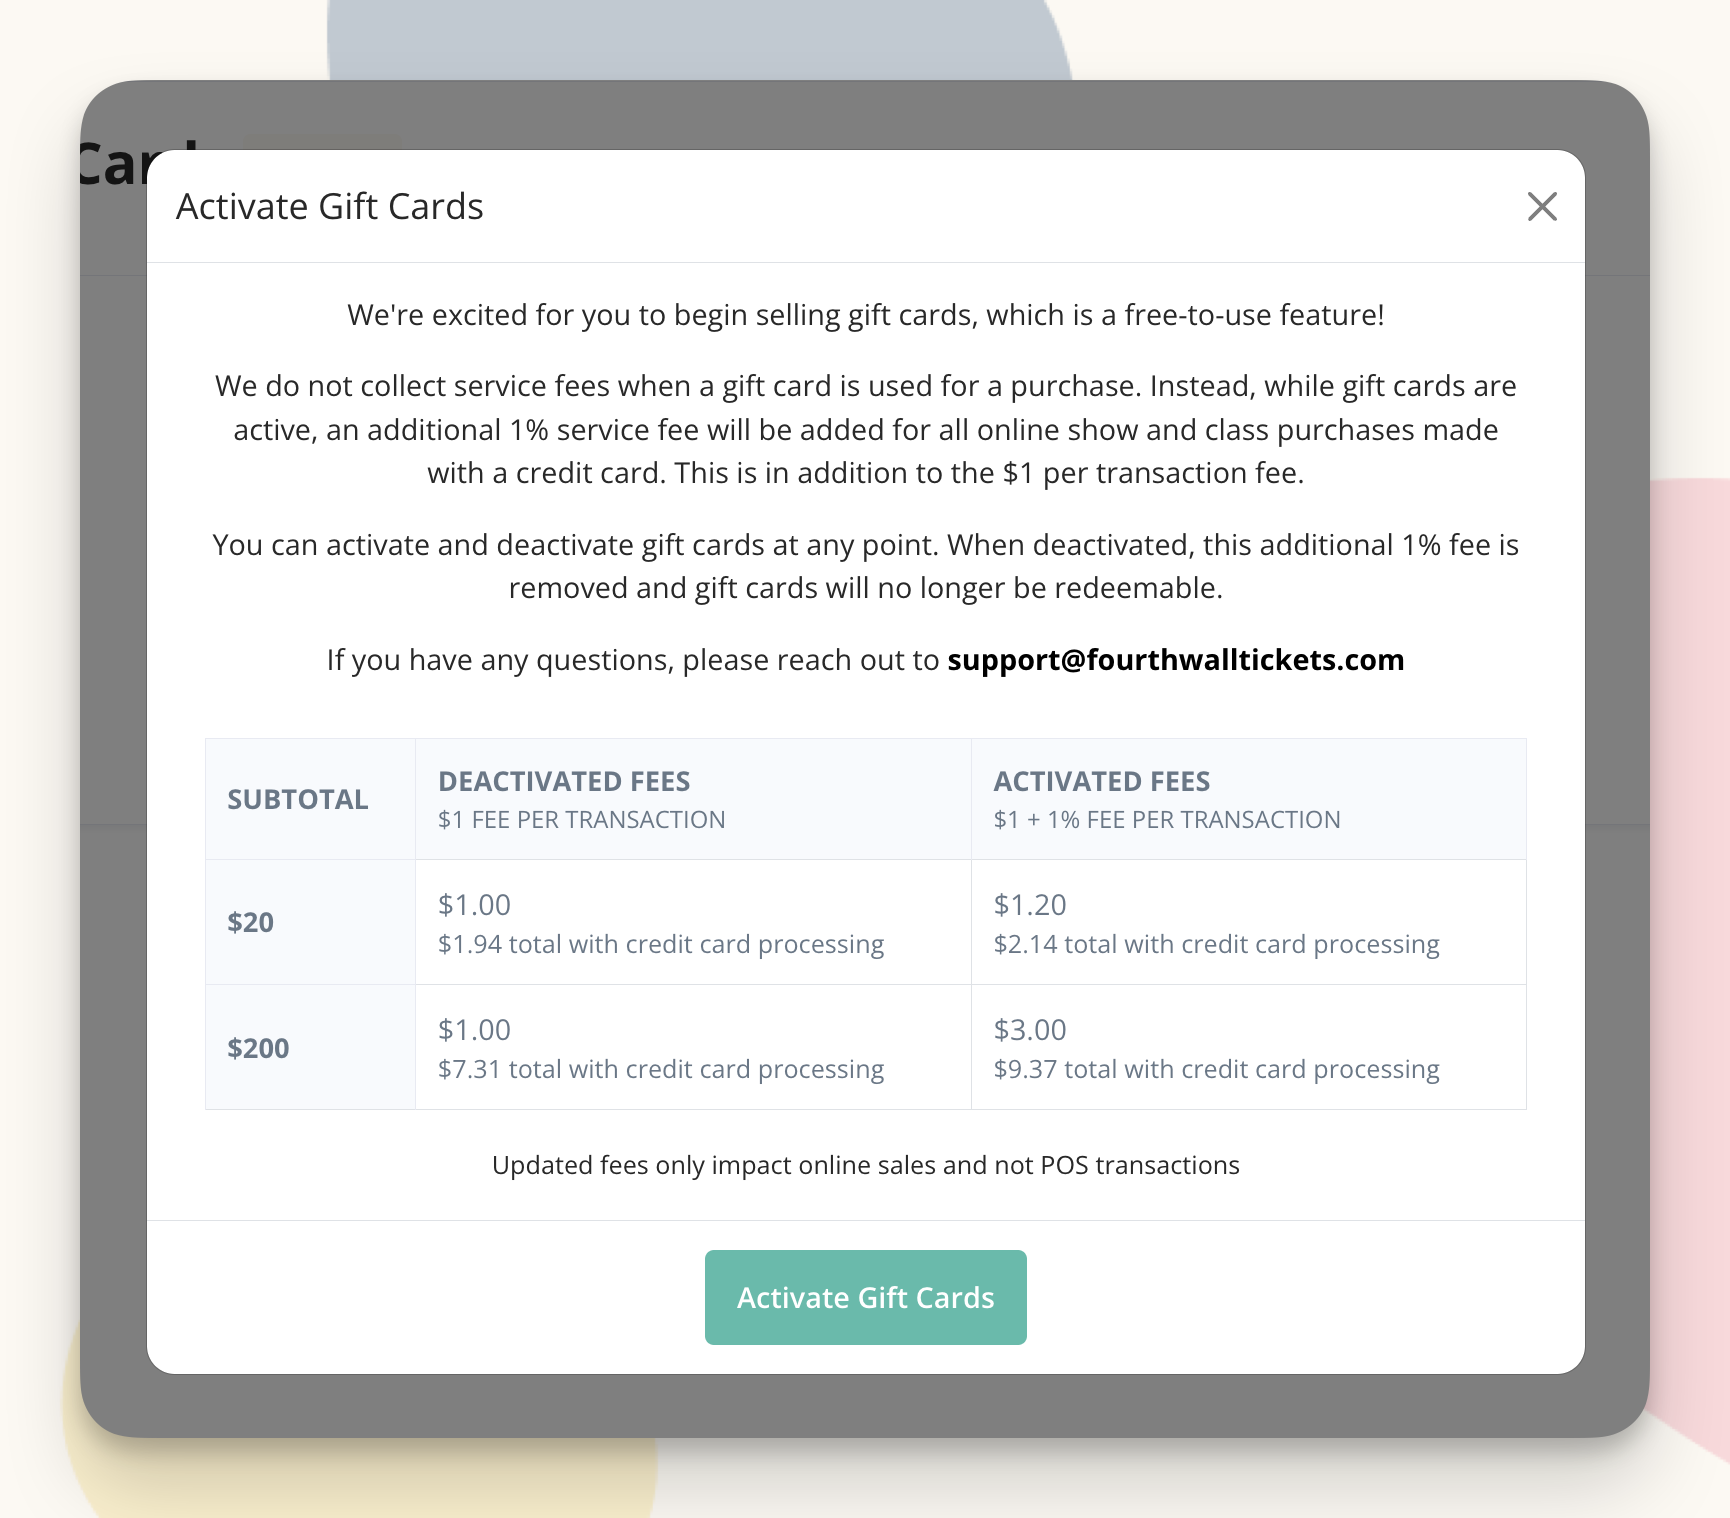
 {% endhint %}

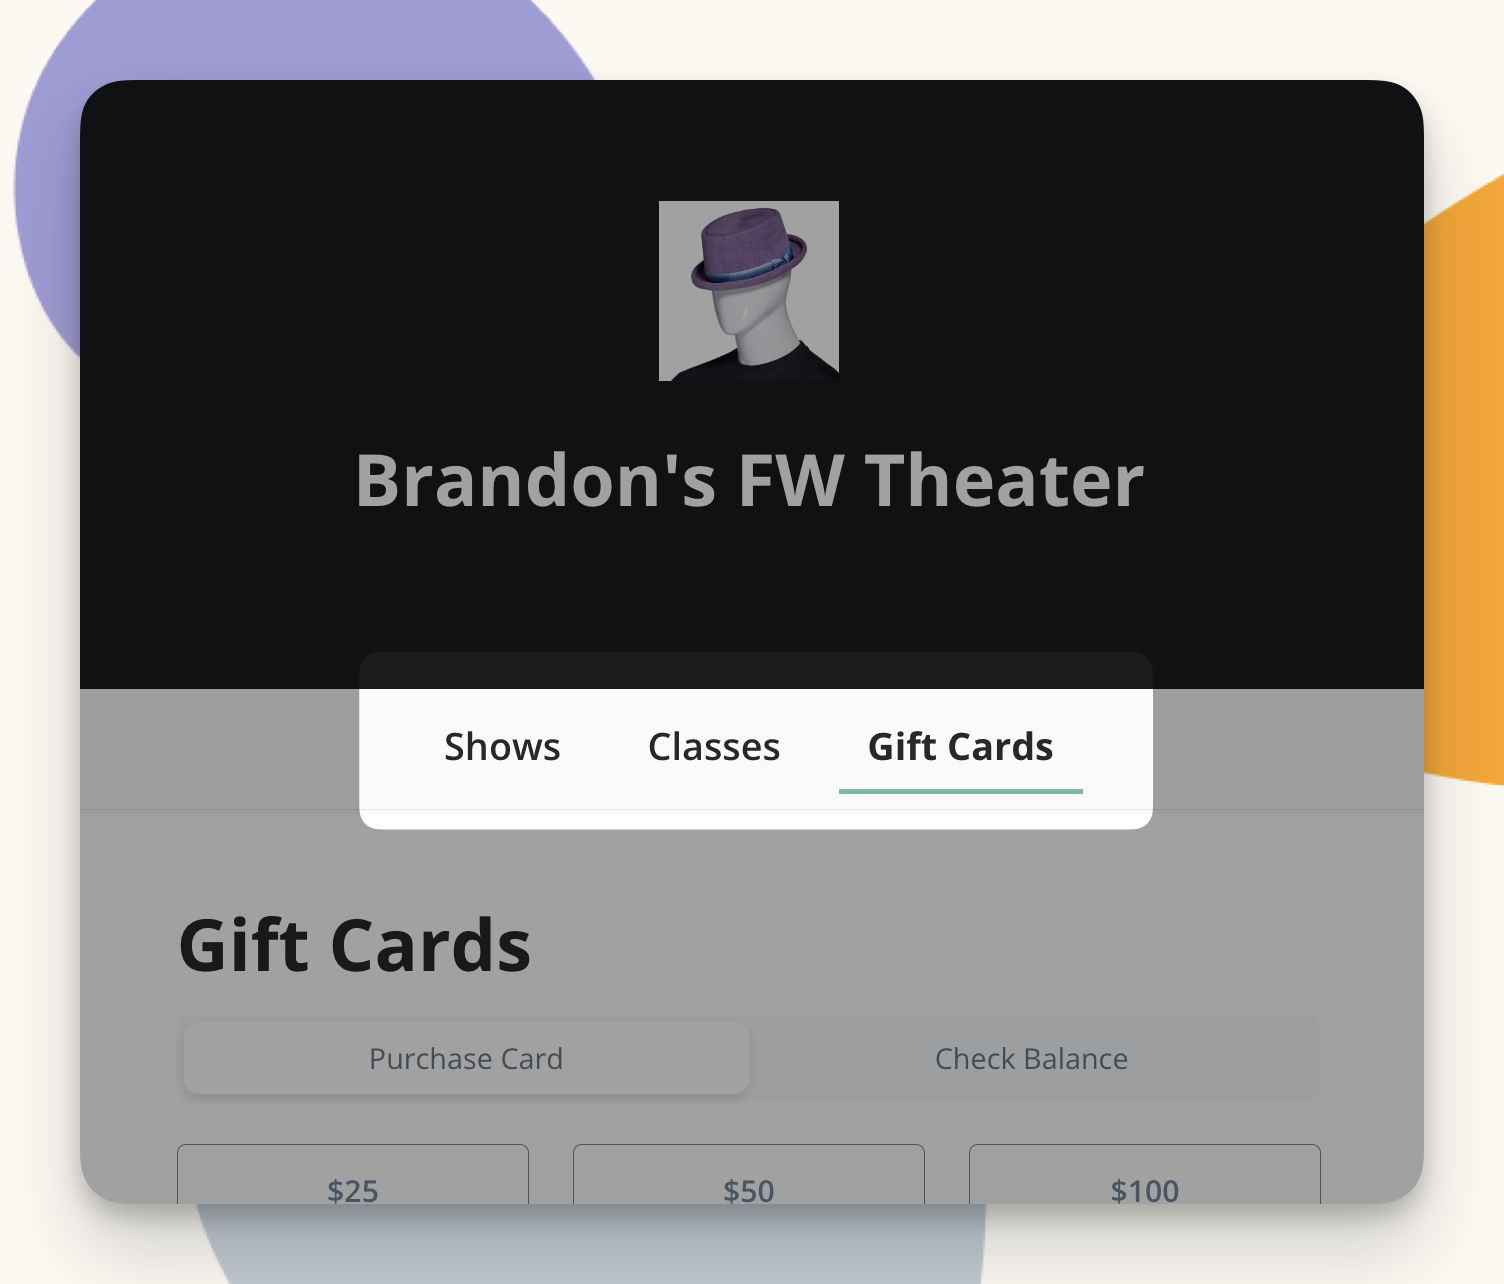
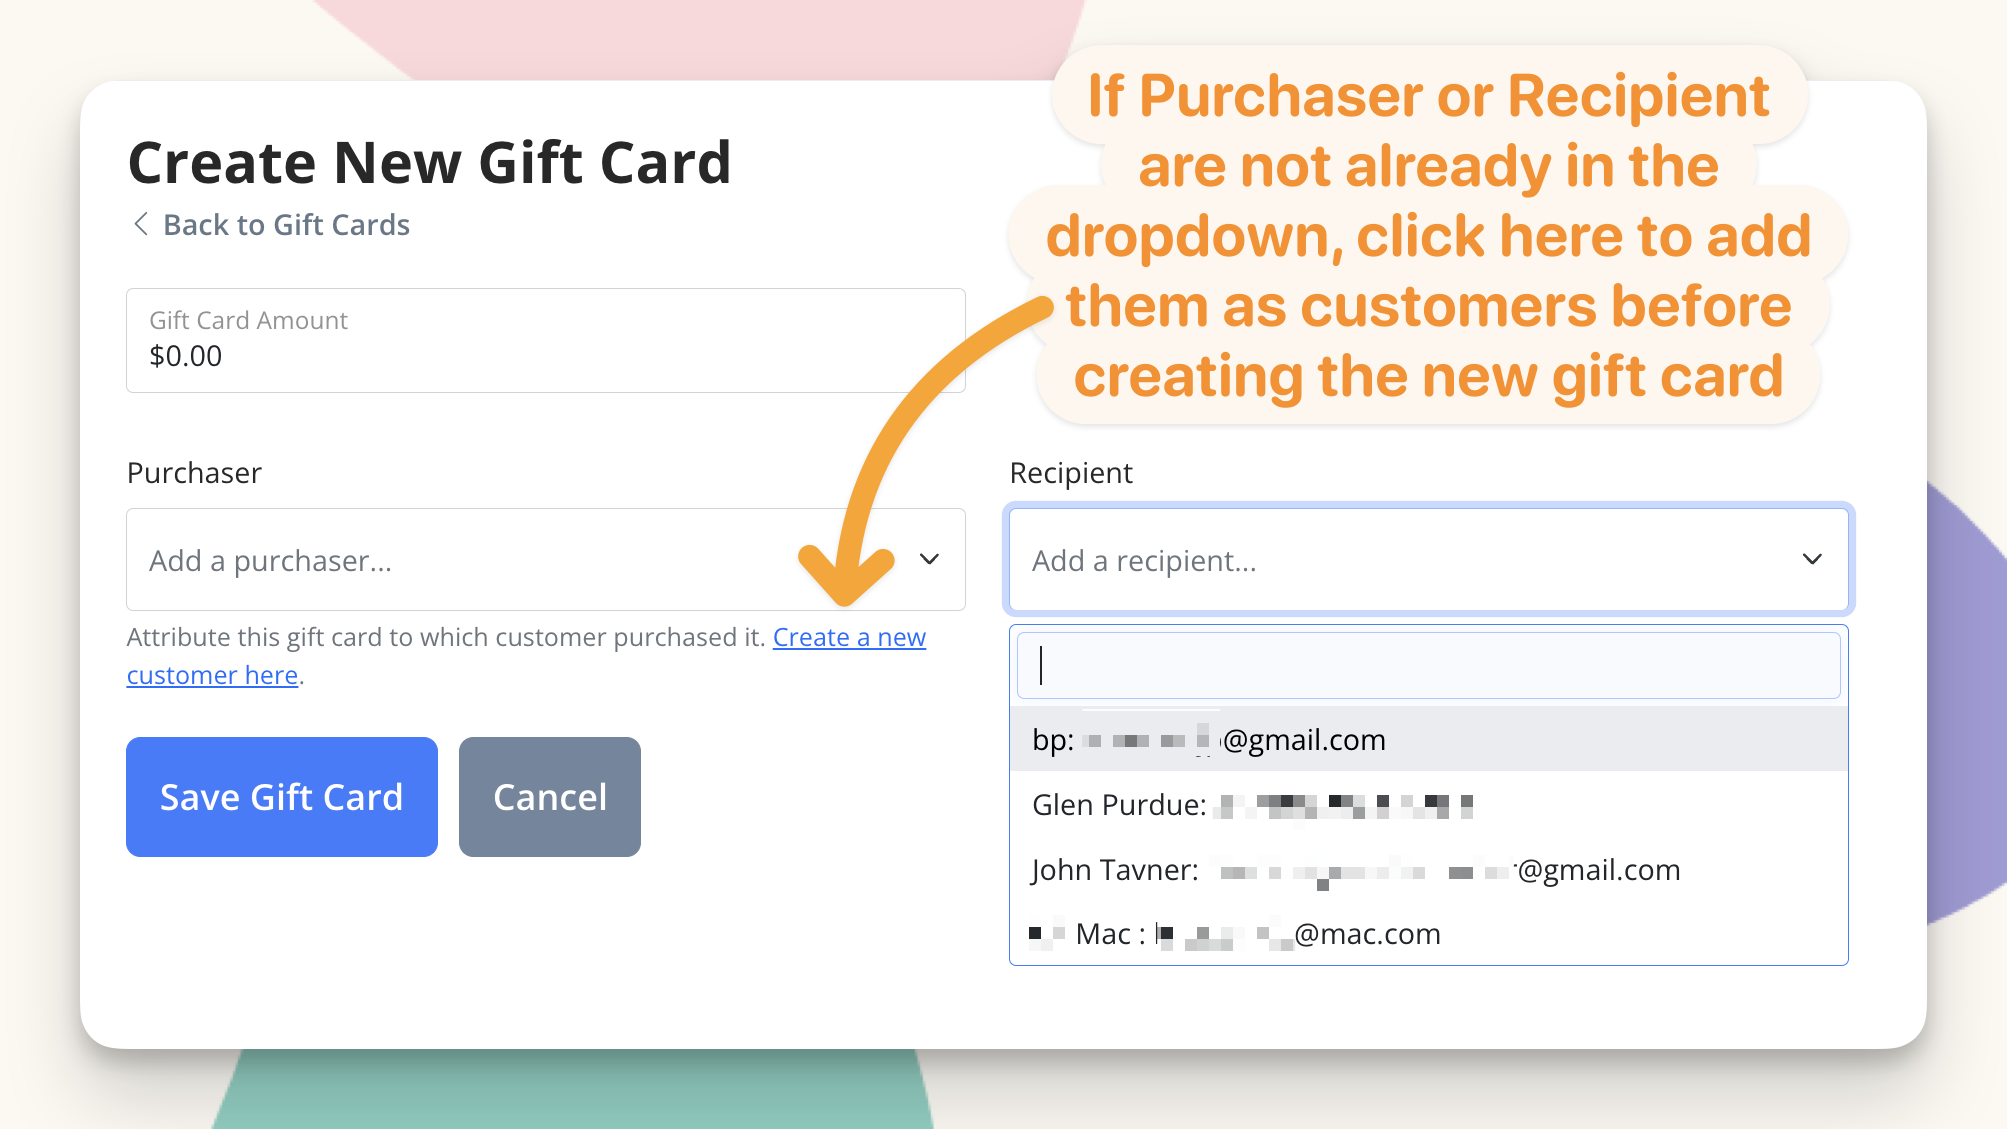
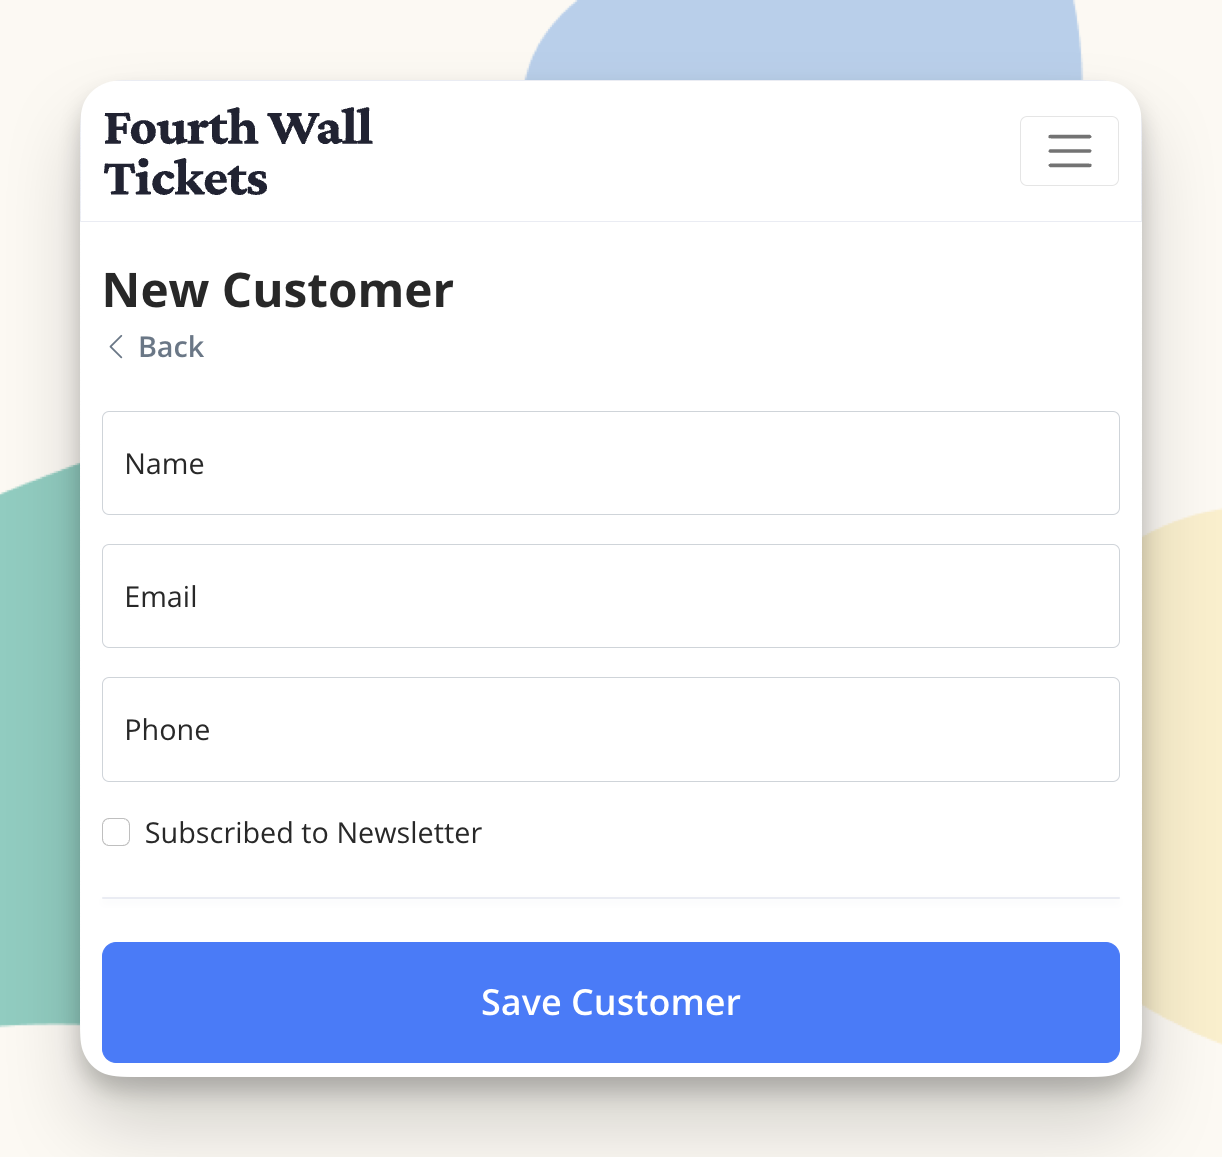 {% endhint %}
***
## 🛒 Purchasing Gift Cards
For theatres that have the Gift Cards feature activated, patrons can purchase gift cards from the theatre's CrowdWork page. Gift cards are available in preset $25, $50 and $100 denominations, or a custom dollar amount can be entered. Patrons can optionally enter a personal message to be included in the gift card email sent to the recipient.
**When a new gift card is purchased online:**
* The full gift card value is immediately credited to the theatre's account.
* If applicable, new customers are automatically created in the theatre's account.
* The recipient will receive an email containing the new gift card code (and optional personal message). A receipt is emailed to the purchaser.
* CrowdWork will then automatically track the balance and deduct amounts whenever that gift card code is redeemed for purchases.
{% endhint %}
***
## 🛒 Purchasing Gift Cards
For theatres that have the Gift Cards feature activated, patrons can purchase gift cards from the theatre's CrowdWork page. Gift cards are available in preset $25, $50 and $100 denominations, or a custom dollar amount can be entered. Patrons can optionally enter a personal message to be included in the gift card email sent to the recipient.
**When a new gift card is purchased online:**
* The full gift card value is immediately credited to the theatre's account.
* If applicable, new customers are automatically created in the theatre's account.
* The recipient will receive an email containing the new gift card code (and optional personal message). A receipt is emailed to the purchaser.
* CrowdWork will then automatically track the balance and deduct amounts whenever that gift card code is redeemed for purchases.